
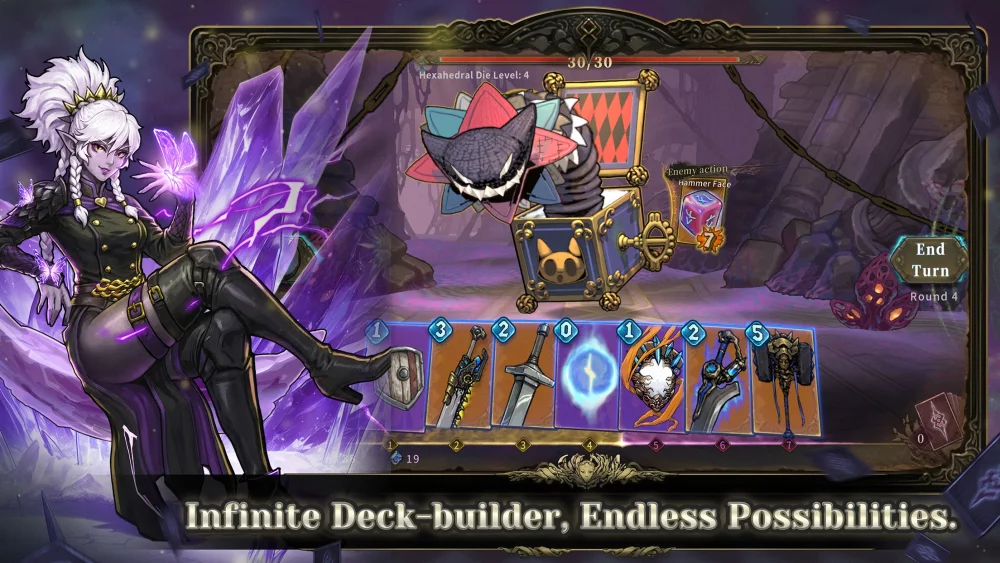
Integrating the Disarm mechanic with the Chaos Blessing path is one of the most potent defensive strategies in Abyssal Soul. In a sequential roguelike card battler where enemy damage scales exponentially in later acts, relying purely on armor cards or health pools is a losing battle. By strategically selecting Chaos Blessings that trigger Disarm, you can actively strip enemies of their offensive capabilities, creating windows of safety to execute your highest-damage combos.
This guide breaks down exactly how to test and optimize a Disarm-focused Chaos Blessing build in Abyssal Soul. From deck construction and weapon crafting to managing boss resistances and timing your triggers, you will learn how to turn this tactical status effect into a reliable win condition for your hardest runs.
Understanding the Disarm Mechanic in Abyssal Soul
In the dark medieval fantasy combat of Abyssal Soul, Disarm acts as a hard counter to physical and weapon-based enemy intents. When an enemy is afflicted with Disarm, they are temporarily prevented from executing their primary attack cards. Instead of trying to out-block a massive incoming hit, Disarm allows you to delete that threat window entirely.
However, Disarm is distinct from other crowd-control effects like Stun or Silence. Understanding these nuances is critical for high-level play:
- Disarm vs. Stun: While a Stun skips an enemy's entire turn, Disarm only restricts attack actions. A disarmed enemy can still cast buffs, apply debuffs to your character, or summon minions.
- Intent Indicators: You must watch the enemy's intent UI. Disarm is highly effective against the crossed-swords icon (direct damage) but useless against the purple eye icon (curses/debuffs).
- Duration and Action Points: Depending on your build, Disarm usually lasts for a specific number of enemy actions or a full turn cycle.
To effectively use Disarm, you must recognize the specific animations and intent cues that signal an enemy's deadliest strike. When you successfully land a Disarm, you create a rhythmic cycle: neutralize the threat, follow up with your high-damage sequence, and cycle your deck before the effect expires.
Why Combine Disarm with Chaos Blessings?
In a standard deck, applying Disarm requires playing high-cost, specialized utility cards. This often disrupts your offensive momentum, forcing you to spend valuable Action Points (AP) just to survive.
The Chaos Blessing path completely changes this dynamic. By testing and selecting specific Chaos Blessings, you can move the Disarm mechanic from active card plays to passive triggers. Chaos Blessings introduce modifiers that weave Disarm naturally into your existing attack sequences.
The Risk and Reward of the Chaos Path
Chaos Blessings in Abyssal Soul are defined by their high-risk, high-reward nature. Many blessings that offer guaranteed or high-percentage Disarm procs require a trade-off. You may have to sacrifice a portion of your current HP, discard cards from your hand, or accept a temporary vulnerability debuff.
The strategic shift here is moving from purely offensive stat-stacking to tactical neutralization. Paying 5% of your max HP to trigger a Chaos Blessing that disarms a boss about to deal 60 damage is an overwhelmingly favorable trade.
Best Chaos Blessings for Disarm Builds
When navigating the blessing tree, prioritize nodes that scale with your attack frequency rather than those tied to long cooldowns.
- Chaotic Severance: Grants a percentage chance to apply Disarm on critical hits. This is the cornerstone of a multi-hit deck.
- Entropy’s Grasp: Whenever you apply Disarm to a target, this blessing spreads a shorter duration of the effect to adjacent enemies. Excellent for mob encounters.
- Blood Price: An active toggle blessing that guarantees your next attack card will Disarm the target, at the cost of discarding your highest-damage card or sacrificing health. Best saved for telegraphed boss nukes.
- Void Resonance: Increases the duration of all applied status effects by one action, but reduces your baseline armor generation.
Deck Building Strategies for Disarm Consistency
To make a Chaos Blessing Disarm build reliable, your deck must be optimized to trigger your blessings as often as necessary. If your Disarm relies on a 15% chance-on-hit from a Chaos Blessing, playing single-hit, high-cost cards will result in poor consistency.
Prioritize Multi-Hit Attack Cards
Cards like Flurry of Blows or Shadow Strike that hit an enemy three to five times in a single sequence dramatically increase your odds of triggering a chance-based Chaos Blessing. Mathematically, a 15% proc chance rolled four times yields a roughly 48% chance to apply the status in a single card play.
Deck Thinning and Draw Engines
Because you need your Disarm triggers available precisely when the boss telegraphs a massive attack, deck bloat is your worst enemy. Remove low-impact starter cards at campfires or merchants. Integrate draw-engine cards that allow you to cycle through your deck quickly. If you know the boss attacks every third turn, your deck must be lean enough to draw your guaranteed Disarm enablers exactly when that turn arrives.
Balancing Utility and Damage
A common trap when testing Disarm in the Chaos Blessing path is over-indexing on control. If you lock the enemy down but lack the raw damage to kill them, the fight will drag on. Eventually, you will run out of resources, or the boss will out-scale your control. Ensure your deck maintains a core "win condition"—whether that is scaling poison damage, massive single-hit finishers, or ramping strength buffs—that you can execute while the enemy is disarmed.
Weapon Crafting Optimization for Disarm
Your equipment plays a massive role in supplementing your deck and blessings. When optimizing your weapon crafting in Abyssal Soul, look for affixes and forging materials that enhance status effect application.
| Weapon Affix / Trait | Synergy with Chaos Disarm | Crafting Priority |
|---|---|---|
| Status Effect Mastery | Increases the base duration of all applied debuffs, including Disarm. | High |
| Chaos Resonance | Increases the proc rate of all percentage-based Chaos Blessings by a flat amount (e.g., +5%). | Essential |
| Lightweight Frame | Refunds 1 AP when a card applies a status effect, allowing for longer combo chains. | Medium |
| Vulnerability Application | Enemies afflicted by Disarm take 15% increased physical damage. | High |
By aligning your crafted weapons with your Chaos Blessing selections, you create a cohesive build that doesn't rely purely on RNG to keep you safe during critical phases.
Strategic Timing: Executing the Combo in Combat
Applying Disarm requires a keen understanding of enemy attack sequences. Spamming your Disarm-based blessings at the start of a fight is a fast way to lose a run, as many effects have diminishing returns or cooldowns.
Step 1: Read the Enemy Intent
Always check the intent indicators above the enemy's head. If a boss is preparing a buff or a minor attack, it is usually better to absorb the damage with standard armor cards. Save your Disarm for the "telegraphed" attacks—massive hits often indicated by a glowing red aura or a specific charge-up animation.
Step 2: Prep the Trigger
If you are using a blessing like Blood Price, activate it right before you play your sequence. If you are relying on Chaotic Severance, ensure you have your multi-hit cards and critical-chance buffs in hand.
Step 3: Isolate the Threat
In multi-enemy encounters, focus your Disarm application on the unit with the most dangerous attack pattern. By neutralizing the elite enemy, you simplify the battlefield. You can then use your remaining AP to clear out minor mobs with standard AoE attacks.
Step 4: Capitalize on the Window
Once the enemy is Disarmed, stop playing defensive cards. The enemy cannot attack you. Use this window to dump your entire hand into offensive scaling, card draw, or raw damage.
Managing Boss Resistances and Diminishing Returns
While Disarm is powerful, Abyssal Soul prevents players from indefinitely stun-locking end-game bosses. As you push into higher difficulty tiers, you will encounter the Resilience mechanic.
Every time a boss is affected by a hard control effect like Disarm, they gain a stack of Resilience. Each stack reduces the duration of the next Disarm or decreases the percentage chance of it landing.
To manage this:
- Do not waste Disarm on Phase 1: Many bosses have relatively weak early phases. Save your Disarm triggers for Phase 2 or Phase 3, when their damage output becomes lethal.
- Look for Cleanse Windows: Some bosses periodically cleanse themselves of debuffs. Applying a Disarm right before a boss cleanses is a wasted resource. Learn the boss's turn order and apply Disarm immediately after their cleanse phase.
- Have a Backup Plan: Always verify an enemy's resilience level before committing to a Disarm-heavy strategy for that specific fight. If you encounter an enemy with the "Unstoppable" trait (immune to Disarm), you must be able to pivot your strategy mid-run to rely on raw damage mitigation or evasion.
Common Mistakes to Avoid
When testing Disarm within the Chaos Blessing ecosystem, players frequently make a few critical errors:
- Triggering Too Early: Using a guaranteed Disarm blessing on a turn where the enemy is only attacking for minimal damage wastes the cooldown and builds unnecessary boss Resilience.
- Ignoring Non-Attack Threats: Remember that Disarm does not stop Curses, Damage-over-Time (DoT) applications, or enemy scaling buffs. If a boss is casting a lethal poison, Disarm will not save you. You must still draft cards that cleanse debuffs from your character.
- Failing to Track Cooldowns: Chaos Blessings often have internal cooldowns (e.g., "Once every 3 turns"). If you miscalculate and play your multi-hit cards expecting a Disarm while the blessing is on cooldown, you will be left completely defenseless against a heavy attack.
Conclusion
Mastering the Disarm mechanic through Chaos Blessings in Abyssal Soul transforms the game from a reactive struggle into a proactive, calculated execution. By carefully selecting blessings that synergize with multi-hit cards, thinning your deck for consistency, and timing your triggers to counter massive enemy telegraphs, you can systematically dismantle the game's hardest encounters. Document your successes and failures with different blessing combinations, refine your weapon crafting, and you will soon find yourself effortlessly navigating the darkest depths of the abyss.

Free Abyssal Soul Codes
Current active codes and how to redeem them.

Emily Johnson
Emily writes practical mobile strategy guides with a focus on resource planning, base progression, and the early decisions that shape a long-term account.
COMMUNITY
Player Comments
134 players commented on this guide.
This saved me time in the early game.
I wish I had read this before upgrading the wrong thing.
Good guide for Abyssal Soul players. The strategy part was useful.
This helped me understand strategy much better.