
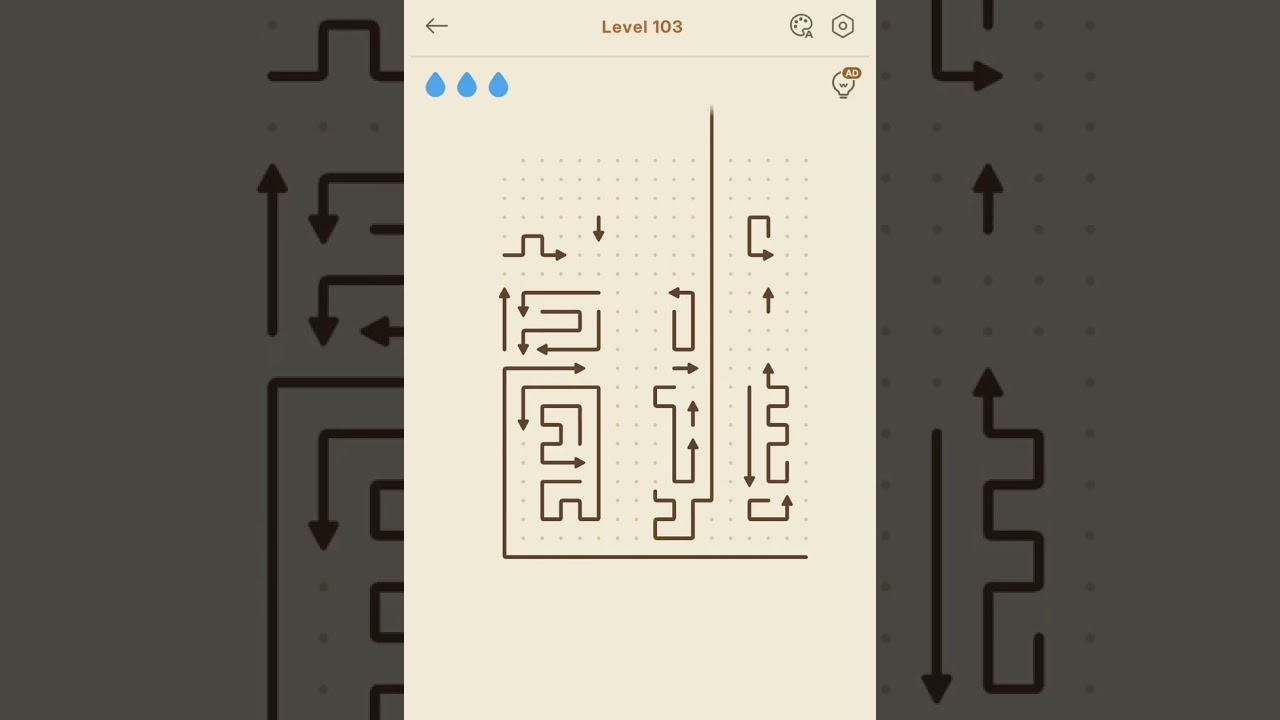
To clear levels 101 through 110 in Amaze GO!, tap unobstructed perimeter arrows that point directly off the grid before attempting to move interior tiles. Puzzles in this bracket feature tightly packed directional formations where central arrows cannot exit until outer borders are cleared. Following an outside-in sequence opens the escape routes necessary to dissolve interlocking corner clusters and pinwheel loops without causing collisions.
Core Clearance Order for Levels 101–105
Levels 101 through 105 enforce strict perimeter clearing because nearly every central arrow has its flight path blocked by an adjacent tile.
- Scan the outer borders: Identify arrows positioned along the four edges that point away from the center of the board. These tiles have open flight corridors and must be launched first.
- Clear a single corner quadrant: Levels 103 to 105 introduce staggered corner clusters where border arrows wrap around adjacent rows. Rather than tapping arrows randomly across all four edges, dismantle one complete corner formation.
- Funnel inward arrows through open flanks: Removing a full corner opens a dedicated escape channel, allowing inward-facing tiles from neighboring rows to clear cleanly off the board.
Breaking Pinwheels and Interlocking Grids in Levels 106–110
Levels 106 through 110 introduce complex cross-locks, most notably four-arrow pinwheels positioned in closed, perpendicular loops. Tapping any arrow inside an active pinwheel results in an immediate collision.
To untangle these formations, locate the single anchor arrow whose line of sight is obstructed by only one exterior tile:
- Levels 106–107: Look for an anchor arrow situated along the bottom or side border. Clear the single border tile blocking its trajectory, then tap the anchor arrow to break the pinwheel's tension and free the remaining tiles.
- Levels 108–110: Watch for dual-directional locks placed along the center column. Clear the far-left and far-right columns first to reveal whether the upward or downward arrow has an open escape lane.
Level-by-Level Priority Breakdown
Targeting the correct structural trigger on each stage prevents deadlocks and wasted moves.
| Stage Bracket | Primary Bottleneck | Initial Clearing Focus | Objective |
|---|---|---|---|
| Levels 101–102 | Dense exterior perimeter ring | Unobstructed outer rim arrows | Strip all four borders to open escape channels for interior tiles. |
| Levels 103–104 | Staggered vertical flanks | Left and right outer columns | Remove side barriers so horizontal center arrows can exit freely. |
| Level 105 | Top-heavy directional cluster | Uppermost border row | Clear top-facing anchors to let lower, upward-pointing arrows exit. |
| Levels 106–107 | Perpendicular corner cross-locks | Solitary bottom-edge anchor | Break the four-way pinwheel loop by freeing the lowest directional trigger. |
| Levels 108–109 | Mirrored dual-core blocks | Far-left and far-right outer edges | Divide the grid into two halves, resolving exterior columns before center lines. |
| Level 110 | Multi-layer spiral formation | Upper-right corner cluster | Unlock the primary spiral tail to initiate a continuous, cascading board clear. |
Resolving Perpendicular and Opposing Arrow Blocks
Recognizing how intersecting arrows interact prevents mid-stage stalls:
- Perpendicular cross-blocks: In L-shaped and T-shaped intersections, a horizontal arrow's flight path crosses a vertical arrow's path. Identify which of the two has an uninhibited route to the edge of the board. Launch that clear arrow first, which instantly frees the crossing tile behind it.
- Head-to-head blocks: When an upward-facing arrow and a downward-facing arrow share the same column, neither can move forward through the other. Clear adjacent parallel columns first. Removing neighboring arrows exposes side routes and vacates the shared column, allowing both opposing blocks to fly off without colliding.
Input Timing and Execution
Premature inputs are the most common cause of failure in this stage range.
- Verify the full corridor: Before tapping any tile, trace its entire forward path to the grid boundary to ensure no blocking arrows remain in that line.
- Pace your taps: Arrow launch animations require a fraction of a second to complete. Tapping rapidly during chain reactions can register an input on a tile while the preceding arrow is still clearing the lane, resulting in an unintended collision. Launch an unblocked anchor, wait for its path to empty, and then tap the newly freed arrow behind it.
Free Amaze GO! Codes
Current active codes and how to redeem them.

Sarah Williams
Sarah specializes in RPG and collection games, explaining team building, character growth, and beginner-friendly ways to avoid expensive early mistakes.
COMMUNITY
Player Comments
86 players commented on this guide.
Can you add more details about strategy in a future update?
The tips are practical and easy to follow.
This helped me understand strategy much better.
The explanation is clear, especially for beginners.