
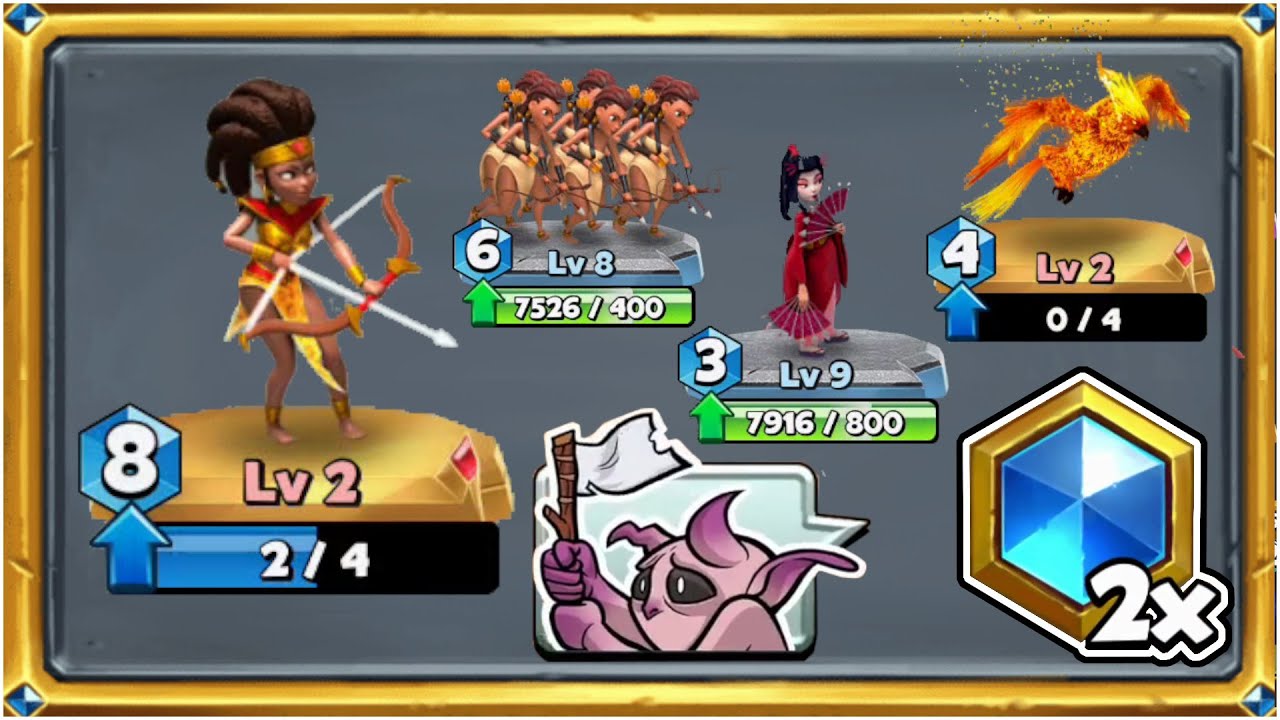
To dominate in Archer Castle, you must move beyond basic tower upgrades and focus on high-synergy hero combinations. The most effective strategy for mid-to-late game progression involves pairing the raw DPS of the Archer Queen with the crowd control of the Fan Dancer and the unyielding sustainability of the Phoenix. This "Triple Threat" composition creates a resilient defensive engine that allows you to clear waves at 2X speed while maintaining a stable fortress.
By understanding the specific mechanical interactions between these three units, you can push through difficult milestones that would otherwise require excessive grinding or resource dumping.
The Core DPS Engine: Archer Queen
The Archer Queen is the undisputed anchor of this high-performance build. In Archer Castle, your primary objective is to eliminate threats before they reach your walls. The Archer Queen excels here because of her high attack speed and consistent projectile output, which scales exponentially with level investments.
Why She Works:
- Single-Target Shredding: She is essential for bringing down high-health boss units that often act as "tanks" for smaller enemy swarms.
- Scaling: Unlike splash-damage heroes that lose effectiveness against single high-HP targets, the Queen remains relevant throughout the entire game.
- Positioning Priority: Because she is a glass cannon, she must be placed in a protected row. Avoid placing her in the front-most slots where splash damage from enemy bosses can hit her.
Tactical Crowd Control: The Fan Dancer
The Fan Dancer serves as the "enabler" for your Archer Queen. Her utility lies in her ability to disrupt enemy movement. In Archer Castle, if enemies reach your walls, you lose. The Fan Dancer prevents this by slowing and clumping enemy units.
Strategic Deployment:
- Maximizing AOE: By slowing enemies, the Fan Dancer creates "choke points." If your other heroes or tower skills have area-of-effect (AOE) damage, the Fan Dancer ensures that these skills hit the maximum number of targets.
- The "Gap" Strategy: Her movement patterns often force enemies to reorganize, creating micro-gaps in their formation. These gaps provide the Archer Queen with clear lines of sight, preventing your primary damage dealer from wasting shots on targets that are already dying.
- Timing: Do not waste her ability on single-unit spawns. Wait until a significant wave density builds up to trigger her CC effect, ensuring that the entire incoming mob is slowed simultaneously.
The Phoenix: Infinite Sustainability
The Phoenix is your insurance policy. In high-level Archer Castle gameplay, a single break in your defensive line can lead to a quick defeat. The Phoenix provides a "second life" mechanic that is invaluable for 2X speed runs.
Why the Phoenix is Mandatory:
- Resurrection Tempo: When the Phoenix falls, it doesn't leave the board; it enters a dormant state before reviving. This effectively keeps a physical body on the field to body-block enemies for a few extra seconds.
- Recovery Window: Use the Phoenix’s revival period to assess your current tower health and hero cooldowns. If you see the Phoenix go down, it is a visual cue that your current defensive setup is being stressed and you may need to trigger your ultimate abilities.
- Aggressive Positioning: Because you have a "second life" on the field, you can afford to place the Phoenix in more aggressive, forward-facing positions, shielding your weaker, high-damage units like the Archer Queen.
Building the Ultimate 2X Damage Synergy
To achieve the 2X damage efficiency required for high-tier farming, you must view these three heroes as a single functional unit rather than separate entities.
The Synergy Loop:
- The Fan Dancer slows and bunches the incoming wave, creating a target-rich environment.
- The Archer Queen focuses on the densest part of the bunched wave, utilizing her high attack speed to drop enemies before they can reach the walls.
- The Phoenix acts as the front-line anchor, soaking up any stray damage that bypasses the crowd control, ensuring that the Queen stays safe to continue her output.
Common Mistakes to Avoid
Even with this powerful trio, players often stumble due to poor resource management. Avoid these common traps:
- Neglecting Tower Upgrades: Heroes are powerful, but they are not a replacement for your castle’s base stats. Ensure your castle health and base damage are upgraded to meet the minimum requirements of your current wave.
- Over-Investing in Support: While the Fan Dancer and Phoenix are essential, do not over-level them at the expense of your Archer Queen. The Queen must be the highest-level unit in this trio to ensure her DPS scales with enemy health.
- Ignoring Cooldown Management: Always check your hero ability cooldowns. If the Phoenix is in its revival phase, be prepared to manually trigger any available defensive tower skills to fill the gap in your frontline defense.
Decision Making: When to Rotate
There are instances where this trio might struggle, specifically during "boss-heavy" stages where high-speed melee units bypass your Fan Dancer. In these cases:
- Assess the Threat: If the enemies are reaching your walls too quickly, prioritize leveling the Fan Dancer’s slow duration.
- Swap for Burst: If you are failing to clear high-health bosses, temporarily swap a secondary support hero for a burst-damage dealer, but never remove the Archer Queen.
- Idle vs. Active: This trio is optimized for active 2X play. If you find yourself losing while idling, you may need to invest more in passive castle defense stats rather than hero-specific synergies.
By mastering the positioning of these three heroes, you move from simply surviving to actively controlling the flow of battle. Focus your gold on these core units, watch your hero cooldowns, and use the Phoenix to mitigate the risks associated with high-speed, high-density waves. With this foundation, you will find Archer Castle significantly easier to navigate as you push toward higher wave counts.

Free Archer Castle Codes
Current active codes and how to redeem them.

Michael Smith
Michael covers live-service games, events, reward systems, and efficient daily routines, turning frequent updates into clear actions for players.
COMMUNITY
Player Comments
80 players commented on this guide.
This saved me time in the early game.
I wish I had read this before upgrading the wrong thing.
The explanation is clear, especially for beginners.
This guide answered the exact question I had.