
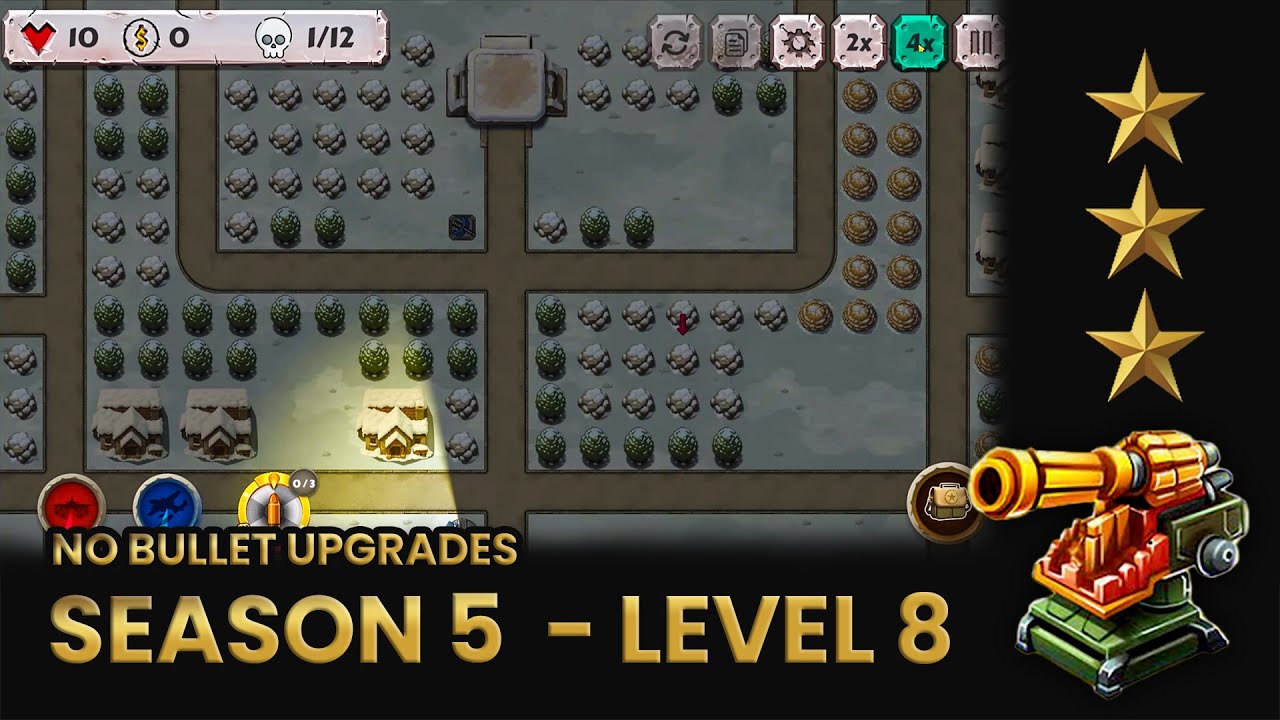
To clear Season 5 Level 8 in Battle Strategy: Tower Defense without purchasing bullet upgrades, anchor your defense at the primary intersection using a compact core of three to four standard towers. Upgrading base tower tiers provides the damage, range, and firing rate needed to stop armored columns and swarms without relying on consumable bullet modifiers.
Initial Tower Placement and Chokepoint Setup
The opening waves feature fast, light scout units. Secure the early route immediately to build your resource pool without leaking units to your base.
- Deploy a Rapid-Fire Anchor: Place a standard rapid-fire or Gatling tower on the sharp inside corner of the first path intersection. This position gives the turret the longest continuous firing arc over both approach lanes.
- Add Splash Damage Support: Place a cannon or artillery platform in the second row directly behind the rapid-fire tower. The cannon softens incoming clusters while the rapid-fire turret cleans up survivors.
- Configure Target Priorities: Set your single-target rapid-fire turret to target "First" or "Lowest Health" to prevent damaged runners from escaping the bend.
- Hold Off on Specialized Units: Do not place anti-air or heavy anti-armor towers during the first two waves. Early scout units have low health pools, so extra un-upgraded platforms only drain credits needed for tier upgrades.
Mid-Wave Upgrade Priorities
Between waves 4 and 7, leveling your existing core towers delivers more effective damage per credit than purchasing new base-level platforms. Upgrade your primary rapid-fire tower to Tier 2 first, then raise your splash cannon to Tier 2 before expanding the perimeter.
| Tower Archetype | Priority Upgrades | Level 8 Tactical Role | Ideal Grid Placement |
|---|---|---|---|
| Rapid-Fire / Gatling | Tier 2 & 3 Range and Speed | Clear light runners and low-health swarms | Sharp inside corner of main turn |
| Cannon / Artillery | Tier 2 Damage and Blast Area | Soften grouped infantry and armored units | Second row behind primary corner |
| Slow / Support Field | Tier 1 Range | Keep waves inside overlapping firing zones | Center of intersection crossfire |
| Missile / Anti-Air | Timed to incoming air warnings | Intercept flying units before the base lane | Rear elevated or central pad |
Managing Armored and Fast Waves
Without armor-piercing bullet modifiers, you must rely on sustained exposure time to break down heavy targets.
- Introduce Slow Support by Wave 5: Build a slow or freeze support tower in the center of your kill pocket. Keeping armored targets inside your cannon's blast radius compensates for the lack of flat bullet buffs.
- Adjust Targeting for Mixed Waves: Heavy tanks often absorb cannon shells while faster escorts slip past. When mixed columns enter the intersection, set auxiliary towers to focus on the fastest enemies to prevent leaks.
- Prepare Anti-Air Defenses: Construct a missile platform only when aerial alerts appear. Keep it near the rear-center of your layout so its full firing circle covers the approach to your base gate.
Late-Wave Execution and Clean-Up
The final push combines heavy armor, shielded units, and fast buggies. Complete the stage by refining your damage distribution:
- Add a Rear Cleanup Tower: Place a high-damage single-target installation, such as a sniper or secondary missile pod, near the back of the track to eliminate heavily damaged tanks that limp out of the main kill zone.
- Liquidate Inactive Positions: Sell early-stage perimeter turrets near the enemy spawn if their firing range no longer covers active waves.
- Reinvest in Top Tiers: Funnel refunded gold into a Tier 3 upgrade for your central splash cannon or expand the slow field radius to finish off the final assault.
Free Battle Strategy: Tower Defense Codes
Current active codes and how to redeem them.

Sarah Williams
Sarah specializes in RPG and collection games, explaining team building, character growth, and beginner-friendly ways to avoid expensive early mistakes.
COMMUNITY
Player Comments
104 players commented on this guide.
Nice guide. I am checking the other Battle Strategy: Tower Defense articles next.
The explanation is clear, especially for beginners.
I tried this today and it worked better than my old setup.
This saved me time in the early game.