
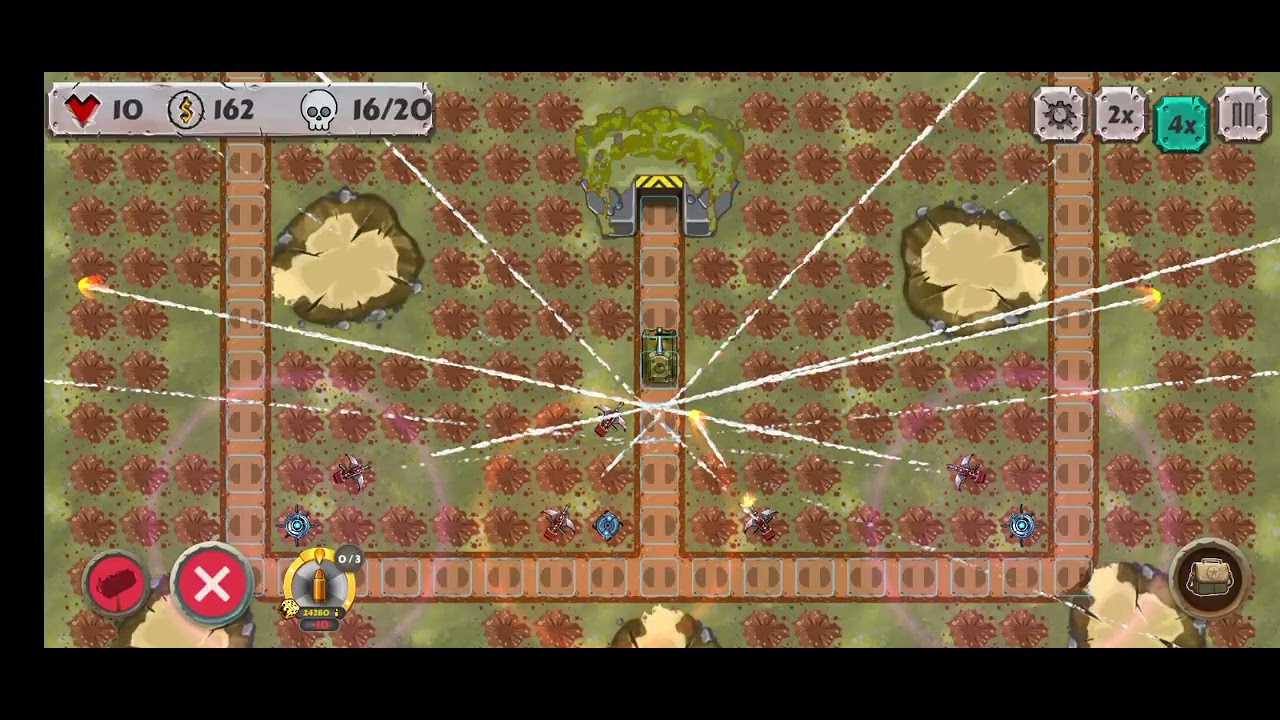
To beat Train Mode Station 1 in Battle Strategy: Tower Defense, concentrate your firepower on the central intersection where enemy paths merge before reaching the tracks. Build cheap, rapid-fire turrets near the spawn to farm tactical funds from early infantry, place slowing support towers at the funnel, and invest early upgrades into heavy cannons to destroy armored vehicles before they hit the train.
Track Choke Point and Turret Placement
Station 1 restricts your building space to specific dirt tiles bordering entry roads and railway bends. Hostile forces enter from split routes that funnel into a single crossing ahead of the stationary train platform. Because train durability does not regenerate between waves, stopping leaks before the crossing is critical.
Position your primary damage towers along the inner corner of this track bend to give them maximum continuous line-of-sight on oncoming targets. Placing towers too close to outer map edges disperses your damage and allows fast units to break through during dense waves.
Recommended Build Order
Establish a stable defense in the opening waves before committing resources to heavy artillery:
- Forward Light Turrets: Place two Gatling or light machine gun turrets beside the initial spawn path to clear light infantry quickly and generate early tactical funds.
- Central Heavy Cannon: As motorized vehicles begin arriving, build a heavy cannon on the central pad overlooking the track crossing to break heavy armor.
- Intersection Slowing Support: Install a frost or slowing tower directly at the convergence point to compress advancing vehicles into the splash radius of your artillery.
- Platform Cleanup Anchor: Place a rapid-fire turret near the train platform to finish off damaged, fast-moving runners that slip past the main kill zone.
| Turret Role | Build Timing | Optimal Placement | Target Setting |
|---|---|---|---|
| Gatling Gun | Wave 1 | Forward spawn entrance | First |
| Heavy Cannon | Early to Mid Waves | Central track bend | Strongest |
| Slowing / Frost Tower | Mid Waves | Pathway convergence hub | First |
| Rocket Artillery | Mid to Late Waves | Rear perimeter pad | Strongest / Dense Group |
Targeting Priorities and Wave Control
Default targeting can cause heavy weapons to fire at low-threat infantry while fast vehicles rush the tracks. Adjust turret behavior based on weapon role:
- Light Turrets ("First"): Keep front-line Gatling guns set to target the first enemy. This strips incoming swarms and eliminates agile scout bikes before they outrun heavier fire.
- Cannons and Artillery ("Strongest"): Set central cannons and explosive artillery to target the strongest enemy. During later waves, heavily armored half-tracks and combat trucks lead the attack. Locking artillery onto high-health targets ensures explosive splash damage softens escorts while cracking vanguard armor.
- Commander Abilities: Reserve active airstrikes and mortar strikes strictly for clustered vehicle columns at the intersection. Using cooldowns on isolated scout units leaves the platform vulnerable during late-wave surges.
Upgrade Priority and Late-Wave Adjustments
Leveling existing key turrets delivers higher damage density on Station 1 than filling perimeter tiles with basic towers:
- Leveling Milestone: Direct your funds into upgrading the central heavy cannon to its first damage and range thresholds before buying extra perimeter units.
- Tile Economy: Leave non-essential perimeter tiles open until your core kill zone at the intersection is upgraded to handle mid-game armor.
- End-Wave Selling: In the final wave, once forward Gatling guns finish clearing basic infantry, sell those forward light towers. Reinvest the refunded funds into upgrading rear defenses and boosting central cannon damage to dismantle the remaining armored bosses before they reach the platform.
Free Battle Strategy: Tower Defense Codes
Current active codes and how to redeem them.

Michael Smith
Michael covers live-service games, events, reward systems, and efficient daily routines, turning frequent updates into clear actions for players.
COMMUNITY
Player Comments
64 players commented on this guide.
The explanation is clear, especially for beginners.
Good guide for Battle Strategy: Tower Defense players. The strategy part was useful.
I tried this today and it worked better than my old setup.
This helped me understand strategy much better.