
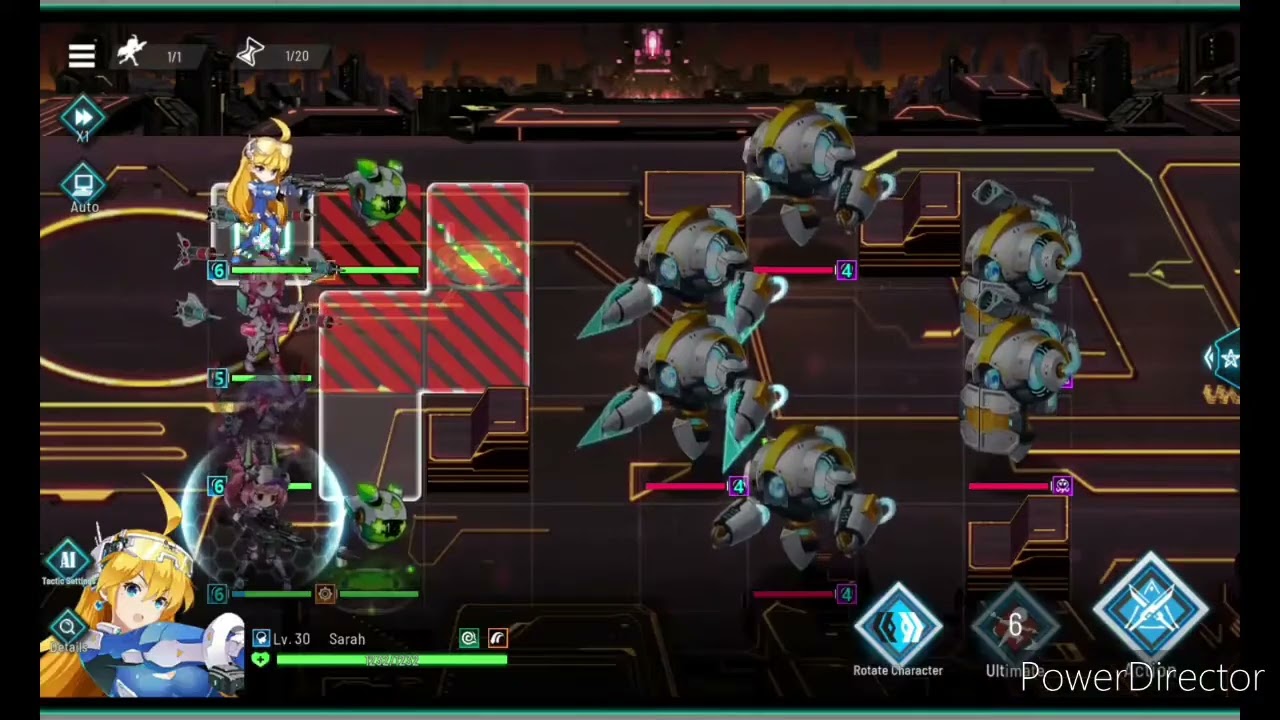
Chapter 4 represents the first major "skill check" for commanders in Battlezone Saga: Gacha Diva. Up until this point, auto-battle settings often suffice to clear content; however, the increased enemy density and the introduction of shielded mecha units in stages 4-1 and 4-2 demand a transition to active command. To successfully push through this chapter, you must shift your focus from relying on raw power to mastering the mechanics of target selection, energy management, and battlefield awareness.
Mastering Target Prioritization
The primary challenge in early Chapter 4 is the influx of swarming mecha units. Left to their own devices, your units will often split their fire across multiple targets, failing to secure necessary kills. This inefficiency allows enemy artillery and debuff-heavy units to stack damage on your front line.
To overcome this, you must manually select high-priority targets. Always eliminate units in the following order of importance:
- Backline Artillery/Snipers: These units deal the highest amount of chip damage. Removing them early prevents your healers from being overwhelmed.
- Debuffers/Supports: Mecha that apply armor reduction or movement slows can quickly turn a manageable encounter into a total wipe.
- Shielded Tanks: While they are tempting to ignore, they often block your path or provide damage mitigation to the rest of their squad.
By focusing fire manually, you ensure that individual enemy units are destroyed quickly, reducing the total incoming damage per second (DPS) on your team.
Optimizing Ultimate Ability Windows
In Battlezone Saga: Gacha Diva, an ultimate ability is a resource, not just a way to deal damage. Using your ultimates as soon as they are off cooldown is a common mistake that leads to failure in Chapter 4.
The Art of the "Bottleneck"
Wait for enemies to group up naturally. Mecha units in this chapter often path toward your front line in tight clusters. By waiting for these clusters to form before firing Area-of-Effect (AoE) ultimates, you maximize the value of every point of energy. A single well-placed ultimate on four enemies is exponentially more effective than four ultimates used on individual targets.
Interrupting Telegraphed Attacks
Elite mecha in Chapter 4 feature "wind-up" animations for their strongest abilities. You will notice a visual indicator, such as a glowing ground zone or a charging weapon animation, before they launch a devastating strike. You should save your crowd-control (CC) ultimates specifically to interrupt these animations. A stun or knockback skill timed correctly will cancel the enemy’s move entirely, effectively granting your team a "free" window of damage.
Front-Line Survivability and Formation Strategy
Your tank is the anchor of your formation; if they fall, your backline damage dealers will be focused down in seconds. When pushing through Chapter 4, you must monitor your tank’s health bar with extreme precision.
- The 30% Threshold: If your tank’s health dips below 30%, avoid panic-healing if their defensive cooldowns are still active. Wait for them to use their own damage-mitigation abilities before layering your support heals on top. This prevents "over-healing" and ensures you have a safety net for the next wave.
- Formation Flexibility: If you are consistently failing stages, evaluate your team composition. In Battlezone Saga: Gacha Diva, swapping a secondary damage dealer for a secondary support or a dedicated shielder can often be the difference between success and failure. You do not need to win quickly; you only need to win. Increasing your formation's longevity often results in a faster clear time because it prevents the "respawn cycle" that ruins momentum.
Leveraging Environmental Hazards
The maps in Chapter 4 are not merely aesthetic; they are tactical assets. Many stages include explosive canisters or hazardous zones that deal percentage-based damage.
Strategic Luring: If you find yourself stuck on stage 4-2, move your tank slightly behind these hazards. By positioning your team correctly, you force the AI-controlled mecha to path through these environmental traps as they approach you. You can then use knockback abilities to pin them within the hazard zone. Because environmental hazards often deal damage based on a percentage of max health, this strategy is exceptionally effective against the high-HP elite mecha that would otherwise act as a gear check for your account.
Balancing Offensive and Defensive Rotations
The most common pitfall in these stages is over-investing in offensive rotations. If you expend all your energy on offensive ultimates, you will have no way to react when the enemy retaliates with their own high-damage sequences.
To master Battlezone Saga: Gacha Diva, you must adopt an alternating rotation:
- Aggressive Push: Use your damage-dealing ultimates to break through the initial enemy wave or to secure a kill on a priority target.
- Defensive Reset: Hold your energy for 3–5 seconds after your initial push. Watch the enemy's energy bars or animation patterns. If they prepare an AoE attack, use your defensive shields or heals immediately.
By maintaining this rhythm—pushing when the enemy is vulnerable and resetting when they are dangerous—you transition from a reactive player to a proactive commander. This cadence is the key to maintaining momentum through the later stages of the campaign.
Final Checklist for Chapter 4 Success
Before attempting a stage again after a failure, conduct this quick internal audit:
- Am I hitting the right target? (Are the snipers dead first?)
- Am I wasting AoE skills? (Did I wait for them to cluster?)
- Am I using my CC to interrupt? (Did I stop the boss's special move?)
- Is my formation balanced? (Do I have enough defensive utility?)
Consistency is the hallmark of a high-level commander in Battlezone Saga: Gacha Diva. By applying these mechanical adjustments, you will find that even the most difficult stages in Chapter 4 become manageable through careful, deliberate strategy rather than just grinding for higher gear levels.

Free Battlezone Saga: Gacha Diva Codes
Current active codes and how to redeem them.

James Brown
James focuses on Android gaming on PC, emulator setup, controls, performance tuning, and practical troubleshooting for longer play sessions.
COMMUNITY
Player Comments
32 players commented on this guide.
The explanation is clear, especially for beginners.
This guide answered the exact question I had.
I wish I had read this before upgrading the wrong thing.
This helped me understand strategy much better.