
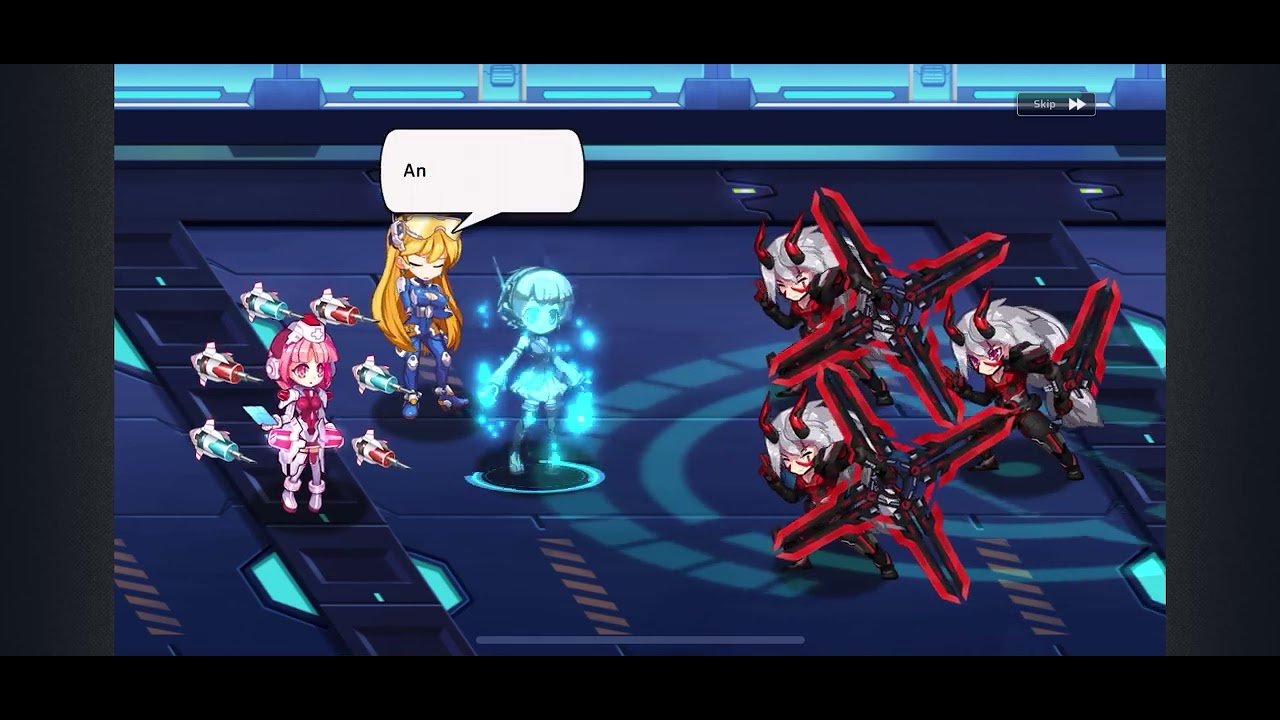
To conquer Stage 1-3, "Terrifying Invaders," in Battlezone Saga: Gacha Diva, you must transition from simple auto-battling to active tactical management. This stage serves as the first major "gate" for new commanders, forcing you to move beyond basic stats and engage with the game’s grid-based combat mechanics. Success in this encounter hinges on your ability to protect your squishy damage dealers while managing the timing of your hero ultimate abilities to clear clustered enemy waves efficiently.
Understanding the "Terrifying Invaders" Threat Profile
Stage 1-3 introduces a significant step up in complexity by mixing enemy archetypes. Unlike the tutorial stages where enemies trickle in one by one, the "Terrifying Invaders" spawn in synchronized waves consisting of melee bruisers and ranged attackers.
The melee units are designed to act as "anchor points," locking your frontline units in place, while the ranged invaders attempt to bypass your tanks to target your backline. If you leave your healers or glass-cannon DPS units exposed, they will be decimated within seconds. The key to this stage is recognizing that the enemies are not just mindless drones; they are programmed to focus-fire the unit with the lowest health pool. Identifying this pattern early allows you to manipulate enemy AI by placing your tankiest unit in the most forward, vulnerable-looking position to draw their fire.
Strategic Positioning: Controlling the Grid
In Battlezone Saga: Gacha Diva, positioning is your first line of defense. Because the map for Stage 1-3 is relatively compact, you do not have the luxury of spreading out. Instead, you must create a "defensive turtle" formation.
- The Tank Anchor: Place your highest-HP character (typically a Guardian or Vanguard class) in the center-front tile. This forces all melee enemies to path toward that single point, effectively clustering them together.
- Backline Safety: Place your Support and Ranged DPS units in the rear-most tiles. Avoid the edges if possible; enemy reinforcements often spawn from the side boundaries. Placing your support in the center-rear keeps them shielded by the tank’s proximity.
- Lateral Shifting: If you notice an enemy ranged unit focusing on a specific backline hero, wait for their attack animation to begin, then move that hero one tile over. This "stutter-stepping" causes the enemy’s projectile to miss, wasting their attack turn and giving your damage dealers more time to clear the board.
Mastering Ultimate Ability Timing
The most common reason for failure in Stage 1-3 is the "panic ultimate"—the tendency to fire off high-damage abilities the moment they charge. This is a trap. In this stage, you must view your ultimates as tactical resets rather than just damage sources.
Wait for the "Terrifying Invaders" to fully spawn and move into the center of the grid. When you have at least three enemies grouped within a 2x2 area, trigger your Area-of-Effect (AoE) ultimates. If you have a healer, do not use their ultimate until your tank drops below 50% HP. Using a heal at full health is a wasted resource that could have been the difference between life and death during the final wave.
The Three-Phase Wave Rule
- Phase 1 (Initial Spawn): Focus on basic attacks to conserve energy. Let your tank build up the "aggro" pool.
- Phase 2 (The Mid-Wave): This is when ranged units appear. Use single-target nukes to eliminate the ranged threats immediately.
- Phase 3 (The Final Boss/Wave): Unleash all saved AoE ultimate abilities simultaneously to clear the screen before the enemies can overwhelm your formation.
Resource Management and Progression Requirements
If your team is performing perfectly but still losing, the issue is not your strategy—it is your preparation. Battlezone Saga: Gacha Diva rewards players who invest in the right growth systems early. Before re-attempting Stage 1-3, perform a quick audit of your squad:
- Level Gaps: Ensure your core team is at least level 7. The stat jump between level 5 and 7 is significant for survivability.
- Gear Synergy: Check your equipment tab. Do not just equip the highest rarity gear; prioritize items that provide "Defense" or "HP" bonuses for your frontliners and "Attack" or "Crit" bonuses for your backline.
- Elemental Counters: The "Terrifying Invaders" often lean toward a specific element. Check the stage preview screen before clicking "Start." If you have a hero that possesses an elemental advantage, prioritize their leveling. An elemental advantage can provide a 20–30% damage reduction, which is often enough to keep a hero alive through the entire encounter.
Common Mistakes to Avoid
Many players lose this stage because they treat it like an endless runner. Avoid these three common pitfalls to secure your victory:
- Over-committing to Movement: Moving your heroes too often disrupts their own attack timers. Only move if a hero is in imminent danger of being killed.
- Ignoring the "Kill Priority": Always kill the ranged invaders first. Your tank can survive three melee attackers for a long time, but two ranged attackers will melt your backline in seconds.
- Ignoring the "Auto-Battle" Settings: If you are playing on auto, disable it for Stage 1-3. The AI is not smart enough to hold ultimates for the final wave. Manual control is mandatory for overcoming the difficulty spikes found in this stage.
Final Tactical Summary
Clearing "Terrifying Invaders" is a rite of passage in Battlezone Saga: Gacha Diva. By shifting your focus from "how much damage can I deal" to "how can I control the grid," you turn a challenging encounter into a manageable victory. Keep your tank central, your support protected, and your ultimates held for the final, most dangerous wave. Once you master the rhythm of these wave patterns, the strategies learned here will serve as the foundation for every difficult campaign stage you encounter as you progress through the game.

Free Battlezone Saga: Gacha Diva Codes
Current active codes and how to redeem them.

Emily Johnson
Emily writes practical mobile strategy guides with a focus on resource planning, base progression, and the early decisions that shape a long-term account.
COMMUNITY
Player Comments
35 players commented on this guide.
Good guide for Battlezone Saga: Gacha Diva players. The heroes part was useful.
This saved me time in the early game.
This helped me understand heroes much better.
The tips are practical and easy to follow.