
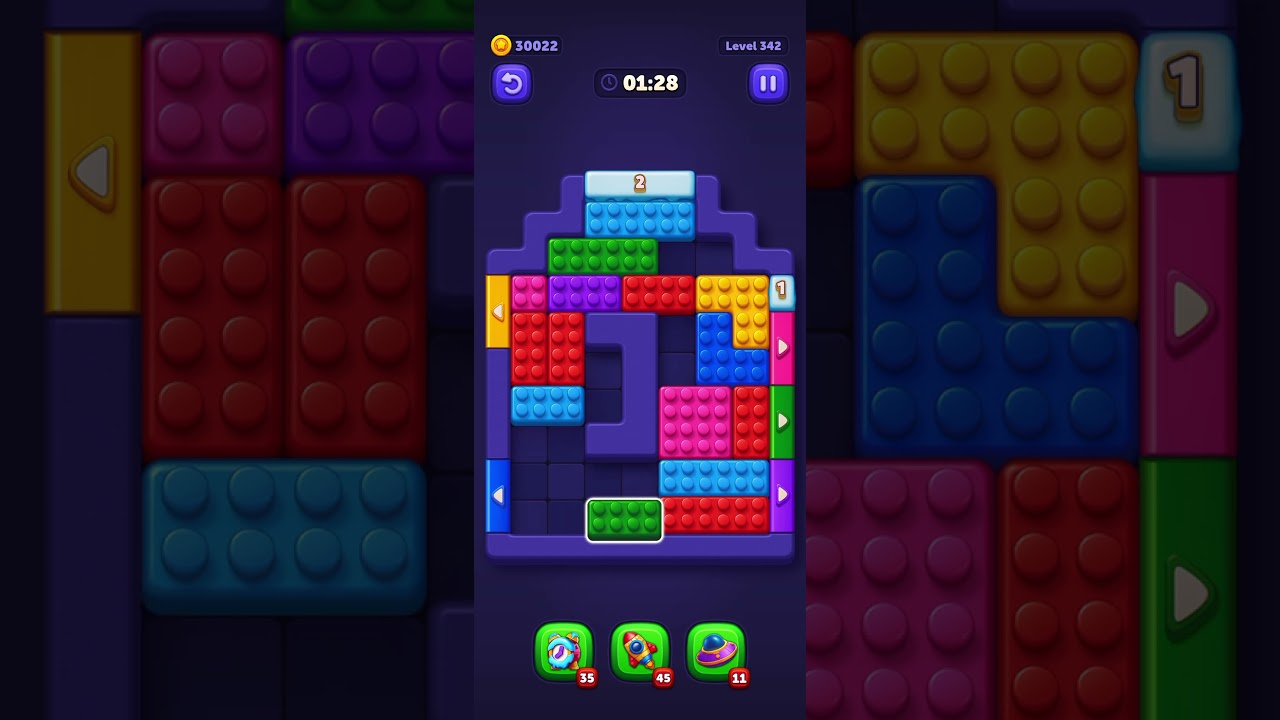
To beat Level 342 in Block Out, transfer blocks that complete active color sets immediately instead of moving unmatchable tiles into your holding tray. Level 342 features tall, multi-layered columns with alternating color arrangements and restricted tray capacity. Because blocks moved to the tray cannot return to the playing field, premature transfers quickly cause fatal deadlocks. Keep at least two tray slots empty until you can confirm a full color set clearance.
Opening Moves and Priority Targets
The opening phase requires uncovering deep vertical lanes while keeping your buffer clear. Level 342 scatters matching pieces across different columns, often placing them directly under blocker tiles.
Before making your first move, scan the grid and follow this sequence:
- Match Immediate Sets: Pull top blocks only if they immediately form a complete set or pair with a color already resting in the tray.
- Target Stacked Identical Pairs: Clear columns that have two of the same color stacked at the top. This removes two tiles while consuming minimal buffer capacity, opening direct access to the lower layers.
- Check Buried Pieces: Select columns where removing the top tile reveals two or more pieces needed for your current set.
- Leave Isolated Single Colors: Avoid transferring an isolated color from an outer column if its remaining matches are buried under dense stacks.
Tray Capacity Management
Each incomplete color set occupies a separate tray slot until the set threshold is fulfilled. When all slots fill without a set ready to clear, the level ends in defeat. Monitor your tray state to decide whether to dig into columns or focus entirely on clearing current sets:
| Buffer State | Occupied Slots | Recommended Action | Risk Level |
|---|---|---|---|
| Clear | 0–2 slots | Dig into columns to uncover blocked lower layers | Low |
| Moderate | 3–4 slots | Stop opening new colors; pull only pieces that complete existing tray sets | Medium |
| Critical | 5+ slots | Move only guaranteed matching pieces to trigger immediate set clearances | Extreme |
When reaching critical tray load, do not tap any block that introduces a new color to the dock. Every move must reduce the number of occupied slots back down to a safe range.
Mid-Game Chaining and Endgame Precautions
Once the top layers are gone, mid-stage progress depends on setting up two-step clearances. Look across all remaining stacks to find moves that trigger chain reactions. For example, if moving a blue block uncovers a yellow block needed to complete an active set in your tray, prioritize that blue block over an unrelated tile. Clearing one complete shade at a time keeps slots rotating freely.
During the endgame, column heights shrink to two or three blocks, but single mismatched tiles often sit at the very bottom of the lanes. Before triggering the second-to-last set:
- Check the color of the bottom tile in every remaining column.
- Calculate whether your remaining open tray slots can absorb the blocker tiles needed to reach those bottom pieces.
- Clear colors in an order that leaves an immediate exit route for the final single tiles, preventing a late deadlock before the board is clear.
Free Block Out Codes
Current active codes and how to redeem them.

Emily Johnson
Emily writes practical mobile strategy guides with a focus on resource planning, base progression, and the early decisions that shape a long-term account.
COMMUNITY
Player Comments
116 players commented on this guide.
Nice guide. I am checking the other Block Out articles next.
This guide answered the exact question I had.
I tried this today and it worked better than my old setup.
I wish I had read this before upgrading the wrong thing.