
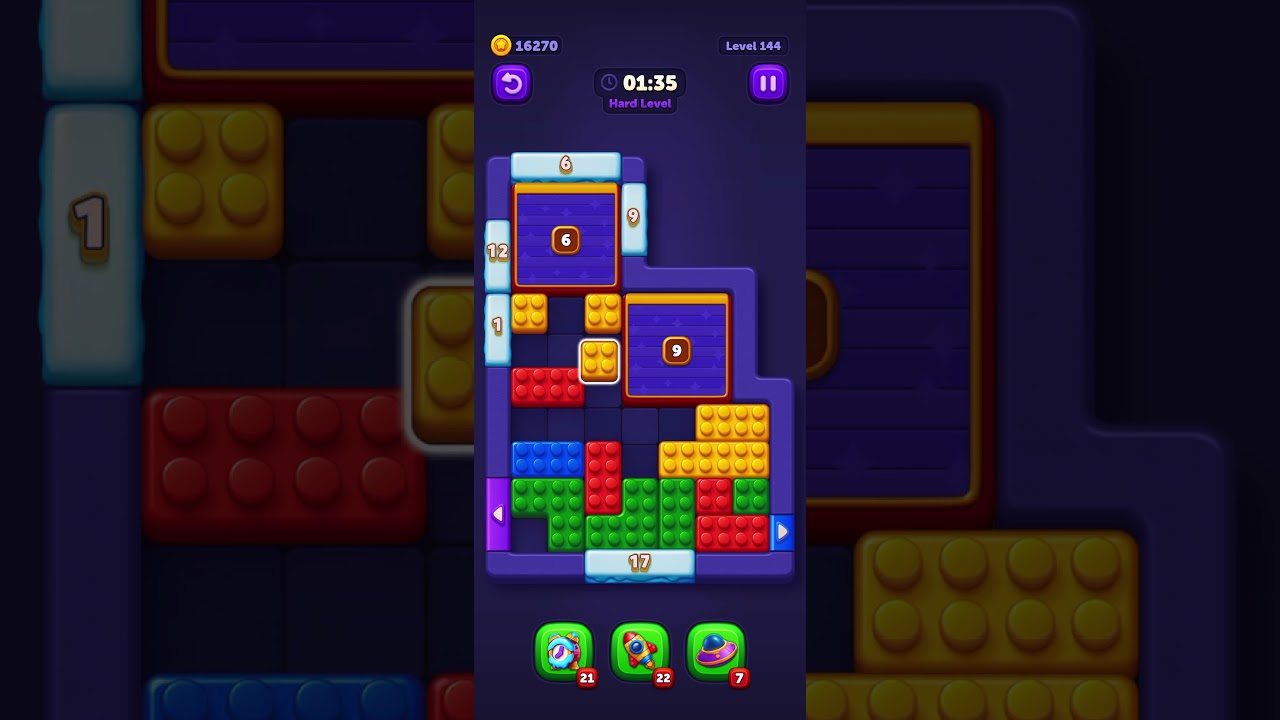
To clear Level 144 in Block Out, dismantle the shallow outer columns first to expose buried pieces while keeping at least two buffer slots empty. Avoid pulling blocks from the deep central columns during your opening moves, and never hold more than two unmatched colors in your bottom tray at once.
Level 144 Board Layout and Tray Hazards
Level 144 distributes red, blue, green, and yellow blocks across compact, multi-tiered vertical columns. Moving a block requires transferring it into your bottom buffer tray, where it occupies a slot until you assemble a complete three-tile set. If the buffer fills completely without triggering a match, the run immediately fails.
The main obstacle on this stage is the fragmented placement of matching tiles. Several columns show isolated colors on top, but their matching partner blocks remain trapped beneath opposing layers. Committing top pieces without securing an immediate route to the third matching tile quickly congests the tray. Success depends on identifying which columns hide completing pieces before moving blocks into the buffer.
Three-Phase Column Clearing Strategy
Dismantling the board in three distinct phases prevents buffer deadlocks and ensures continuous access to matching tiles.
Phase 1: Outer Column Excavation
Target the outermost columns first because they have the shallowest stack depths. Removing these perimeter blocks reveals the second tier quickly without demanding excessive tray space. If an outer tile cannot be paired or cleared within two moves, leave it in place until complementary colors surface elsewhere on the board.
Phase 2: Color Group Cycling
Once the outer perimeter is thinned, focus exclusively on cycling one color group out of the tray at a time. Pull visible matching blocks and uncover the final matching tile to trigger an immediate set clear. Eliminating each set reopens holding slots, giving you the necessary space to dig into deeper stacks.
Phase 3: Central Stack Deconstruction
With side columns open and the buffer cleared, tackle the tall center columns. You can safely place transitional blocks into the tray because the cleared lanes give you the visibility and space required to extract buried anchor pieces.
| Phase | Primary Objective | Buffer Occupancy Limit | Recommended Action |
|---|---|---|---|
| Phase 1 | Excavate outer columns | Maximum 1 slot occupied | Clear shallow pairs |
| Phase 2 | Cycle active color groups | Maximum 2 slots occupied | Match complete sets |
| Phase 3 | Dismantle tall central stacks | Maximum 3 slots occupied | Reveal hidden anchor tiles |
Buffer Management Rules
Maintaining at least two empty buffer slots is mandatory throughout Level 144. The buffer serves strictly as an active sorting conduit, not long-term storage.
- Apply the one-in, one-out rule: Before tapping a piece that does not complete a set, verify that the tile directly underneath matches a color already waiting in your buffer.
- Avoid multi-color juggling: Do not store three or four distinct colors in the tray simultaneously. If unmatched colors begin to accumulate, stop tapping unopened columns and direct your next moves toward completing an existing set.
- Stop blind tapping: Tapping an accessible block simply because it is available often exposes an incompatible color underneath, locking an essential slot and causing an unavoidable deadlock later in the run.

Free Block Out Codes
Current active codes and how to redeem them.

Sarah Williams
Sarah specializes in RPG and collection games, explaining team building, character growth, and beginner-friendly ways to avoid expensive early mistakes.
COMMUNITY
Player Comments
53 players commented on this guide.
This helped me understand strategy much better.
Good guide for Block Out players. The strategy part was useful.
I tried this today and it worked better than my old setup.
This guide answered the exact question I had.