
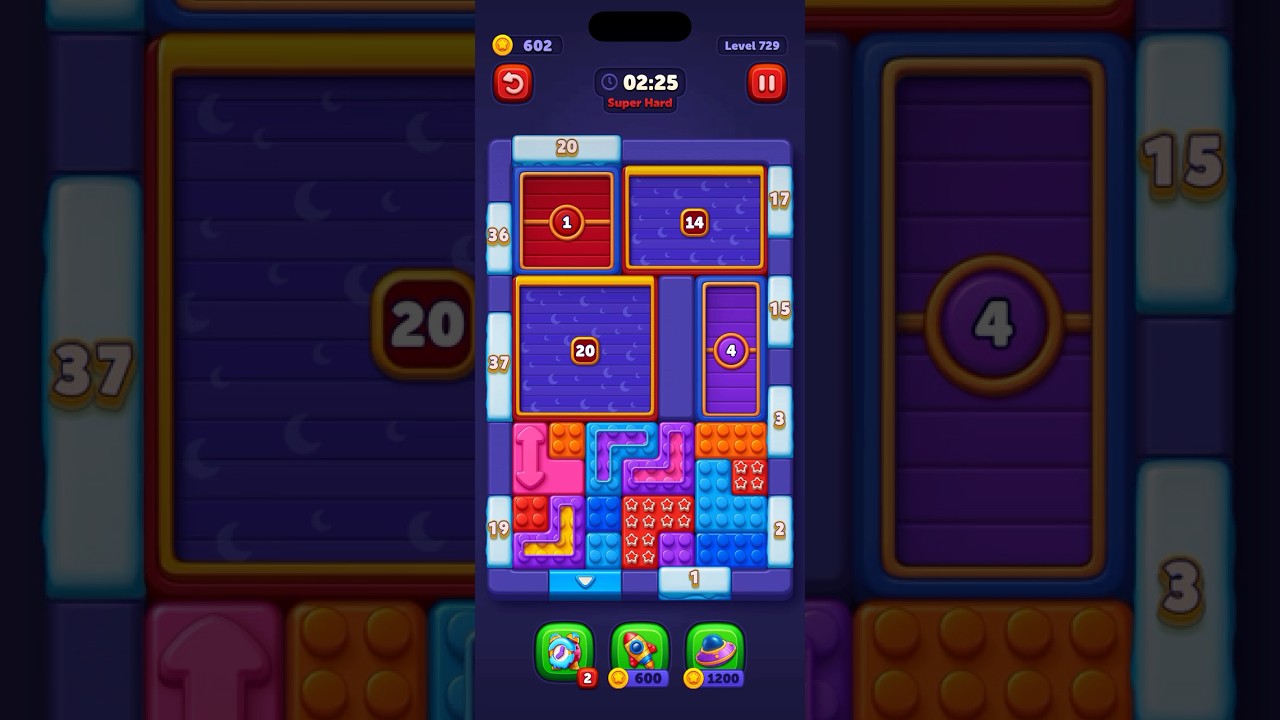
To beat Level 729 in Block Out, dismantle the central blockades first and route matching pieces directly to exit doors while keeping at least two empty slots in your buffer tray.
Level 729 uses a multi-tiered grid where perimeter pieces wedge against interior stacks. Moving perimeter tiles aimlessly creates gridlock at key intersections. Prioritizing central bottleneck tiles over tempting edge pieces allows trapped columns to flow toward matching exit doors.
Early Move Priority and Clearance Sequence
Opening transit corridors to active colored exit doors takes precedence over clearing isolated edge blocks. At the start of the level, focus your moves on the tiles anchoring the central blockades:
- Identify receptive exit doors: Check which colored exit doors are active and take note of the required colors.
- Locate blocking foreground tiles: Pinpoint the specific foreground blocks in the center that barricade those target colors.
- Execute direct clears: Slide pieces directly into matching exit doors without parking them in the buffer tray.
- Retrieve newly revealed matches: As initial blocking pieces leave the board, immediately slide the uncovered matching tiles into their doors to establish continuous clearance corridors.
Direct extractions eliminate on-board spatial choke points without consuming temporary holding space.
Buffer Tray Management
The buffer tray serves as a temporary staging area for multi-step maneuvers, not as general storage for inconvenient blocks. Parking pieces in the tray without an immediate extraction plan quickly causes board deadlocks.
Stage a tile in the tray only when that move immediately exposes an underlying piece that exits the board on the next step. Use these operating thresholds to guide staging decisions:
| Buffer Slots Available | Deadlock Risk Level | Tactical Action Required |
|---|---|---|
| 4 to 5 Open Slots | Low Risk | Stage necessary blocking pieces to reveal nested tiles and clear central junctions. |
| 2 to 3 Open Slots | Moderate Risk | Stop staging non-essential blocks; route pieces exclusively toward active exit doors. |
| 0 to 1 Open Slots | Critical Hazard | Move only tiles that immediately leave the board or clear an occupied tray slot. |
Dropping to a single open slot without an immediate direct match ready usually leads to an unavoidable restart.
Split-Color Columns and Color Transitions
As block layers clear, door requirements and target quotas shift toward secondary colors. Drawing tiles into the buffer based on previous door requirements leaves dead weight in the tray once active colors change.
When addressing split-color columns where a top block covers tiles of a different color:
- Check the active exit door requirements before moving the covering tile.
- Only move the top block into the buffer tray if the underlying blocks can exit immediately into active doors.
- Confirm that every staging action directly resolves an existing occupant in the buffer tray before committing the move.
Endgame Routing
Once the central multi-layered clusters are broken down, the board resolves into linear, single-file columns.
Verify that each remaining column has an unobstructed path to its matching door before sliding pieces. Complex buffer maneuvers are no longer necessary in this phase. Slide each block directly into its target exit in sequence, ensuring the buffer tray drains completely to close out the level.

Free Block Out Codes
Current active codes and how to redeem them.

James Brown
James focuses on Android gaming on PC, emulator setup, controls, performance tuning, and practical troubleshooting for longer play sessions.
COMMUNITY
Player Comments
78 players commented on this guide.
The tips are practical and easy to follow.
Can you add more details about strategy in a future update?
The explanation is clear, especially for beginners.
I wish I had read this before upgrading the wrong thing.