
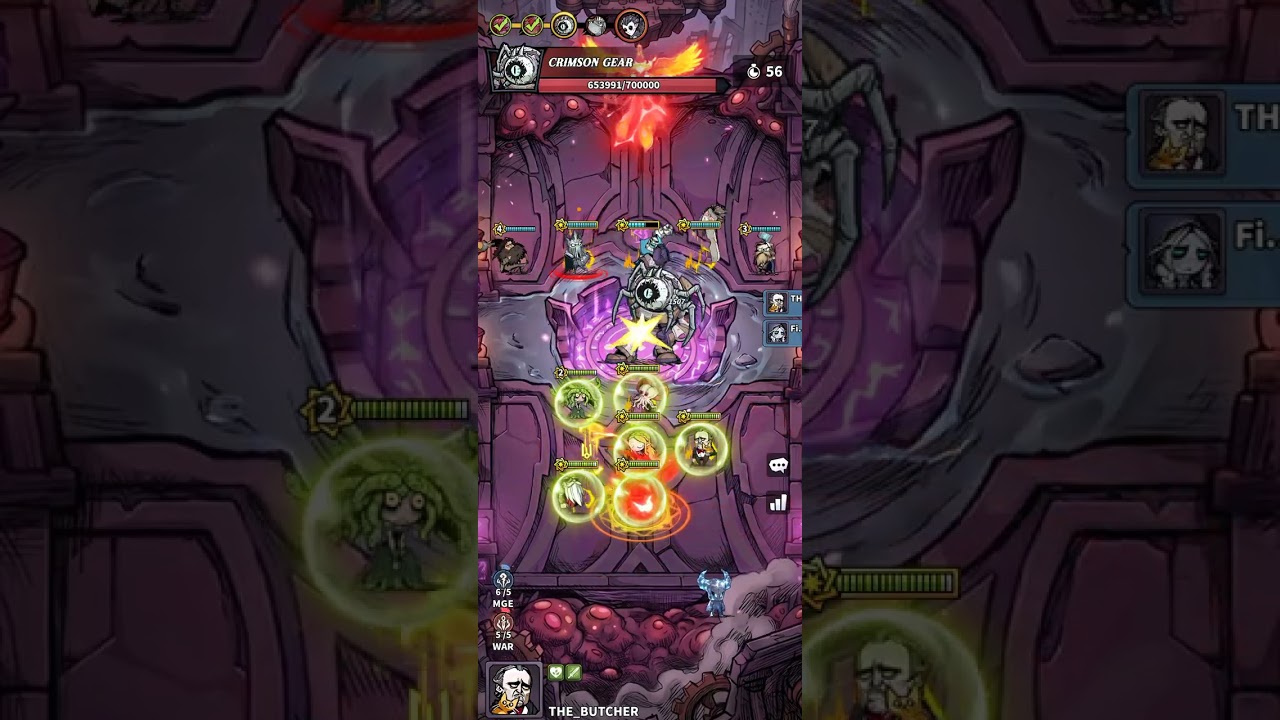
To clear Abyss Trial Level 3 in Don't Die: SruvivalAutoBattler, your duo must divide responsibilities between area-of-effect wave clear and single-target boss damage. Placing frontline tanks slightly off-center directs the boss's cleave attacks away from your backline carries, preventing team wipes while both boards clear lane pressure.
Assigning Co-Op Board Roles
Attempting to run identical setups leaves both boards vulnerable to minion overflow or sudden boss sweeps. Splitting board functions ensures one player neutralizes swarms while the other focuses on burning down the boss.
| Role Assignment | Recommended Hero Focus | Primary Objective |
|---|---|---|
| Crowd Control & Swarm Clear | Witches, Mages, Frontline Guardians | Slow, stun, and eliminate minion waves before they push into mid-board. |
| Single-Target Boss Execution | High-tier Archers, Assassins, Armor Breakers | Focus down elite units and burn through the Level 3 boss's health pool. |
| Hybrid Sustain Anchor | Warrior frontline with ranged support | Absorb incoming hits, prevent leaks, and stabilize early-round economy. |
A Witch-heavy board pairs naturally with an Archer-focused partner. The crowd-control setup slows incoming trash mobs, which keeps targeting lanes open so the partner's physical damage dealers can attack the boss uninterrupted.
Early Drafting and Economy Rules
Failing to build a steady economy in early rounds leaves your board underpowered when the boss spawns. Use the first five rounds to establish durable units rather than burning gold on excessive shop rerolls.
- Prioritize 2-star upgrades over incomplete synergies: A raw 2-star hero provides higher baseline stats and survivability early on than activating partial trait synergies.
- Preserve gold for interest thresholds: Avoid rolling down to zero gold in the first three rounds. Maintaining reserve thresholds provides the income needed for mid-game leveling and board expansion.
- Draft backup frontline units: Keep at least two durable frontline tanks on your board or bench to replace casualties without exposing fragile backliners.
- Funnel upgrades into your main carry: Direct duplicate units and equipment onto your primary damage dealer rather than distributing resources evenly across support units.
By round five, each player should field at least one primary frontline tank and one fully functional 2-star carry.
Positioning to Counter Boss Cleaves
The Level 3 boss uses wide forward cleaves that can eliminate an entire frontline if heroes are bunched together in the center.
- Main Tank Placement: Place your primary tank one tile off-center in the front row. This forces the boss to engage at an angle, turning its cone attacks away from your backline damage dealers.
- Off-Tank Placement: Position secondary bruisers one tile behind the main tank. They will absorb secondary aggro without taking the full brunt of the boss's opening sweep.
- Carry Placement: Place ranged carries, such as Archers and Casters, in the opposite rear corners. Splitting backline units across both corners ensures a single stray area-of-effect burst cannot wipe out your entire damage engine.
- Support Placement: Keep crowd-control supports centered in the back row where their auras and spells can reach both sides of the lane.
Managing Reinforcements and Target Swaps
The Level 3 boss periodically spawns minion reinforcements to pull your carries' targeting away from the boss.
To maintain damage uptime, the crowd-control player must deploy slowing spells or stuns on incoming adds immediately upon spawn. Keeping adds pinned near their entry points allows the burst-damage board to keep its targeting locked directly on the boss. If backline units get pulled off-target by stray adds, shift your frontline tanks between combat phases to redirect the boss back into your carries' primary line of sight.

Free Don't Die: SruvivalAutoBattler Codes
Current active codes and how to redeem them.

Emily Johnson
Emily writes practical mobile strategy guides with a focus on resource planning, base progression, and the early decisions that shape a long-term account.
COMMUNITY
Player Comments
55 players commented on this guide.
The explanation is clear, especially for beginners.
This helped me understand strategy much better.
This guide answered the exact question I had.
This saved me time in the early game.