
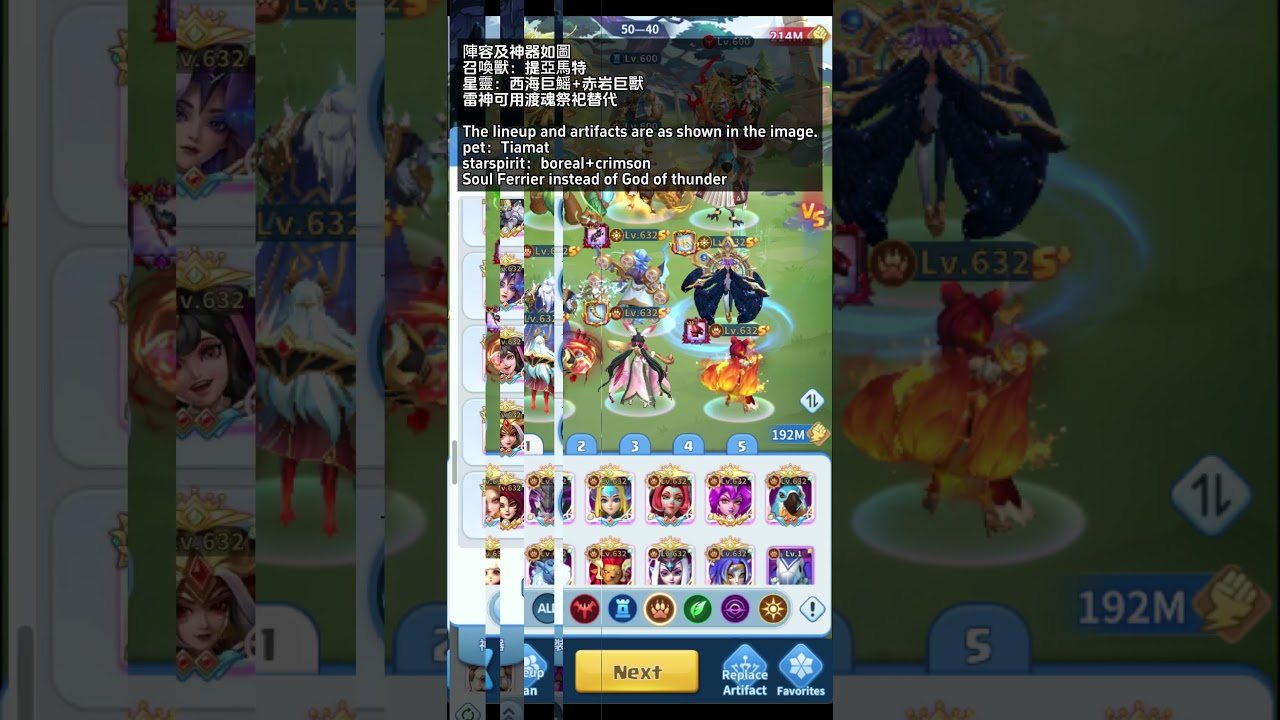
To clear Beast Expedition Stage 60 in Hero Clash, deploy a mono-Beast team structured to survive the boss's opening burst, apply debuffs before the enemy acts, and penetrate high enemy armor. Because the mode locks you out of Human and Night faction units, your survival depends on slot placement, precise speed tuning, and rune stats.
Recommended Stage 60 Team Formation
Position your Beast heroes to protect your damage dealer and absorb heavy opening attacks:
- Slot 1 (Main Tank): Place a durable frontline tank such as Fagon or Roger here to take the boss's initial attacks and build energy from incoming hits.
- Slot 2 (Off-Tank / Control): Run a secondary frontline hero with crowd control or sustained durability to absorb cleave damage and disrupt front-row enemies.
- Slot 3 (Utility / Buffer): Position an energy support or team buffer here to cast defensive shields or stat buffs before backline units take direct damage.
- Slots 4 and 5 (Backline Supports / Secondary DPS): Use these slots for healers, cleanse providers, and defense-reduction debuffers.
- Slot 6 (Primary Carry): Reserve the protected back-corner slot for your primary single-target damage carry so they can safely cycle ultimate abilities.
Speed Tuning and Turn Order
The enemies in Stage 60 have high base speed. If your utility units act after the boss, your team risks being wiped before setting up damage reduction.
Equip your utility heroes and debuffers with Swift or Windwalker runes so they act before the enemy frontline. Your action order should follow this sequence:
- Buffer: Applies attack debuffs to the boss or defensive shields to the team.
- Debuffer: Shreds enemy armor or increases critical vulnerability.
- Tank: Absorbs hits and uses crowd control if available.
- Carry: Attacks immediately after armor reduction is active to maximize damage output.
If your primary carry attacks before your debuffer shreds the boss's armor, your overall burst damage will drop sharply. Adjust your speed boots and rune sub-stats until this exact order is achieved.
Recommended Rune Sets and Stats
Frontline units require direct mitigation, while your carry must prioritize armor penetration over flat attack power to bypass the boss's defense values.
| Hero Role | Primary Rune Sets | Essential Main and Sub-Stats |
|---|---|---|
| Main Tank | Evolution, Guardian, Vitality | Damage Reduction %, HP %, Armor |
| Off-Tank / Control | Apocalypse, Earth, Control | Speed, Effect Hit %, HP % |
| Buffer / Utility | Windwalker, Divine, Swift | Speed, Effect Resistance, HP % |
| Primary Burst Carry | Broken Blade, Berserker, Sin | Armor Pierce, Crit Rate %, Crit Damage % |
Target at least 70% Armor Pierce on your primary carry through relic engravings, artifact bonuses, and rune sub-stats. Without high Armor Pierce, standard attacks deal minimal damage against the Stage 60 boss.
Artifact Selection and Combat Execution
Equip survivability artifacts such as Holy Water or Wings of Angel on your midline supports. These artifacts grant reactive shields or damage caps when incoming burst exceeds a threshold of the hero's maximum health, preventing your healers and buffers from falling in Round 1. If your carry dies during mid-fight area-of-effect rounds, equip an artifact that grants temporary invulnerability or a revive upon taking fatal damage.
For the fight itself:
- Turn off auto-battle: Manually target the main boss and hold critical burst abilities until armor-shred debuffs are applied.
- Watch Round 1 debuffs: If your control hero fails to land their debuff or your Slot 1 tank takes an unmitigated critical hit on turn one, restart the attempt immediately.
- Confirm survival into Round 2: A viable run requires all six heroes to survive the initial enemy assault with full energy bars ready to cycle ultimates in the second round.
Free Hero Clash Codes
Current active codes and how to redeem them.

Emily Johnson
Emily writes practical mobile strategy guides with a focus on resource planning, base progression, and the early decisions that shape a long-term account.
COMMUNITY
Player Comments
133 players commented on this guide.
Can you add more details about heroes in a future update?
I tried this today and it worked better than my old setup.
This saved me time in the early game.
Good guide for Hero Clash players. The heroes part was useful.