
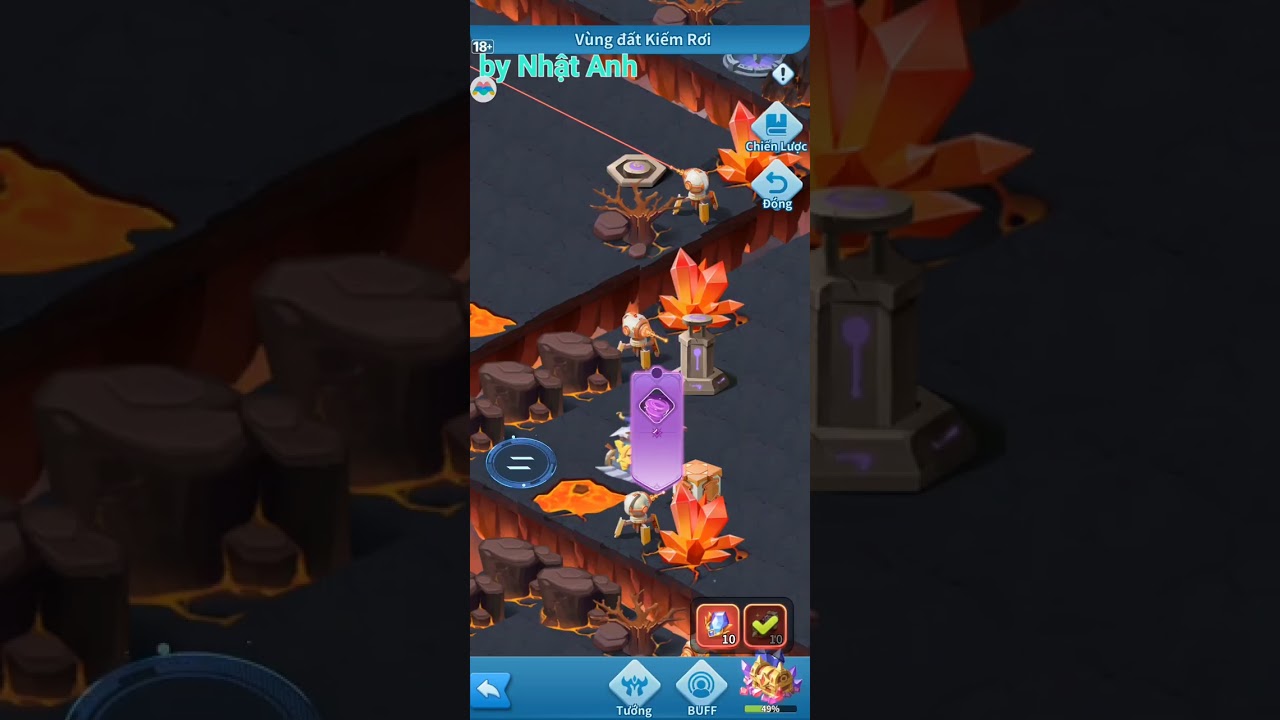
To achieve 100% exploration on Stage 19: Land of Broken Blades in Hero Clash, clear the outer perimeter camps for relic buffs before triggering color switches in a strict sequence. Activating switches out of order or taking teleporters without looting isolated platforms locks barriers permanently for that run, forcing a complete stage reset.
Map Mechanics and Tactical Priorities
The stage uses interactive color pedestals that toggle matching spike barriers up and down across segmented terrain. Lowering one colored obstacle often raises another, cutting off retreat paths or sealing loot chests.
Health and energy carry over across all fights in Adventure mode. Frontline chip damage sustained in early battles persists into elite encounters, making sustained survival mandatory. Bring at least one dedicated healer or shielder alongside your main damage dealer.
| Map Component | Primary Function | Tactical Priority |
|---|---|---|
| Color Switch Obelisks | Toggles matching barrier gates up or down | Activate only in sequence to avoid isolating chests |
| Recovery Springs | Restores 50% HP or revives a fallen hero | Reserve for elite encounters and the final boss |
| Combat Relic Altars | Grants permanent run-specific stat buffs | Claim before fighting high-threat elite camps |
| Teleport Platforms | Moves the squad between disconnected ledges | Clear all items and camps on a platform before leaving |
Step 1: Clear the Outer Rim and Lower the Green Barrier
- Defeat the low-tier camps directly adjacent to your starting position to collect your first combat relics.
- Select offensive stat buffs—such as Attack Percentage, Crit Rate, or Energy Recovery—to quickly burst down enemy backlines in later fights.
- Path along the lower right corridor, clearing minor enemy mobs to open walking space. Do not interact with any switches during this sweep.
- Interact with the green switch mechanism only after clearing the outer perimeter mobs. This lowers the green barriers guarding the intermediate ring.
Step 2: Solve the Central Switch and Teleport Puzzle
Once the green barrier drops, move into the central corridor toward the blue and red switch puzzle. Toggling the blue switch opens the northern path but shuts the eastern route.
- Toggle the blue switch to lower the northern barricade.
- Defeat the elite guard blocking the northern teleport platform.
- Step onto the teleporter to land on the isolated western ledge.
- Defeat the guard on the ledge to reach the red switch and an isolated chest.
- Open the chest first, activate the red switch, and then take the return portal back.
- Head south through the newly lowered red gates to claim intermediate treasure chests.
If a core hero takes fatal damage during any elite fight, pause the game and restart the encounter before the defeat screen appears to retry the battle without losing health.
Step 3: Defeat the Final Boss for 100% Exploration
The stage boss waits on the elevated northern terrace behind the final barrier gate. This encounter deals heavy area-of-effect damage that punishes low-health squads.
- Confirm that every secondary camp and relic altar across the map has been cleared before initiating the boss fight.
- Use any saved Recovery Springs to restore your team to full health.
- Place your primary tank in Slot 1 and position crowd-control heroes directly across from the enemy's primary damage dealer to interrupt ultimate casts.
- Defeat the boss, then activate the final switch behind the platform to drop the barrier guarding the grand golden chest.
- Verify that the exploration counter reads 100% on the map overview before leaving the stage.

Free Hero Clash Codes
Current active codes and how to redeem them.

Emily Johnson
Emily writes practical mobile strategy guides with a focus on resource planning, base progression, and the early decisions that shape a long-term account.
COMMUNITY
Player Comments
36 players commented on this guide.
I wish I had read this before upgrading the wrong thing.
The tips are practical and easy to follow.
I tried this today and it worked better than my old setup.
Can you add more details about heroes in a future update?