
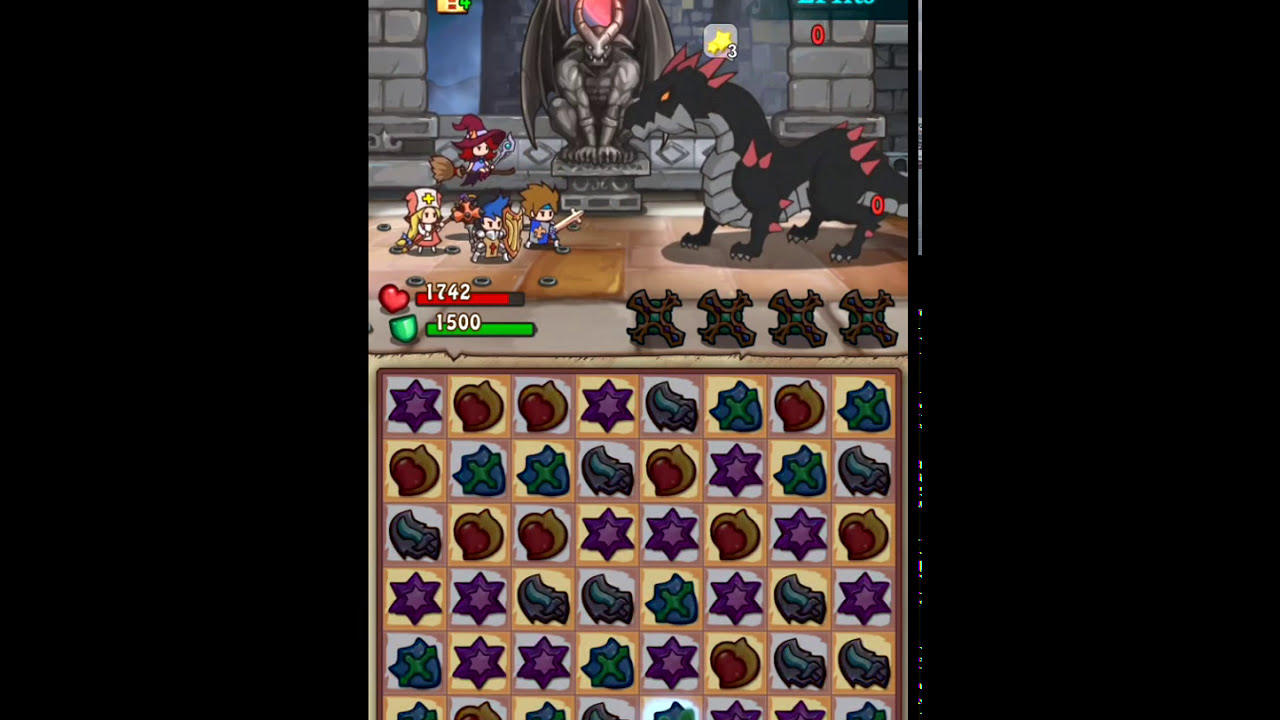
To defeat the Black Dragon at the Moon Gate in Hero Emblems II, max out your defense points (DP) before the boss attack counter reaches zero, clear locked tiles to keep the board moving, and unleash your offensive skills only during the dragon's multi-turn cooldown window.
Preparing Before the Boss Room
Survival against the Black Dragon begins in the preceding Palace of Darkness encounters. Entering the final chamber with broken armor or depleted DP forces you to play defensively immediately, wasting early setup opportunities.
Treat the final regular enemy encounter before the Moon Gate as a reset phase:
- Slow your offense: Stop using high-tier skill emblems once the final minion is low on health.
- Recover your barrier: Use basic three-tile shield matches to fully restore your DP pool.
- Set up the board: Manually align emblems so that four-tile or five-tile power emblems are ready to trigger when the boss encounter begins.
- Finish with basic matches: Eliminate the remaining minion using standard three-tile sword or magic combinations to preserve special tiles.
Managing the Boss Attack Countdown
The Black Dragon displays a turn counter above its head that tracks when it will cast its dark breath attack. When this counter drops, the boss deals heavy burst damage that bypasses unshielded health. Adjust your priorities according to the turns remaining.
| Timer Status | Boss Threat Level | Primary Action | Secondary Action |
|---|---|---|---|
| 3–4 Turns | Low / Cooldown | Form 4-tile and 5-tile offensive combos | Clear non-essential board clutter |
| 2 Turns | Moderate / Charging | Replenish missing DP to maximum | Stockpile healing hearts near bottom |
| 1 Turn | Critical / Imminent Breath | Trigger shield skill emblems; cap DP | Avoid clearing unused healing tiles |
| Post-Hit (0) | Reset / Vulnerable | Match stored healing emblems if HP took bleed | Resume offensive board setup |
Never gamble on low-damage sword matches when the timer is at one turn. If the dragon hits your party without an active DP shield, excess damage bleeds directly into your health pool and applies severe debuffs.
Clearing Locked Tiles and Board Hazards
The dragon locks tiles and drops dark hazards onto the grid throughout the fight. Blocked tiles restrict tile movement and prevent you from matching essential shields when attacks land.
Prioritize hazard removal using these methods:
- Match adjacent tiles: Triggering standard three-tile matches directly next to a locked tile breaks the lock.
- Detonate skill emblems: A four-tile line-clearing emblem removes multiple obstructions in its path.
- Clear along the bottom rows: Making matches near the bottom of the grid triggers falling cascades from above, which often breaks locks passively without spending turns directly on them.
- Save cleansing skills for clusters: Do not use area-of-effect cleansers on an isolated lock; wait until two or more hazards restrict the same quadrant of the board.
Shield Cycling for DP Survival
DP functions as your primary damage buffer. It regenerates through shield emblem matches and prevents incoming hits from damaging base party HP.
To maintain your shield efficiently:
- Leave isolated shield pairs on the board while the boss timer sits at two or three turns.
- Connect those pairs when the counter drops to one turn, bringing your DP to full capacity right before impact.
- If the breath attack completely breaks your barrier, match a stored four-tile shield emblem immediately on the following turn to restore the armor before spending turns on healing hearts.
Capitalizing on Burst Damage Windows
When the Black Dragon finishes its breath attack, the counter resets to its maximum value, opening a multi-turn damage window.
Use this cooldown phase to detonate stored warrior sword skills and magic combinations. Triggering mage and warrior skill runes simultaneously deals heavy damage to the boss's health bar while clearing large sections of the grid to cause cascading drops. Once the dragon's attack counter drops back to two turns, stop focusing on offense and begin assembling shield pairs for the next defensive phase.

Free Hero Emblems II Codes
Current active codes and how to redeem them.

James Brown
James focuses on Android gaming on PC, emulator setup, controls, performance tuning, and practical troubleshooting for longer play sessions.
COMMUNITY
Player Comments
81 players commented on this guide.
This guide answered the exact question I had.
The explanation is clear, especially for beginners.
Nice guide. I am checking the other Hero Emblems II articles next.
The tips are practical and easy to follow.