
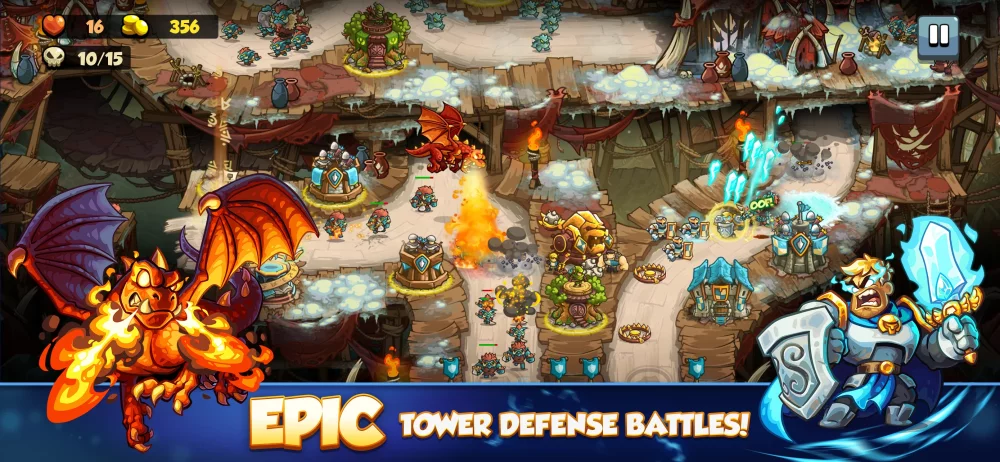
To beat Royal Ransom on Impossible difficulty with 3 stars in Kingdom Rush 6: Genesis, build a fortified chokepoint around the central road intersection using barracks, physical ranged towers, and magic artillery. Anchor your hero behind your footmen to prevent lethal focus fire, stagger hero abilities during elite waves, and use reinforcement call-ins upstream to split fast skirmishers from heavily armored brawlers.
Initial Tower Layout and Early Gold Allocation
Starting the stage on Impossible requires spreading your opening gold across multiple low-tier plots rather than rushing an expensive tier-three upgrade. Early waves send fast skirmishers and standard infantry from converging paths. Rushing a single high-tier tower leaves the secondary road exposed to fast leaks that bypass your defenses before your hero can rotate.
Set up your opening defense around the main confluence with three mutually supportive plots:
- Central Barracks: Place an entry-level barracks directly at the central road junction to cluster incoming ground enemies into a single kill zone.
- Upstream Ranged Tower: Position an archer tower slightly upstream along the primary path to chip down unarmored runners and flying units before they reach the soldier line.
- Core Magic Tower: Build an introductory magic emplacement adjacent to the central junction where its projectiles have maximum lingering travel time across the curve.
This triangular core halts early runners while conserving enough gold to react to sudden lane shifts.
Hero Positioning and Stall Tactics
Because Impossible difficulty grants enemies elevated attack values, stationing your hero directly in front of the enemy spawn leads to rapid death and prolonged respawn timers.
Instead, station your hero directly behind your barracks footmen. This positioning forces incoming enemies to target disposable soldiers first, giving your hero room to deal sustained damage and cast crowd-control skills safely. When elite raiders approach, hold your hero back until the enemy frontline locks onto your footmen, then move your hero into melee range.
If your hero's health drops below thirty percent, immediately retreat them five paces back toward your rear tower line. This drop disengages enemy aggro, transfers incoming attacks onto newly spawned barracks units or summoned reinforcements, and allows your hero's passive health regeneration to kick in without conceding lane ground.
Mid-Wave Adaptation and Tower Roles
Waves five through nine introduce heavily armored vanguard units alongside swarms of light infantry. Physical arrows deal negligible damage against high armor values, making magic penetration essential.
Upgrade your central magic tower to strip armor before incoming tanks reach your primary stall point. Deploy flanking artillery to clear the swarms trailing behind them.
| Tower Archetype | Optimal Placement | Primary Target Priority | Tactical Purpose |
|---|---|---|---|
| Central Magic Tower | Core intersection curve | Armored brutes and vanguard elites | Strips armor and burns high-health targets |
| Flanking Barracks | Direct chokepoint center | Fast runners and skirmishers | Groups incoming waves into concentrated fire zones |
| Archer / Crossbow | Upstream vantage plots | Flying threats and light infiltrators | Provides steady DPS and finishes leaking runners |
| Artillery | Rear overlapping junction | Clustered light infantry swarms | Delivers heavy splash damage across stalled packs |
Deploy reinforcement call-ins slightly upstream from your barracks rally point whenever armored elites overlap with fast-moving runners. Spacing reinforcements ahead of your main line acts as a temporary roadblock, peeling away fast units so your magic towers can burn down armored targets sequentially.
Late-Wave Ability Rotation and Execution
The final waves flood both converging lanes with mixed waves of armored champions, disrupting spellcasters, and high-speed infiltrators. Invest your late-game gold into specialized abilities on your core chokepoint towers rather than scattering low-level towers along peripheral borders.
Execute this rotation during high-density pushes:
- Anchor the Intersection: Purchase shield upgrades or enhanced armor on your central barracks to keep footmen alive against high-damage elite strikes.
- Stagger Active Cooldowns: Trigger your primary board spell as the vanguard enters the central intersection. Hold your hero's active burst ability until the secondary wave merges into the pack.
- Adjust Soldier Rally Points: If high-damage elites threaten to wipe your squad with an area attack, shift your barracks rally point slightly backward along the lane to pull enemies deeper into your artillery's firing arc.
- Deploy Reinforcement Traps: Place standard reinforcements directly behind any leaking runner to stall them within range of your perimeter archers.
Common Mistakes on Impossible
- Rushing Skill Upgrades Early: Unlocking costly secondary skills on a single tower before establishing your core defensive triangle leaves secondary lanes underdefended. Reserve early gold strictly for baseline towers and primary tier upgrades.
- Static Hero Placement: Leaving your hero locked in one spot allows flanking runners to slip past during dual-lane pushes. Watch lane indicators and rotate your hero between waves to intercept breakthrough threats before they reach the stage exit.

Free Kingdom Rush 6: Genesis Codes
Current active codes and how to redeem them.

Sarah Williams
Sarah specializes in RPG and collection games, explaining team building, character growth, and beginner-friendly ways to avoid expensive early mistakes.
COMMUNITY
Player Comments
137 players commented on this guide.
Nice guide. I am checking the other Kingdom Rush 6: Genesis articles next.
Can you add more details about heroes in a future update?
I wish I had read this before upgrading the wrong thing.
I tried this today and it worked better than my old setup.