
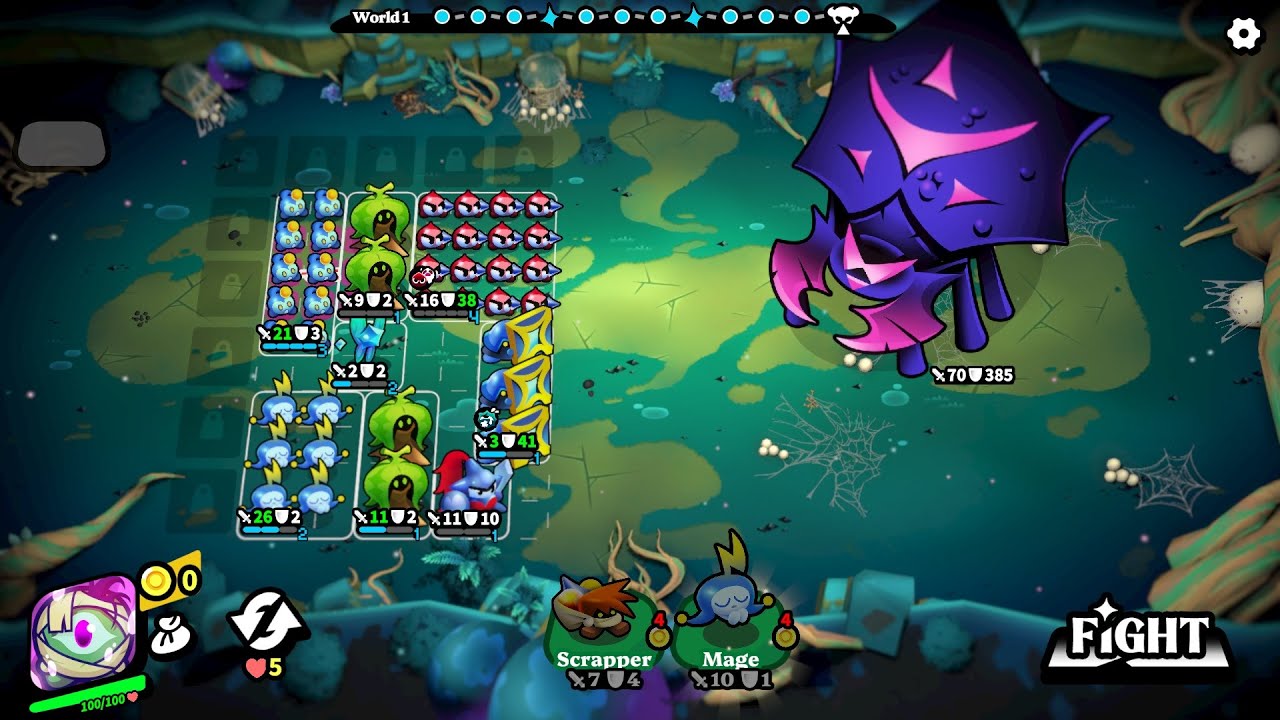
To minimize unit loss across escalating combat waves in Knightica, place your highest-health melee units in the front two rows of your board while positioning archers and spellcasters in the back rows. Forming a solid, contiguous line of defensive units forces enemy AI to target your tanks, preserving your fragile damage dealers and stabilizing your army's combat effectiveness.
Building a Frontline Buffer Zone
Your primary defensive goal is to create a physical barrier that absorbs enemy aggression before threats reach your fragile backline. Placing high-armor or health-regenerating units in adjacent tiles across the front two rows creates a unbroken line that restricts enemy pathing.
- Tile Contact: Position tank units horizontally adjacent to each other. Leaving open spaces in your front row allows fast or swarming enemies to slip past and directly engage your backline.
- Stat Priority: Select units with high health, high armor, or built-in health regeneration for your front two rows. Their main job is holding position and absorbing damage while your ranged units clear targets.
- Edge Placement: Place your highest-health or most expendable tanks on the outer edges of the front row. Enemies pathing toward the nearest visible target will pull toward the flanks, keeping the center clear.
Protecting Ranged Damage Dealers
Once your frontline formation is set, organize your ranged damage dealers in the back two rows furthest from the enemy spawn zone. Isolating archers and mages prevents them from taking unnecessary melee damage.
- Maximize Distance: Keep glass-cannon damage dealers in the rear rows so they can attack without entering melee range.
- Spread Out Units: Avoid clustering your ranged attackers onto adjacent tiles if board size allows. Maintaining empty tiles between squishy units prevents area-of-effect abilities from wiping out multiple damage dealers at once.
- Clear Line of Sight: Ensure every unit has a functional path or attack angle to avoid blocking your own troops behind redundant frontline units.
Formation Strategy by Unit Type
| Role | Board Placement | Primary Function | Positioning Priority |
|---|---|---|---|
| Frontline Tanks | Front 2 rows, horizontally touching | Absorb incoming melee hits and block movement | High armor, high HP, or HP regeneration |
| Flank Anchors | Outermost tiles of the front row | Draw enemy pathing outward away from the center | Highest durability or expendable units |
| Backline DPS | Back 2 rows, spaced apart | Deal sustained single-target or area damage | Kept insulated behind tanky units |
Adjusting Formations Between Waves
Check the preview window before each round to evaluate incoming enemy placement and composition, then adjust unit positions accordingly:
- Reinforce Failing Flanks: If enemies breach your left or right side in a previous round, shift a stronger tank to that outer tile before starting the next wave.
- Focus Elite Targets: When facing high-health elites or bosses, shift your frontline tanks to surround the single threat on three or four sides. This pins the boss in place so your backline can focus fire safely.
- Consolidate Low-Tier Units: Consolidate damaged or weak ranks between rounds. Maintaining fewer, higher-tier tanks holding a dense line is more effective than filling the board with fragile units that block line of sight.

Free Knightica Codes
Current active codes and how to redeem them.

James Brown
James focuses on Android gaming on PC, emulator setup, controls, performance tuning, and practical troubleshooting for longer play sessions.
COMMUNITY
Player Comments
153 players commented on this guide.
The explanation is clear, especially for beginners.
Good guide for Knightica players. The strategy part was useful.
This helped me understand strategy much better.
Nice guide. I am checking the other Knightica articles next.