
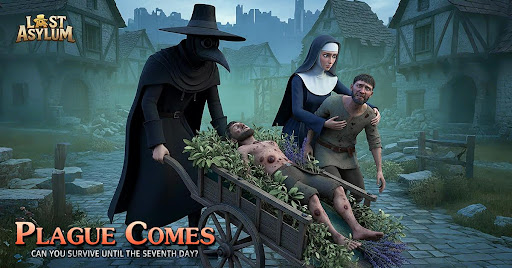
In Last Asylum: Plague: Plague, your ability to thrive in a post-apocalyptic wasteland depends as much on your tactical decision-making as it does on your ability to process information. The game’s user interface (UI) is dense, designed to provide a comprehensive overview of your sanctuary’s health, resource economy, and squad readiness. For new and intermediate players, the sheer volume of menus, icons, and notifications can be overwhelming. However, mastering these elements is the most effective way to eliminate "dead time"—periods where your base is idle or your heroes are underutilized.
This guide breaks down the essential components of the Last Asylum: Plague: Plague interface, providing the structural knowledge you need to turn your base into an unstoppable survival machine.
Decoding the Primary Command Interface
The main command screen is your central hub. It is designed to prioritize critical information, but its efficiency depends on your ability to filter out non-essential visual noise.
- Top-Left: Resource Economy: This is your lifeblood. You will find indicators for your primary resources here. Always monitor these before initiating new construction. If your resource bars are flashing or red, it indicates a bottleneck in production, signaling that you need to prioritize upgrading your resource-generating buildings before moving to combat structures.
- Bottom-Right: Mission Tracking: This area acts as your primary roadmap. The mission log here is context-sensitive; it updates dynamically based on your current objectives. If you ever feel lost regarding what to do next, the "Next Objective" prompt in this corner is your north star.
- The "Global" Notification Bar: Look for a thin bar or icon cluster that appears near the top-center or right. This tracks ongoing timers. Whether it is a research project or a building upgrade, keeping this timer active is the secret to competitive progression.
Strategic Building Upgrade Prompts
One of the most common mistakes in Last Asylum: Plague: Plague is ignoring the "floating" icons that appear above structures. These prompts aren't just decorative; they are automated indicators that a building has reached a state where it can be upgraded or that a task has been finalized.
Why You Should Never Ignore Prompts:
- Queue Management: If you have an empty building queue, you are actively losing potential power. Every minute a building sits at its current level when it could be upgrading is a minute of lost efficiency.
- Resource Caps: Often, buildings provide storage space. If you ignore an upgrade prompt, you may hit a resource cap, preventing you from collecting further rewards from tasks or missions.
- Visual Shortcuts: Clicking these prompts is faster than panning across your base to manually find structures. Train yourself to check for these markers every time you log in.
Navigating Hero Deployment and Squad Management
The Hero interface is where the game shifts from base management to tactical warfare. Understanding the visual hierarchy here is essential for high-level play.
- The "Power" Metric: The game assigns a Power value to every hero. While this is a general indicator of strength, it does not always reflect synergy. Do not simply swap in the highest-power hero if they don't fit the elemental or tactical requirements of the mission.
- Reserve vs. Active: The interface clearly separates your deployed squad from your reserve heroes. Use the "Auto-Fill" feature as a baseline, but always perform a manual check of your squad’s roles (Tank, DPS, Support) before engaging in high-difficulty combat.
- The Drag-and-Drop Workflow: The menu is designed for rapid swapping. If a mission involves heavily armored enemies, look for the icons in your hero pool that denote "Armor Piercing" or "Explosive" damage types. Dragging and dropping these into your active slot is the fastest way to adjust your composition on the fly.
Interpreting Mission and Objective Notifications
Last Asylum: Plague: Plague uses a notification badge system (usually a red dot or a pulsating icon) to guide players toward unclaimed rewards. These are your most efficient source of growth.
When you see a notification badge on your Quest or Events menu, clear it immediately. These rewards often include "Speed-Ups" or rare materials that are essential for breaking through mid-game walls. If you ignore these, you will find your progression lagging behind players who systematically clear these tasks.
Pro-Tip: Check the "Daily Missions" tab consistently. The UI here is designed to show you exactly how many points you need to unlock the final tier of rewards. Prioritize the tasks that offer the highest point values to maximize your daily intake of premium currency and upgrade materials.
Streamlining Combat Menu Transitions
The pre-combat screen is the most undervalued part of the UI. Many players treat this as a loading screen, but it is actually a vital tactical review board.
Before you click "Start," look at the following elements:
- Enemy Intel: The UI will display the types of enemies you are about to encounter. If the screen shows a high density of "Plague Infected" or specific boss types, consider if your current squad’s passives are optimized for that specific enemy class.
- Reward Preview: The pre-combat screen shows potential drops. If you are farming for a specific material to upgrade a building, this screen tells you if you are in the right place. Don't waste stamina on missions that don't provide the current resource you lack.
- Difficulty Thresholds: If the game displays a "Recommended Power" that is significantly higher than your current squad power, the UI will often highlight this in yellow or red. Heed these warnings; they are accurate indicators of whether you are equipped for the encounter.
Common Interface Mistakes to Avoid
- Ignoring the "World" Toggle: Many players get stuck in their base view. The button that toggles the "World Map" is often small or placed on the periphery. Remember that your base is only half the game; the World Map is where you find gathering nodes and external threats.
- Over-relying on Auto-Upgrade: While the game offers shortcuts, always check the requirements listed in the upgrade window. Sometimes, the game will suggest an upgrade that eats through a resource you need for something more critical.
- Forgetting to Collect from Production Buildings: Automated production buildings (like farms or scrap collectors) often have a "collection" icon that appears when they are full. If you don't collect, they stop producing. Make a habit of doing a "sweep" of your base every time you log in to ensure all production cycles are refreshed.
By internalizing these navigation habits, you minimize the friction between your intent and your in-game actions. Last Asylum: Plague: Plague rewards those who can quickly identify where they are, what they need, and how to get it. Use the UI to your advantage, and you will find your sanctuary growing significantly faster than those who overlook the finer details of the command screen.

Free Last Asylum: Plague Codes
Current active codes and how to redeem them.

James Brown
James focuses on Android gaming on PC, emulator setup, controls, performance tuning, and practical troubleshooting for longer play sessions.
COMMUNITY
Player Comments
56 players commented on this guide.
This helped me understand strategy much better.
Can you add more details about strategy in a future update?
This saved me time in the early game.
The tips are practical and easy to follow.