
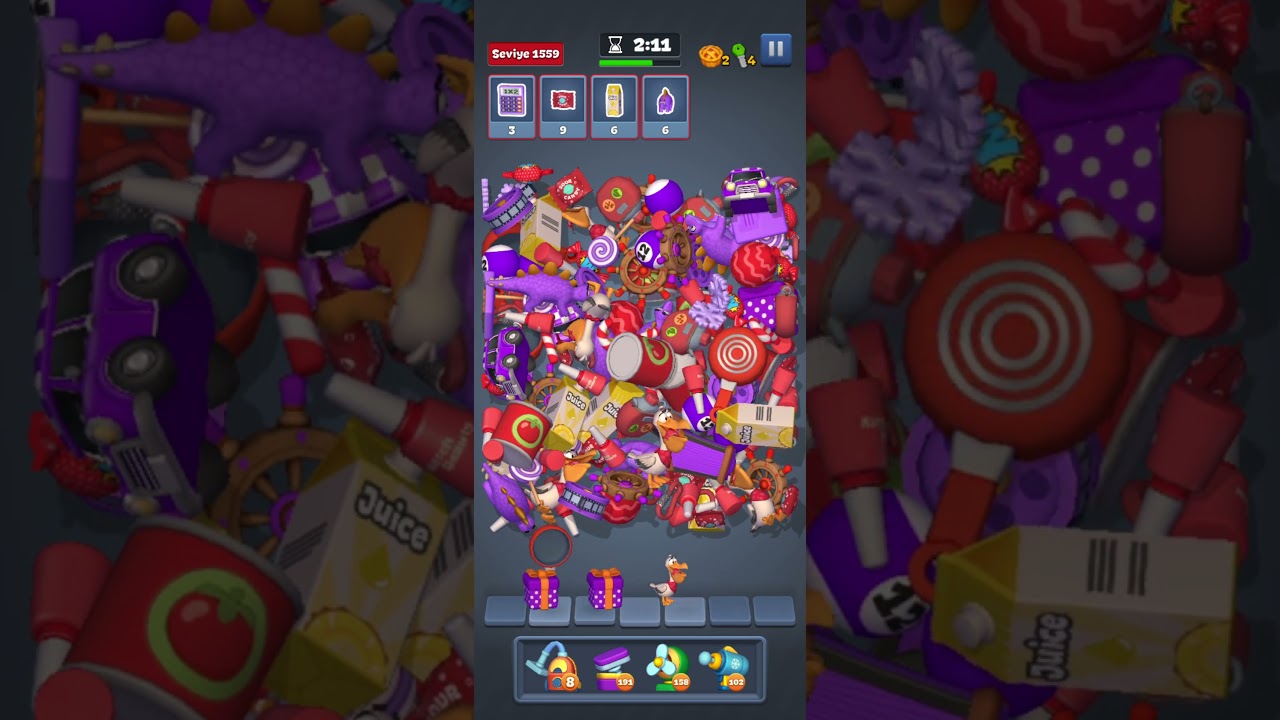
To beat Level 1559 in Match Factory!, focus on matching immediately visible goal triplets while preserving at least three open slots in your seven-slot bottom tray. Dense item piles frequently bury stage goals beneath random clutter. Avoid picking solitary target pieces prematurely, peel away surface layers from the perimeter inward, and reserve utility boosters exclusively for board jams and late-stage timer pressure.
Managing Tray Space and Target Priority
Your primary failure point on Level 1559 is filling the bottom tray before completing sets. Because the holding tray contains only seven slots, grabbing two pieces of a goal item without an accessible third piece severely restricts your remaining capacity.
To maintain board control, categorize visible objects before committing taps:
| Item Situation | Board Position | Recommended Action | Risk to Tray Space |
|---|---|---|---|
| Complete Triplet | All three pieces fully exposed | Collect all three immediately to advance stage goals | Low |
| Split Pair | Two visible, one buried nearby | Clear light surface clutter to reach the third piece | Moderate |
| Single Target | One visible, others buried deeply | Leave on the board until partner items are uncovered | High |
| Non-Goal Clutter | Trapped over required targets | Clear only if a full three-piece set resolves instantly | Very High |
Commit to single-set resolution. Before tapping an object into the tray, confirm that all three pieces are selectable or that removing the first two will shift the pile enough to reveal the third. If four tray slots become occupied, immediately stop exploring new items and focus entirely on completing the sets already in your tray.
Excavation Tactics for Dense 3D Piles
Level 1559 features a dense central mound governed by 3D physics. Tunneling directly downward into the center causes the surrounding items to tumble inward. This inward collapse creates tighter knots of overlapping clutter that further conceal your required items.
Instead of digging straight down, apply these clearing habits:
- Peel outer edges first: Clear perimeter items to allow the central mound to settle and flatten naturally under gravity.
- Look for partial silhouettes: Scan clutter for distinctive colors, handles, or corners belonging to target items before tapping.
- Clear direct weight: When an edge of a target piece is visible, remove only the surface items resting directly on top of it so the target can roll free.
When to Deploy Boosters
Treat boosters as surgical recovery tools rather than shortcuts for easy surface matches. Deploy them in the final phase of the level or when your tray is on the verge of locking up:
- Vacuum: Use this tool when two matching pieces sit in your tray and the third piece remains wedged under deep clutter. The Vacuum extracts the matching item from anywhere on the board and immediately frees your tray space.
- Spring: Deploy the Spring when items settle into an immovable tangle. It launches objects upward to reshuffle their positions, breaking open tight clusters without consuming tray slots.
- Ice Gun: Trigger the freeze effect when your remaining targets are identified but complex extractions require uninterrupted time against the countdown clock.
Emergency Board Recovery Sequence
If your tray reaches five or six occupied slots without an obvious match in sight, follow this sequence to stabilize the board:
- Audit current tray items: Identify the exact shapes and colors occupying your tray slots.
- Scan exclusively for matching pieces: Ignore all other board objectives and search solely for the final item of an existing tray set.
- Check for high-impact shifts: Tap a single loose surface piece only if its removal will cause a target piece to roll into view.
- Activate utility before locking: If no matching third piece can be reached, trigger a Vacuum or Spring immediately instead of making a random tap that causes a game over.

Free Match Factory! Codes
Current active codes and how to redeem them.

Sarah Williams
Sarah specializes in RPG and collection games, explaining team building, character growth, and beginner-friendly ways to avoid expensive early mistakes.
COMMUNITY
Player Comments
80 players commented on this guide.
This saved me time in the early game.
This helped me understand strategy much better.
I wish I had read this before upgrading the wrong thing.
I tried this today and it worked better than my old setup.