
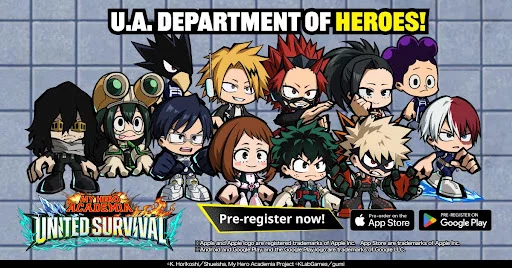
In MHA: UNITED SURVIVAL, achieving top-tier results in Score Attack and boss raids does not require a wallet full of premium currency. While rare, high-rarity units often grab the headlines, the true backbone of a competitive account is a well-built roster of accessible "Free-to-Play" (F2P) heroes. These characters are selected for their specialized utility—specifically their ability to manipulate enemy defenses and maximize the damage output of your entire squad.
By prioritizing heroes that provide consistent debuffs and crowd control, you can bridge the power gap between your account and "whale" rosters. This guide breaks down the five most essential F2P heroes in MHA: UNITED SURVIVAL and how to leverage them for maximum impact in competitive modes.
The Strategic Value of F2P Utility Units
In the context of Score Attack, "utility" is the most valuable currency. A hero that deals massive damage to a single target is replaceable, but a hero that applies a permanent "Defense Down" debuff or increases the team’s critical hit rate is an irreplaceable pillar of your strategy.
F2P heroes in MHA: UNITED SURVIVAL are often superior for progression because their shards are readily available through daily shops, mission rewards, and event exchanges. This accessibility allows you to reach maximum limit breaks and high-tier awakenings much faster than you could with limited-banner characters. In this game, a fully awakened F2P hero with maxed-out skills will almost always outperform a low-star premium unit.
The Top 5 F2P Heroes for Competitive Play
While the meta in MHA: UNITED SURVIVAL shifts, the following five units provide the most consistent utility across multiple Score Attack seasons.
1. The Defense Shredder
This hero is your primary engine for high scores. Their signature quirk allows them to apply a stackable defense reduction on the boss. In MHA: UNITED SURVIVAL, defense reduction is multiplicative; as you strip away armor, your heavy hitters’ damage output scales exponentially. Always prioritize this character in your lead slot to ensure the debuff is active before your main DPS unleashes their ultimate.
2. The Energy Battery
Score Attack modes often penalize you for slow clears. This support hero specializes in energy regeneration, allowing your main squad to fire off their ultimate abilities more frequently. By reducing the downtime between high-damage windows, this hero ensures your team is constantly outputting pressure, which is vital for meeting strict time-based score thresholds.
3. The Crowd Control Specialist
While bosses are often immune to stuns, they are rarely immune to "slow" or "interrupt" effects. This hero excels at disrupting boss attack patterns, allowing your team to survive longer without needing a dedicated healer. Staying alive longer means more attacks, which translates directly into higher total damage scores.
4. The Critical Damage Enabler
This unit provides a team-wide buff to critical hit rate or critical damage. When paired with a high-DPS character who has a high innate critical rate, this hero acts as a force multiplier. They don't need to do the heavy lifting themselves; they simply ensure that every hit your main dealer lands is a devastating one.
5. The Sustained DPS Anchor
Every team needs a "floor" for their damage output. This F2P hero is chosen for their high-frequency, low-cooldown abilities that keep the damage meter climbing even when your primary ultimate is on cooldown. They are your safety net, ensuring that your DPS remains consistent throughout the entire encounter.
Perfecting Your Skill Rotation
Understanding how to use these heroes is just as important as leveling them. To dominate Score Attack, you must master the "Buff/Debuff Window."
- Initiation: Trigger your Defense Shredder and Critical Damage Enabler first.
- Transition: Use your Energy Battery to ensure your main DPS has the resources required for their full rotation.
- Burst: Unleash your primary damage dealer’s ultimate while the boss is at maximum debuff vulnerability.
- Loop: Repeat this cycle. Do not waste abilities as soon as they come off cooldown; hold them for 1–2 seconds to ensure they align perfectly with your buffs.
Resource Management: Do Not Spread Thin
A critical mistake many players make is trying to build the entire roster simultaneously. In MHA: UNITED SURVIVAL, horizontal progression (leveling everyone) is a trap.
- Focus on the Core Three: Pick your primary DPS and your two most essential support units. Bring them to their absolute maximum level cap and skill tier before even touching a fourth hero.
- Shard Farming: Check the daily exchange shops every single day. If shards for your Core Three are available, buy them. This is the fastest way to increase your power level without spending money.
- Gear Optimization: Prioritize gear with "Cooldown Reduction" and "Energy Regen" stats for your supports. Your DPS needs "Attack" and "Critical Damage," but if they don't have the energy to use their skills, the damage stats are irrelevant.
Why This Strategy Works
This approach works because it respects the math behind the game. MHA: UNITED SURVIVAL uses a damage formula where debuffs act as a divisor or a multiplier to the boss's effective health. By lowering their defense, you are effectively giving your team a 20–40% damage boost that doesn't rely on RNG (random number generation) or expensive gear rolls.
When you invest in these specific F2P heroes, you are investing in reliability. Even as the game introduces new, flashier characters, the fundamental need for defense debuffs and energy management will remain. These five heroes are the bedrock of the meta, providing a sustainable, repeatable, and highly effective way to climb the leaderboards in MHA: UNITED SURVIVAL.

Free MHA: UNITED SURVIVAL Codes
Current active codes and how to redeem them.

Emily Johnson
Emily writes practical mobile strategy guides with a focus on resource planning, base progression, and the early decisions that shape a long-term account.
COMMUNITY
Player Comments
75 players commented on this guide.
Nice guide. I am checking the other MHA: UNITED SURVIVAL articles next.
This guide answered the exact question I had.
I tried this today and it worked better than my old setup.
This saved me time in the early game.