
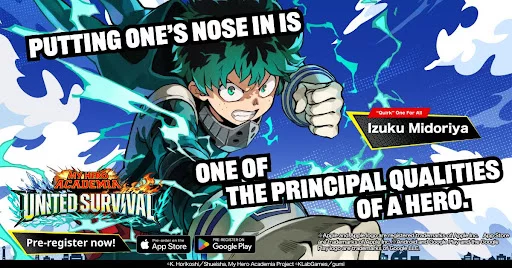
In MHA: UNITED SURVIVAL version 1.3.0, the best way to avoid progression bottlenecks is to funnel your scarce upgrade items into two Tier 0 carries: Inasa Yoarashi for screen-wide mob clearing and AP Shot Katsuki Bakugo for high single-target boss burst.
Because high-grade training materials such as Ultra Dumbbells, character shards, and gold are strictly limited, spreading resources evenly across a full squad will stall your account against late-chapter health pools. Build Inasa first to handle incoming enemy swarms, follow up with AP Shot Bakugo for boss damage checks, and bring crowd-control anchors to functional skill thresholds before investing elsewhere.
---
Version 1.3.0 Character Investment Rankings
The following hierarchy reflects upgrade return on investment for standard stage progression, horde survival, and Score Attack in update 1.3.0:
| Tier | Hero | Primary Role | Upgrade Priority |
|---|---|---|---|
| T0 | Inasa Yoarashi | Screen-Wide Horde Clearing | Maximum (Awaken First) |
| T0 | AP Shot Bakugo | Single-Target Boss Burst | Maximum (Secondary Carry) |
| T0.5 | Polished Icework Todoroki | Area Freeze & Crowd Control | High (Target Skill Milestones) |
| T0.5 | Twice | Meat-Shield Clones & Distraction | High (Clone Multipliers) |
| T1 | Iron Sole Izuku Midoriya | Score Attack & Kiting | Moderate (Situational Focus) |
| T1 | Denki Kaminari | Burst Shockwave Screen Wipes | Moderate (Cooldown Dependent) |
| T2 | Minoru Mineta / Gang Orca | Budget Slows & Stuns | Low (Base Passives Only) |
---
Tier 0: Primary Carry Investments
High-difficulty stages present two primary failure points: swarm saturation that pins your squad against the stage boundary, and elite boss enrage timers. Investing in Inasa and Bakugo directly counters these threats.
Inasa Yoarashi (Horde Clear Anchor)
Inasa Yoarashi is the premier mob-farming unit in version 1.3.0. His wind vortex quirks pull scattered enemy clusters into centralized kill zones while penetrating regular mobs and deflecting incoming projectile swarms.
- Key Upgrades: Leveling his skills expands the pull radius and tick frequency of his whirlwinds.
- Milestone: Prioritize his awakening tokens first. His awakened damage scaling ensures trash mobs die quickly enough in late chapters to keep escape routes clear.
AP Shot Katsuki Bakugo (Boss Executioner)
While area-of-effect heroes handle large waves, they struggle to clear heavily armored bosses before tight stage timers expire. AP Shot Bakugo fills this gap with concentrated explosive rounds that output top-tier single-target DPS.
- Key Upgrades: Focus on offensive perks that raise critical strike thresholds.
- Deployment: Pair Bakugo directly behind Inasa. Once Inasa clears the arena of minor enemies, switch focus to Bakugo to melt boss health bars in both campaign chapters and Score Attack runs.
---
Tier 0.5: Survival and Control Anchors
Tier 0.5 heroes provide battlefield manipulation that allows your squad to survive stages even when below recommended combat power thresholds. They do not need maxed offensive stats to be effective.
- Polished Icework Shoto Todoroki: Drops persistent ice zones along enemy pathing lanes, repeatedly freezing regular enemies and slowing mini-bosses. His freeze effect interrupts aggressive charge attacks. Stop leveling him once you unlock his key crowd-control skill ranks; extra raw damage stats are not necessary for his role.
- Twice: Spawns autonomous duplicates that fire independent projectiles and physically block advancing enemies. These clones pull aggression away from your primary hero. Focus resources strictly on unlocking Twice's clone count and duration multipliers.
---
Tier 1: Specialized Mode Picks
Tier 1 heroes excel under specific mechanical conditions but should remain secondary to your core carries:
- Iron Sole Izuku Midoriya: Built for high-mobility kiting and Score Attack leaderboards. His kick combos and rapid dash frames make it easy to dodge boss telegraphs and stack combo multipliers. However, his attack cones are narrow, requiring manual repositioning to group enemies compared to Inasa's automatic vortexes.
- Denki Kaminari: Clears the immediate area of low-tier mobs using a high-damage electrical discharge. His viability is hindered by long post-discharge downtime. Only invest in Kaminari if your build includes dedicated cooldown-reduction gear or supports.
---
Tier 2: Budget Utility and Traps to Avoid
Early-game supports like Minoru Mineta and Gang Orca provide valuable baseline utility, but committing rare ascension materials to them will stall account growth:
- Minoru Mineta: His grape traps slow advancing packs and root mobile elites, but his damage scaling drops off sharply in later stages.
- Gang Orca: His ultrasonic stun waves interrupt crowds reliably, but he lacks the damage output required to clear high-difficulty DPS checks.
Recommended Next Steps for Resource Management
- Stop Tier 2 Leveling Early: Unlock Mineta's and Gang Orca's initial crowd-control passives, then halt their level progression. Do not spend UR awakening materials on either unit.
- Hit Tier 0.5 Utility Milestones: Invest in Polished Icework Todoroki and Twice only until their freeze duration and clone multipliers are active.
- Funnel Ultra Dumbbells into T0: Direct all high-tier stat items into Inasa Yoarashi first until his awakening is complete, then transfer all remaining materials into AP Shot Bakugo.

Free MHA: UNITED SURVIVAL Codes
Current active codes and how to redeem them.

Michael Smith
Michael covers live-service games, events, reward systems, and efficient daily routines, turning frequent updates into clear actions for players.
COMMUNITY
Player Comments
114 players commented on this guide.
Nice guide. I am checking the other MHA: UNITED SURVIVAL articles next.
I tried this today and it worked better than my old setup.
I wish I had read this before upgrading the wrong thing.
This helped me understand heroes much better.