
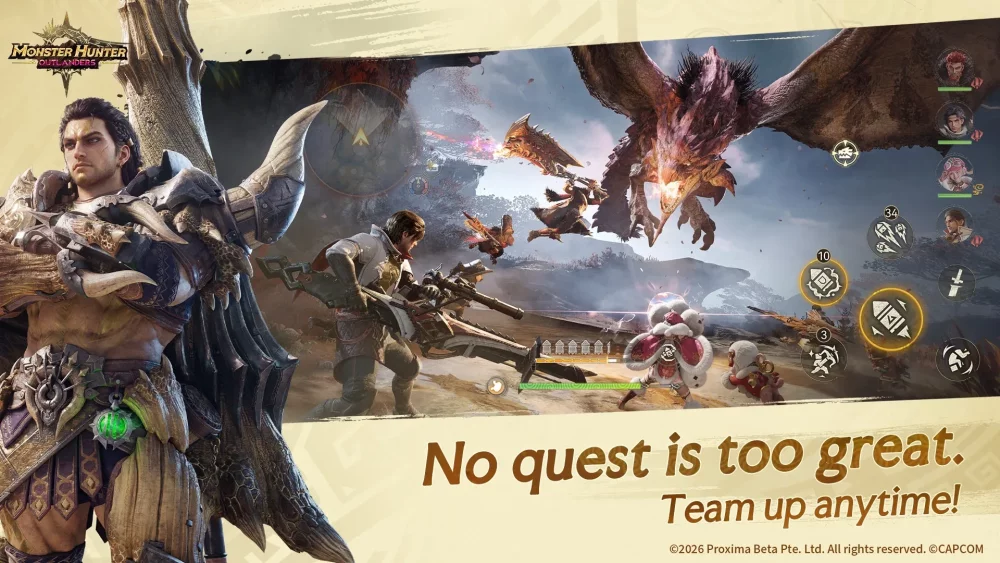
In Monster Hunter Outlanders, your choice of equipment is the single most important factor in determining your success against the game’s increasingly difficult roster of monsters. Unlike other action titles where a "jack-of-all-trades" weapon can carry you through the entire experience, Monster Hunter Outlanders rewards players who treat weapon selection as a tactical decision made before the hunt even begins.
To thrive, you must move beyond a "main weapon" mindset and embrace a strategy centered on elemental counters, efficient resource allocation, and a balanced approach to combat mobility.
Why Elemental Diversity Trumps Raw Power
The most common mistake new hunters make is sticking exclusively to a single weapon type or element. While raw damage values are easy to read, they are rarely the most efficient way to bring down high-rank targets. Monsters in Monster Hunter Outlanders have specific elemental vulnerabilities; using a weapon that exploits these weaknesses allows you to break parts faster, stagger monsters more consistently, and significantly reduce your hunt times.
The Elemental Advantage
- Part Breaking: Elemental damage contributes significantly to breaking armor or severing tails, which are essential for farming rare materials.
- Stagger Potential: Exploiting a monster's weakness often leads to "flinches," providing you with vital windows of opportunity to deal damage without fear of retaliation.
- Time Management: In hunts with strict time limits or aggressive monsters, elemental damage is the difference between a successful capture and a failed quest.
Expert Tip: Aim to have at least one weapon of each major element (Fire, Water, Thunder, Ice, and Dragon) ready for your rank tier. This allows you to rotate your loadout based on the specific monster you are tracking.
Efficient Resource Allocation and Crafting
Materials in Monster Hunter Outlanders are precious, and the "grind" for specific boss parts can be punishing if you are wasteful. Progression is gated by your ability to upgrade gear to meet the defense and damage thresholds of the next tier of monsters.
The "Workhorse" Strategy
Rather than upgrading every weapon you craft to the maximum level, focus your rare monster drops on one "workhorse" weapon for each element. This ensures you always have a viable tool for your current tier of content without spreading your resources too thin.
- Evaluate before you craft: Check the entire weapon tree before committing rare materials. Is this weapon a dead-end, or does it evolve into a powerful endgame tool?
- Prioritize Sharpness and Damage: When resources are scarce, focus on upgrades that provide a boost to "Sharpness" or "Elemental Affinity." These upgrades often provide higher DPS gains than minor increases to base raw damage.
- Bridge the Gap: Use your middle-tier gear to farm the resources needed for the "next tier" of equipment. If you cannot defeat a monster, it is a sign that your current gear needs a focused upgrade, not that you need a completely new weapon type.
Mastering Combat Mobility and Stamina
Combat in Monster Hunter Outlanders is a dance of stamina management. Every action—from dodging to executing high-damage combos—consumes your stamina bar. If you empty this bar recklessly, you will be unable to evade during a monster’s enraged phase, often resulting in a faint.
Combat Best Practices:
- Telegraph Recognition: Every monster has a "tell" before a major attack. Learn these patterns to know when to commit to a damage combo and when to hold your stamina for an emergency dodge.
- Stamina-Efficient Positioning: Instead of constantly sprinting, use your mobility to rotate around the monster. Stay near their hind legs or flanks to avoid their primary attack cones.
- Utility Integration: If your preferred weapon type is stamina-heavy (such as dual blades or heavy bows), look for armor pieces or food buffs that reduce stamina consumption. This allows you to maintain uptime on the monster’s weak points for longer durations.
Navigating the Endgame Grind
The endgame in Monster Hunter Outlanders is where the difficulty curve spikes sharply. You will encounter monsters that demand optimized gear sets. The loop involves farming specific, lower-rank monsters to create gear that grants skills necessary to take down higher-tier threats.
If you find yourself hitting a "damage wall," do not panic. This is rarely a reflection of your skill; it is almost always a sign that your gear is not optimized for that specific encounter. Check the monster’s elemental resistance, swap your weapon to its primary weakness, and ensure your armor set provides skills that negate the monster's most dangerous status effects.
Balancing Aggression with Defensive Utility
A common trap in Monster Hunter Outlanders is the "glass cannon" build—stacking all your skills for maximum damage while ignoring defense. While this looks impressive on paper, it often fails in practice against high-rank bosses that can wipe your health bar in a single strike.
The Value of Defensive Skills
- Dodge Frames: Skills that increase your invincibility window during a roll are invaluable for learning a monster’s attack patterns.
- Health Recovery: Having passive health regeneration or increased potion efficiency allows you to stay in the fight longer, giving you more time to learn the monster’s mechanics.
- Survival as a Teacher: You cannot learn a monster’s moveset if you are constantly returning to camp from a faint. Prioritizing survivability early in a hunt allows you to survive long enough to memorize the monster's attack loops, which inevitably leads to faster clear times in the long run.
Final Decision Checklist
Before every hunt in Monster Hunter Outlanders, run through this mental checklist:
- Element Match: Is my weapon the best elemental counter for this target?
- Stamina Needs: Does my chosen weapon suit the playstyle required for this specific monster?
- Armor Utility: Does my armor set provide at least one defensive skill to help me survive the monster's unique attacks?
- Resource Check: Am I farming the right monster to unlock the next tier of my current weapon tree?
By shifting your focus toward these tactical elements, you will find that Monster Hunter Outlanders becomes much more manageable. Progression is a journey of preparation; the more effort you put into your loadout before the hunt begins, the more successful you will be when you reach the challenging endgame.

Free Monster Hunter Outlanders Codes
Current active codes and how to redeem them.

Sarah Williams
Sarah specializes in RPG and collection games, explaining team building, character growth, and beginner-friendly ways to avoid expensive early mistakes.
COMMUNITY
Player Comments
67 players commented on this guide.
The tips are practical and easy to follow.
This guide answered the exact question I had.
The explanation is clear, especially for beginners.
Good guide for Monster Hunter Outlanders players. The early game part was useful.