
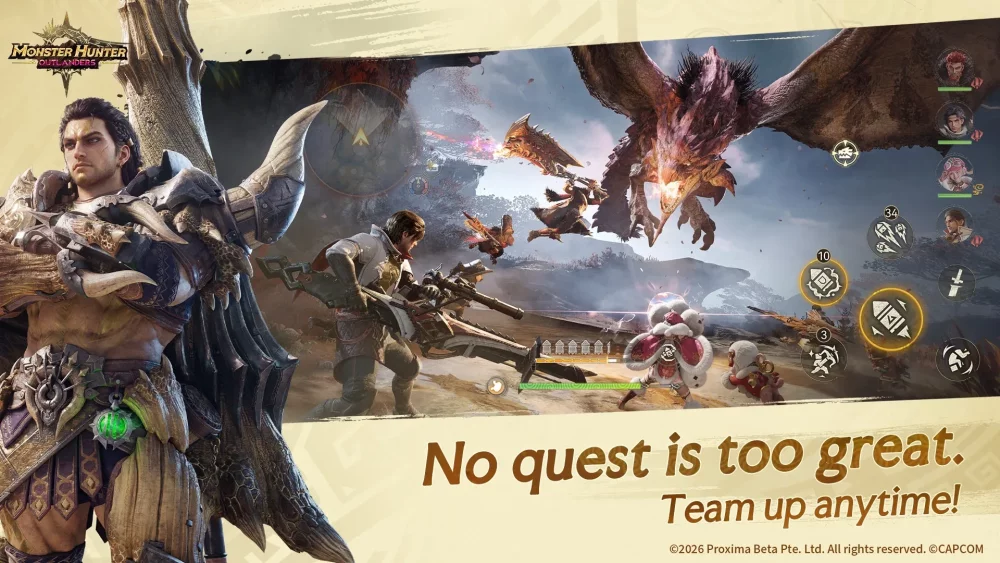
Monster Hunter Outlanders brings the thrill of large-scale monster hunting to mobile, introducing a nuanced progression system that blends traditional series mechanics with modern RPG elements like Combat Power (CP). To succeed, you must move beyond simple hack-and-slash tactics and treat your hunter’s development as a strategic investment. This guide breaks down the core systems, helping you navigate the open world, maximize your damage output, and manage your resources effectively.
Decoding the Combat Power (CP) System
In Monster Hunter Outlanders, Combat Power is the numerical representation of your hunter's overall capability. Unlike console entries where skill and gear stats are the primary metrics, CP aggregates your character’s level, weapon tier, and equipment quality.
Why CP Matters
CP functions as a gatekeeper for mission difficulty. It provides a reliable benchmark to determine if you are ready to tackle a specific monster. Entering a hunt significantly below the recommended CP threshold will result in reduced damage output and increased vulnerability, making the encounter feel artificially difficult.
How to Scale Your CP Effectively
- Integrated Leveling: Never neglect your weapon upgrades. Your CP is a holistic score; if your character is level 30 but your weapon is level 10, your damage output will fail to scale with the difficulty of higher-tier monsters.
- Prioritize Rarity and Synergy: Focus your materials on high-rarity equipment that synergizes with your hunter’s specific weapon type. Spreading resources thin across multiple mediocre weapons is a common trap that keeps your CP stagnant.
- The "Skill" Offset: While CP is a vital metric, it is not an absolute law. If you are within 5-10% of a mission’s recommended CP, expert knowledge of dodge timings and monster attack patterns can bridge the gap. Use the CP indicator as a suggestion for progression, but rely on your mechanical skill to execute the hunt.
Mastering Open-World Navigation
The open-world design in Monster Hunter Outlanders is more than a backdrop; it is your primary engine for material acquisition. Efficient exploration is the difference between a hunter who is constantly farming and one who is consistently upgrading.
Strategic Exploration Tips
- Fast Travel Nodes: Prioritize unlocking fast-travel points as soon as you enter a new zone. Minimizing traversal time is crucial when you are farming specific materials for gear upgrades.
- Verticality and Terrain: Use the environment to your advantage. Many monsters in the game have attack patterns that can be negated by moving to higher ground or using terrain features as natural barriers. Learn which zones offer the best vantage points for ranged weapons and which areas provide cover for melee hunters to reset their stamina.
- Material Cycling: Gathering nodes in the open world operate on a cycle. Map out your most efficient route to hit as many resource nodes as possible in a single pass. This ensures you always have the crafting components necessary to push your gear to the next power bracket.
Strategic Team Building and Elemental Mastery
Monster Hunter Outlanders requires a diverse roster. Relying on a single "main" hunter will eventually hit a wall when you encounter monsters that are resistant to your specific weapon type or element.
Building Your Hunting Party
- Elemental Coverage: Always aim to have at least one hunter capable of dealing Fire, Water, Ice, and Thunder damage. Exploiting a monster's elemental weakness significantly reduces the "Time to Kill," which is essential for timed mission objectives.
- Weapon Variety: Ensure your team includes a mix of fast, mobile weapons (like Dual Blades or Sword and Shield) for aggressive, high-mobility monsters, and heavy-hitting weapons (like Great Sword or Hammer) for breaking monster parts and creating openings.
- Role Differentiation: Some hunters provide passive buffs or utility that can swing a difficult boss fight. Analyze your team’s passives to see which combinations yield the highest total team damage.
Optimizing Gacha and Resource Management
The monetization system in Monster Hunter Outlanders revolves around acquiring new hunters and equipment. Managing your currency (Gems/Tickets) is vital for long-term success.
When to Pull and When to Save
- Avoid the "Newness" Trap: Don't pull on every banner. As a free-to-play or low-spending player, focus on banners that feature hunters or weapons that fill a specific gap in your elemental roster.
- Invest in Depth: It is better to have one highly invested team that can handle 80% of the game's content than a vast collection of level-1 characters. Focus your resources on maxing out your core team’s gear before expanding your roster.
- Resource Hoarding: Save your premium currency for limited-time banners that feature "meta-defining" gear. Keep an eye on community discussions to see which items provide the most significant power spikes.
Overcoming Common Mistakes
Even veteran monster hunters can trip up when transitioning to the mobile-specific systems of Monster Hunter Outlanders. Avoid these common pitfalls to keep your progression smooth:
- Ignoring Part Breaks: Many players focus solely on the boss’s health bar. Remember that the Monster Hunter franchise is built on breaking parts (horns, tails, scales). These breaks provide rare materials that are often essential for high-level upgrades. If you aren't aiming for specific body parts, you are slowing down your progression.
- Neglecting Control Settings: The touch controls in Monster Hunter Outlanders are highly customizable. If you feel like your movement is sluggish, spend time in the settings menu adjusting your camera sensitivity and button layouts. A comfortable control scheme is the most overlooked factor in "skill-based" performance.
- Over-reliance on Auto-Battle: While the game may offer automated features, they rarely account for optimal positioning or dodging during high-tier boss encounters. Use auto-battle for farming low-level materials, but always take manual control when pushing your CP limits or facing new, challenging monsters like the Radiant Prismatic Dragon.
Expert Insight: The Radiant Prismatic Dragon Strategy
The Radiant Prismatic Dragon serves as a gear check for many players. This encounter punishes players who rely on raw power alone. To defeat it:
- Preparation: Check the dragon's elemental weakness and equip your highest-tier weapon of that element.
- Pattern Recognition: The dragon features a "phase shift" where its attack patterns change. Watch for the telegraphs—usually a change in the glow of its scales—before it unleashes its most devastating area-of-effect attacks.
- Part Focusing: Focus your damage on its front limbs to force a "topple." Once the dragon is on the ground, unleash your full rotation of skills.
By balancing your Combat Power, managing your resources with foresight, and mastering the specific mechanics of your target monsters, you will progress through Monster Hunter Outlanders efficiently. Remember: the game rewards preparation just as much as it rewards reflexes. Stay sharp, gather often, and always choose the right tool for the job.

Free Monster Hunter Outlanders Codes
Current active codes and how to redeem them.

Sarah Williams
Sarah specializes in RPG and collection games, explaining team building, character growth, and beginner-friendly ways to avoid expensive early mistakes.
COMMUNITY
Player Comments
116 players commented on this guide.
Good guide for Monster Hunter Outlanders players. The resources part was useful.
The tips are practical and easy to follow.
This saved me time in the early game.
The explanation is clear, especially for beginners.