
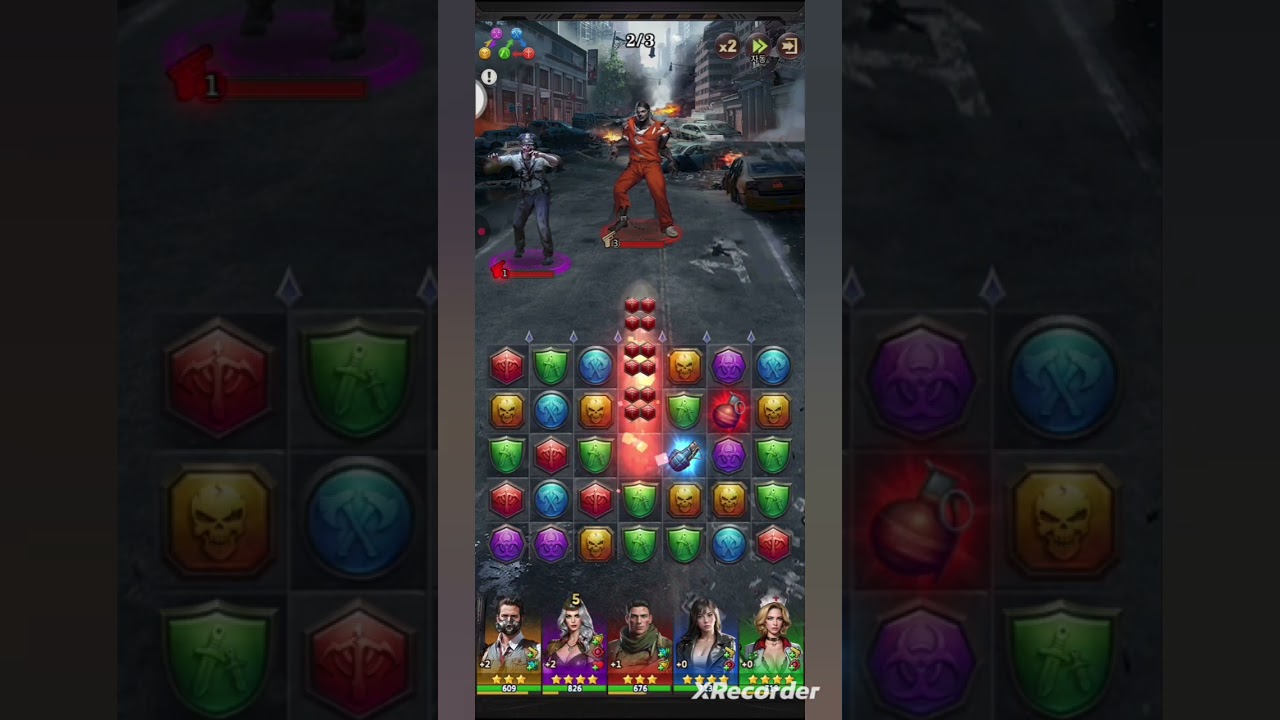
To beat Busan City stages 2-1 through 2-4 in Puzzles & Survival without spending money, deploy a five-color "rainbow" starter squad leveled to approximately level 10, match tiles along enemy columns to exploit elemental counters, and save your hero skills for the Stage 2-4 boss.
Early Team Setup and Resource Investment
Chapter 2 favors team color diversity over mono-color stacking. Deploying one hero of each element ensures that every match-3 combo charges a hero's Rage bar and prevents dead moves on the board.
- Noah: Provides defensive shielding to absorb incoming strikes.
- Chester: Delivers targeted single-target burst damage.
- Doc Gray: Provides team-wide healing to sustain health through multi-wave fights.
- Filler Starter Heroes: Fill the remaining two elemental slots using standard starter units to ensure all five colors are active.
Before entering Stage 2-1, distribute your Antiserum evenly to bring all five active heroes to level 10. Funneling resources equally unlocks baseline skill utility and grants enough health to withstand hits from standard infected walkers. Avoid over-investing low-tier heroes past early requirements so that you preserve Antiserum for higher-tier heroes unlocked later.
Elemental Counters and Column Targeting
Combat projectiles travel straight up from where tiles are matched. Align your matches with enemy positions rather than matching randomly across the board. Striking an enemy with an advantageous element inflicts double damage, while attacking with an elementally weak color cuts damage by half.
- Brave (Red): Deals double damage to Nature (Green) infected sprinters.
- Nature (Green): Counters Calm (Blue) targets.
- Calm (Blue): Counters Brave (Red) frontliners.
- Nova (Purple) and Light (Yellow): Deal reciprocal bonus damage against each other and act as neutral damage against standard colors.
In Stage 2-3, enemies possess higher defense and staggered attack countdowns. Focus your tile matches on a single lane to eliminate one enemy before its attack counter reaches zero, reducing incoming round damage and opening the board.
Board Control: Munitions and Ghosting
Creating special tiles and exploiting open lanes accelerates skill uptime and controls the board state.
| Munition Type | Match Requirement | Board Effect | Primary Use |
|---|---|---|---|
| Grenade | 4 tiles in a line | Explodes in a 3x3 radius | Breaking board locks and clearing clustered enemies |
| Flashbang | 5 tiles (Line, T, or L) | Clears all board tiles of that color | High burst damage and rapid whole-team Rage generation |
The Ghosting Technique
When an enemy in a specific vertical column dies, that lane becomes empty. Tiles matched in an empty lane travel past the combat area into open space. These "ghosted" tiles do not trigger enemy attack countdowns and award double the standard Rage gain to corresponding heroes. Use cleared lanes to safely recharge Doc Gray's heal and Chester's burst attack before progressing to the next wave.
Stage 2-4 Boss Strategy
The final wave of Stage 2-4 features a mutated brute flanked by minion walkers. Entering this wave unprepared will lead to heavy casualties.
- Bank Rage on Wave 2: Near the end of the second wave, make low-impact matches along the outer edges of the board. Delay the final kill until all five heroes have full Rage bars.
- Eliminate Flanking Minions: Immediately fire Chester's active burst and your highest-damage skills into the side minions. Removing them clears outer columns.
- Ghost Tiles for Rage: Match off-color tiles through the empty side lanes to safely recharge skills without advancing the boss's attack timer unnecessarily.
- Time Doc Gray's Heal: Watch the attack countdown above the boss. Hold Doc Gray’s active skill until immediately after the boss lands its heavy hit, restoring your squad's health instantly.
- Funnel Counter Tiles: Match counter-element tiles directly up the center column to chip down the boss's remaining health pool.
Next Progression Steps
Completing stages 2-1 through 2-4 with all heroes surviving grants a 3-star clear on each stage, unlocking the Chapter 2 reward chests.
Collect the Antiserum, Recruit Coins, and Diamonds from the chapter quest interface to advance your Headquarters. Reserve your free Diamonds for Sanctuary construction speedups or VIP points rather than standard tavern recruitments, and channel newly acquired Antiserum into raising your primary team toward level 20 for Chapter 3.
Free Puzzles & Survival Codes
Current active codes and how to redeem them.

Emily Johnson
Emily writes practical mobile strategy guides with a focus on resource planning, base progression, and the early decisions that shape a long-term account.
COMMUNITY
Player Comments
72 players commented on this guide.
The explanation is clear, especially for beginners.
This guide answered the exact question I had.
Can you add more details about strategy in a future update?
The tips are practical and easy to follow.