
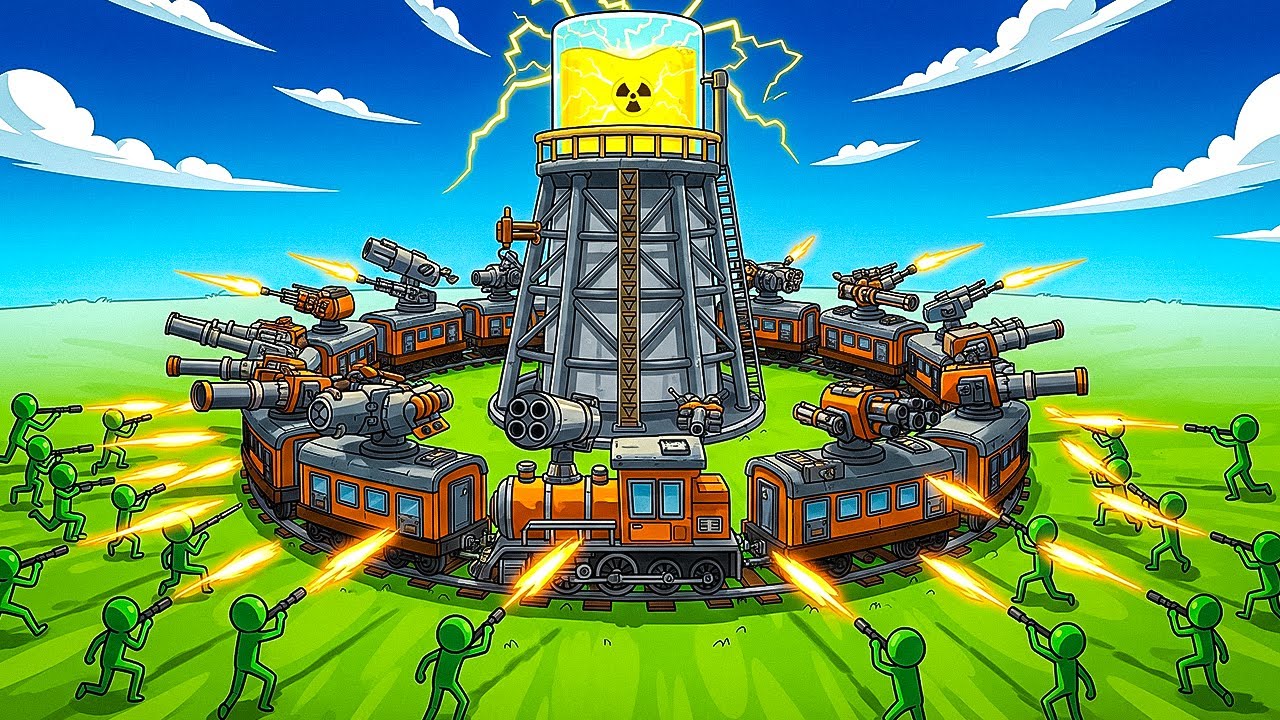
To survive enemy waves in Rail Fortress : Defense, stop purchasing new turrets and allocate salvage to structural repairs whenever your central reactor falls below 50% health. Once the reactor is stable, expand your defenses by placing overlapping turrets along the front and sides of your train cars to eliminate coverage dead zones.
Reactor Power and Repair Priorities
Your central nuclear reactor supplies energy to all active weapon systems. High-tier weapons like flame turrets and heavy cannons deal high damage to armored foes, but they draw heavy energy from your grid. If power demands outstrip reactor output, your system risks a temporary power brownout that disables your defensive grid.
Manage power and repairs using the following rules:
- Repair Threshold: If reactor health drops below 50%, pause all turret purchases and prioritize reactor health and structural reinforcements.
- Power Reserves: Upgrade reactor capacity before equipping high-drain weapons like flame turrets or heavy cannons.
- Physical Protection: Maintain reactor armor to prevent long-range projectile enemies from inflicting stray damage.
Turret Placement Strategy
Enemies approach the train from the front, flanks, and rear. Positioning all firepower on a single car leaves blind spots that fast-moving ground units can exploit.
- Front Locomotive: Install front-facing turrets on the main engine to stop head-on waves before they collide with your train.
- Side Car Flanks: Mount side-facing weapons along each additional car to clear flanking swarmers along the dead zones.
- Redundant Secondary Line: Position secondary turrets directly behind your primary line. If a front-line turret breaks, the backup line maintains fire without leaving a gap.
Weapon Selection by Threat Type
Using a single turret type creates bottlenecks against varied wave compositions. Match weapon traits to specific enemy traits:
| Weapon Category | Target Type | Optimal Placement | Key Function |
|---|---|---|---|
| Fast-Firing Turrets | Fast scouts & light swarms | Front car & outer flanks | Clears massed weak targets quickly |
| Heavy Cannons | Slow armored tanks | Mid-train cars | Pierces high enemy armor pools |
| AOE Weapons | Clumped enemy groups | Near central reactor | Reduces damage pressure across multiple car sections |
Managing Train Expansion Risks
Expanding your train by adding new cars increases available turret slots and storage space. However, a longer train increases the physical surface area enemies can attack and adds power cabling demands to your grid.
Expand horizontally only when you have surplus resources and spare reactor capacity. Position key defensive turrets toward the outer buffer zones to keep incoming damage away from the central reactor. Between waves, evaluate turret performance and swap out ineffective loadouts to adjust for aerial or ground-heavy escalation patterns.
Free Rail Fortress : Defense Codes
Current active codes and how to redeem them.

Sarah Williams
Sarah specializes in RPG and collection games, explaining team building, character growth, and beginner-friendly ways to avoid expensive early mistakes.
COMMUNITY
Player Comments
67 players commented on this guide.
Good guide for Rail Fortress : Defense players. The strategy part was useful.
Can you add more details about strategy in a future update?
Nice guide. I am checking the other Rail Fortress : Defense articles next.
I tried this today and it worked better than my old setup.