
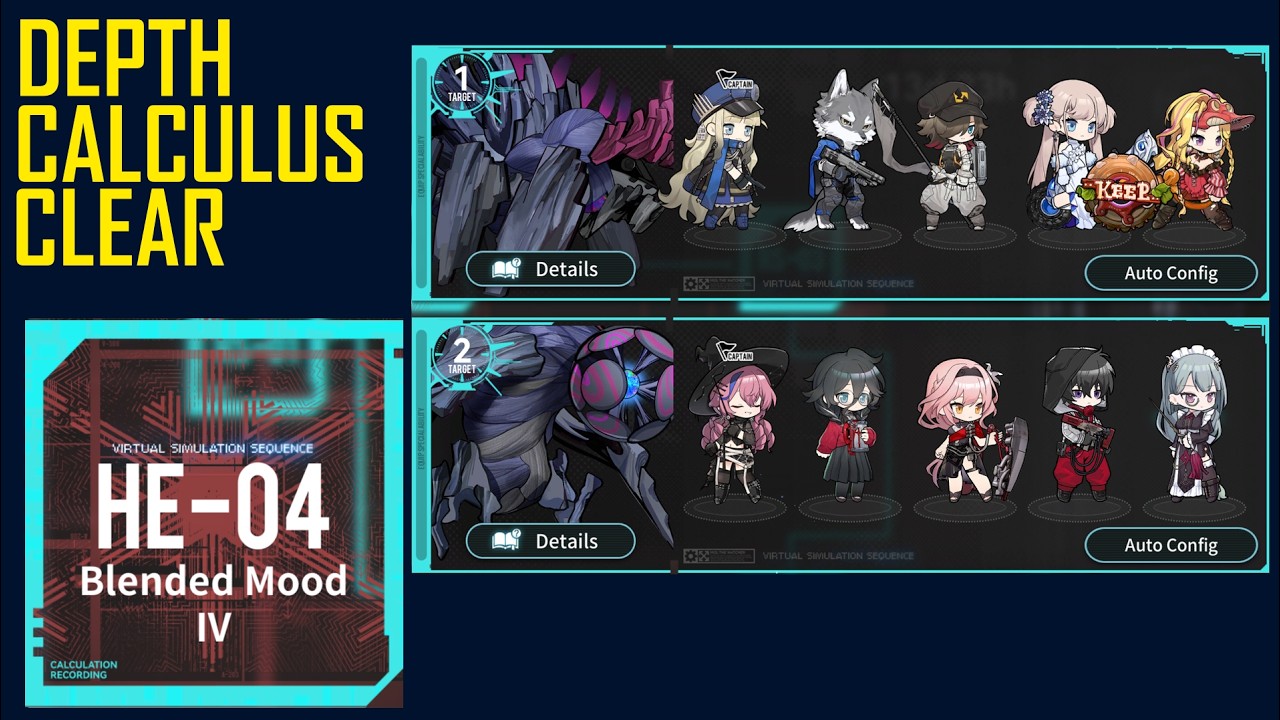
To clear Depth Calculus HE-04 in Resonance Solstice, maintain reserve energy to counter the boss's channeled area-of-effect (AoE) attack, use low-cost cycle cards to prevent hand clogs, and trigger your carry's burst rotation immediately after the boss finishes its strike.
Encounter Threats and Counters
HE-04 combines continuous physical damage on your vanguard with a lethal, charged AoE attack that wipes fragile backline units if left unmitigated.
| Encounter Factor | Threat Profile | Tactical Solution |
|---|---|---|
| Frontline Cleave | High continuous physical damage against the vanguard | Rotate barrier shields and regeneration on your tank. |
| Channeled Boss Burst | Lethal AoE multi-hit damage across the entire squad | Apply crowd control on cast start, or deploy shields at 75% cast completion. |
| Deck Stagnation | High-cost cards clog the hand, locking out answers | Play 1-cost and 2-cost cycle cards to churn into key skills. |
| Timer / Escalation | Boss damage output increases as the fight prolongs | Execute leader skill burst rotations right after surviving an attack cycle. |
Team Composition and Roles
A stable setup requires one vanguard tank, one defensive healer or shielder, one to two card-draw supports, and a dedicated carry.
- Vanguard Tank: Run durable units such as Fenia or Gordian to soak routine melee pressure using self-buffs and passive mitigation without draining team cost.
- Defensive Support: Use shielders or healers like Arina or Rachael to protect the team during AoE spikes.
- Cycle and Utility: Deploy units like Shani or Dorothy to draw cheap 1-cost and 2-cost cards, cycle past dead utility, and generate energy.
- Primary Carry: Rely on burst damage dealers such as Charlotte or Caroline to rapidly burn down boss health during post-channel recovery windows.
Energy Economy and Card Cycling
Energy starvation causes party wipes when defensive counters cannot be played in time. Manage your deck flow using these principles:
- Hold an Energy Buffer: Never spend your last remaining energy on basic damage cards if the boss's charge bar is above 70%. Keep resources ready for an immediate barrier or interrupt.
- Discard Clutter Early: Play or cycle unneeded offensive utility during calm phases so that emergency mitigation tools stay available in your active hand.
- Prioritize Low-Cost Draw: Use cheap card draw to cycle your deck without stalling your energy curve.
- Pre-cast Cost Reduction: Activate energy acceleration or cost-discount skills right before deploying your carry's combo.
Timing Defensive Counters
The boss's channeled attack is the primary failure point in HE-04. Watch the cast bar beneath the boss's health meter to determine your response:
- Interrupt Option: If a crowd control skill (such as stun or freeze) is in hand, cast it immediately when the channel bar begins filling to cancel the attack outright.
- Mitigation Option: If an interrupt is unavailable, hold your shields until the channel bar reaches approximately 75% completion. Activating shields too early causes them to expire before the multi-hit damage finishes landing.
Step-by-Step Combat Sequence
- Stabilize the Opening (0:00–0:15): Cast vanguard defensive buffs and draw engines. Do not spend heavy energy on carry skills until incoming frontline damage is under control.
- Mitigate the First Channel: Watch the boss cast bar. Either interrupt the cast immediately or deploy teamwide barriers at 75% cast progress.
- Cycle for Burst Setup: Once the attack resolves, play low-cost utility cards to draw your carry's primary damage cards and ready your leader skill.
- Discharge Burst Damage: Activate your leader skill and stack damage buffs. Unload your carry's strongest attacks while the boss is in post-cast recovery.
- Repeat and Execute: Maintain your energy buffer through subsequent attack cycles. As the boss reaches low health, hold your defensive plan intact and commit remaining resources to finish the fight.

Free Resonance Solstice Codes
Current active codes and how to redeem them.

Sarah Williams
Sarah specializes in RPG and collection games, explaining team building, character growth, and beginner-friendly ways to avoid expensive early mistakes.
COMMUNITY
Player Comments
121 players commented on this guide.
This saved me time in the early game.
The tips are practical and easy to follow.
The explanation is clear, especially for beginners.
I wish I had read this before upgrading the wrong thing.