
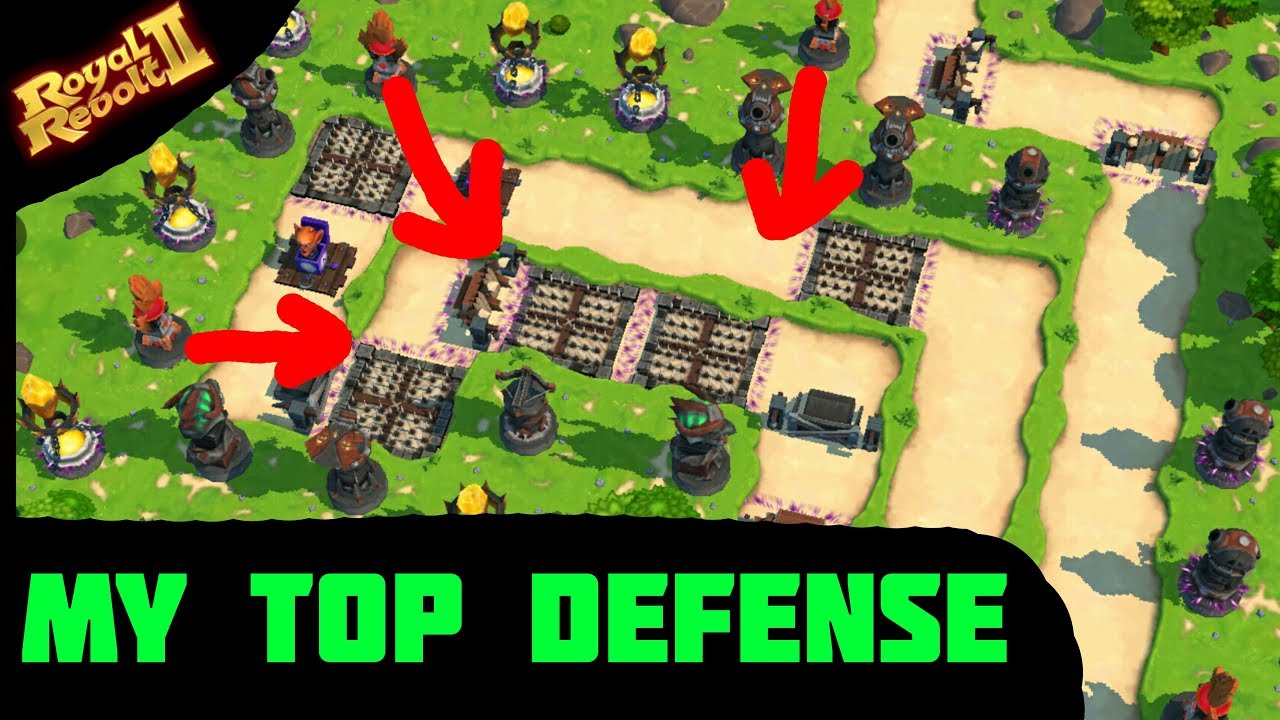
Reaching the top 10 rankings in Royal Revolt 2: Tower Defense requires a fundamental shift in mindset: you must stop viewing your base as a static collection of buildings and start treating it as an automated, high-attrition trap. Because you cannot manually control your units during an offline raid, your success depends entirely on how well your layout manipulates enemy AI and forces attackers into disadvantageous kill zones. By optimizing pathing, layering your damage types, and prioritizing "anchor" structures, you can create a defense that consistently drains enemy resources and time.
The Science of Path Manipulation: Creating Chokepoints
The most vital skill for a top-tier defender is the ability to dictate where the enemy walks. Attackers will always take the most efficient path toward your castle gate, but you can manipulate this trajectory using your walls and tower placements.
- Forced Routing: Use your defensive structures and walls to create a singular, winding path. By leaving only one logical route, you prevent the attacker from splitting their forces, allowing you to focus all your defensive firepower on a concentrated stream of units.
- The Bottleneck Effect: At the narrowest point of your forced path, place your highest-damage towers. When enemy units are funneled into a single file or a tight cluster, they become vulnerable to splash damage and status effects that would be wasted on a spread-out army.
- Front-Loading Complexity: Place high-health structures or bait buildings at the very beginning of the path. This forces the attacker to deploy their heavy hitters early to clear the path, often exhausting their spells or ability cooldowns before they reach your primary defensive core.
Strategic Tower and Troop Synergy
In Royal Revolt 2: Tower Defense, the most dangerous defense is one that combines crowd control with burst damage. A tower that deals massive damage is useless if the target moves too quickly; conversely, a slow effect is wasted if you lack the firepower to capitalize on it.
The Defensive Synergy Trinity
- Crowd Control (CC): Your first layer should consist of towers that stun, freeze, or slow enemy movement. These are the "gatekeepers" that keep attackers within the range of your damage-dealing structures for the maximum amount of time.
- Burst Damage: Once the enemy is slowed or stunned, your high-DPS towers (like cannons or archer outposts) should engage. These should be placed slightly behind your CC structures to ensure they are protected from immediate melee attacks.
- Distraction/Swarm Units: Utilize garrisoned units or buildings that spawn defenders. These units act as a "meat shield," occupying the enemy’s attention and preventing them from reaching your critical, high-value towers.
Managing Passive Defensive Efficiency
Since you are rarely present to defend your base, your layout must be self-sufficient. High-ranking players utilize "distraction architecture" to waste the attacker's time.
If an attacker is forced to target a low-value structure that is positioned slightly off the main path, they lose valuable seconds. In many top-tier matches, the difference between a three-star win and a failed raid is simply a matter of the clock running out. By placing non-essential buildings near the edges of the path, you lure enemy AI into side-tracking, effectively thinning their army before they reach your main gate.
Always ensure your most critical defensive assets are shielded by "disposable" buildings. Never place your most expensive, high-level tower in the front line; it will become the immediate target for every spell and unit the attacker has.
Balancing Upgrades and Defensive Weight
Resource management is a common pitfall for aspiring top 10 players. It is better to have three max-level, perfectly placed "anchor" towers than ten mid-level towers scattered across the map.
- Identifying Anchor Towers: Your anchor towers are those that provide the most utility—usually those that offer AoE damage or significant CC. Prioritize these for upgrades first.
- Data-Driven Iteration: Use the replay feature to analyze every loss. Look for the "break point"—the specific moment or location where the attacker successfully breached your line. If you see them consistently destroying one specific tower, upgrade that tower's health or support it with a defensive unit spawn point.
- Layering for Attrition: Think of your base in layers. Layer one should be cheap, sacrificial buildings that force the attacker to spend units. Layer two should be your core defensive "kill zone." Layer three should be your final line of defense, close to the castle, meant to finish off whatever remains of the attacker's forces.
The Evolving Meta and Strategic Flexibility
The "meta" of Royal Revolt 2: Tower Defense is fluid. As new units are introduced or existing ones are rebalanced, the strategies that kept you in the top 10 last month may fail you today.
- Anticipate Meta Shifts: If you notice a sudden influx of players using a specific high-speed unit, you must pivot your defense to include more heavy-hitting towers or slow-effect structures.
- The "Skip" Factor: Your ultimate goal is not to be invincible—it is to be intimidating. If your base looks like a "resource sink" (i.e., it looks like it will take too long or cost too many troops to beat), many players will choose to skip your base entirely. This is the most effective way to maintain a high rank while you are offline.
By constantly refining your layout based on replay data, focusing your resources on synergistic tower combinations, and forcing attackers into resource-draining bottlenecks, you can transform your kingdom into a top 10 powerhouse. Remember: the best defense is the one that makes the attacker regret even clicking the "attack" button.

Free Royal Revolt 2: Tower Defense Codes
Current active codes and how to redeem them.

Emily Johnson
Emily writes practical mobile strategy guides with a focus on resource planning, base progression, and the early decisions that shape a long-term account.
COMMUNITY
Player Comments
150 players commented on this guide.
Nice guide. I am checking the other Royal Revolt 2: Tower Defense articles next.
This saved me time in the early game.
This guide answered the exact question I had.
I tried this today and it worked better than my old setup.