
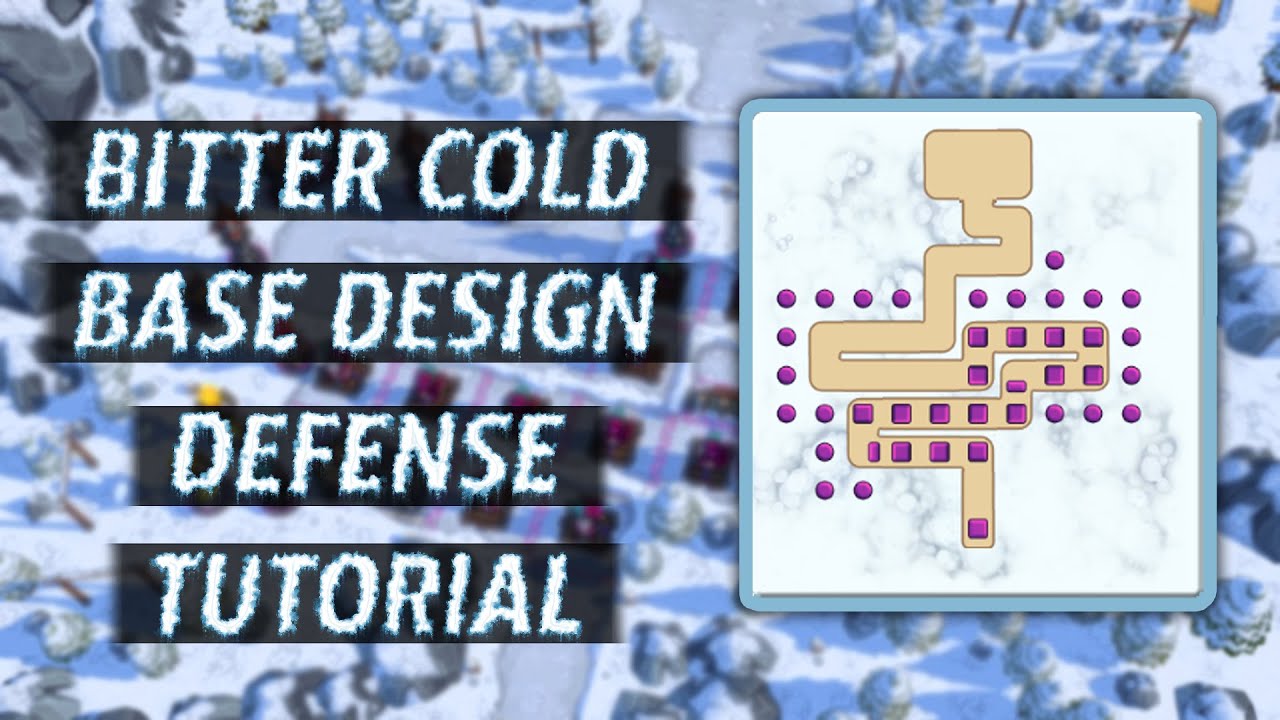
In Royal Revolt 2: Tower Defense, the Bitter Cold map serves as a unique tactical playground. Unlike more open environments, the Bitter Cold map’s layout rewards players who prioritize path manipulation and geometry over raw tower quantity. To successfully defend your throne, you must force invading armies to navigate a gauntlet where your defensive structures can maintain constant, overlapping fire.
The key to mastering this map is recognizing that your defensive strength is not determined by the number of towers you possess, but by the "time-to-kill" (TTK) you can force upon every enemy unit that crosses your threshold. By turning the map’s natural terrain into a series of traps and bottlenecks, you ensure that even high-level raiding parties struggle to reach your castle.
The Geometry of Defense: Utilizing Bottlenecks
The primary advantage of the Bitter Cold map is its inherent structure, which allows for the creation of forced corridors. In Royal Revolt 2: Tower Defense, AI-controlled raiding units and player-led armies behave predictably when faced with obstacles. You can exploit this by using non-defensive buildings—such as barracks or storage units—as structural "walls" to dictate the exact path an invader must take.
Strategic Pathing Rules:
- The Funnel Effect: Use secondary structures to create a single, narrow path leading from the entrance to your throne. If you leave gaps, attackers will take the path of least resistance.
- Maximize Exposure: Ensure your path has sharp, 90-degree turns. These turns force units to bunch up, making them perfect targets for area-of-effect (AoE) towers like the Bomb Tower or the Mortar.
- Eliminate Shortcuts: Frequently test your base by observing replays of failed raids. If you notice units skipping sections of your path, move your decorative or non-essential buildings to plug those gaps immediately.
Synergy: Slowing Structures and Damage Dealers
A common mistake in Royal Revolt 2: Tower Defense is placing all high-damage towers at the very beginning of the map. If your high-DPS towers fire on units that aren't yet bunched up, you lose efficiency. The Bitter Cold map requires a "Slow-then-Smash" approach.
Place your slowing structures—specifically Frost Towers—at the entrance of your narrowest corridors. When units enter these zones, they are forced to group together. Because their movement speed is reduced, they stay within the "kill zone" of your heavy-hitting towers for significantly longer. This synergy effectively doubles or triples the damage output of your defensive grid without requiring you to upgrade every individual structure to max level.
Tiered Defense: Layering for Maximum Impact
Your base should be divided into three distinct defensive tiers:
- The Chokepoint (Early Path): Focus on crowd control. Use Frost Towers and traps to cluster the enemy army together.
- The Mid-Path (The Gauntlet): This is where you place your primary AoE towers. The goal here is to deplete the health of the entire incoming wave simultaneously.
- The Throne Guard (Inner Perimeter): Reserve your highest-level single-target towers for the area immediately surrounding your throne. If a tanky unit or a hero manages to survive the gauntlet, these high-damage towers act as your final line of failure-prevention.
Managing Resource Constraints and Upgrades
Upgrading every tower in your base equally is a trap. In the Bitter Cold map, you should adopt a "Core-Focus" upgrade strategy. Identify the three or four towers that cover the majority of your pathing geometry and prioritize them for upgrades.
- Gold Allocation: Spend your gold primarily on towers that are "always firing." A tower placed in a dead zone that never hits an enemy is a waste of resources.
- Building Priority: If you lack the resources to upgrade everything, focus on the structures that provide the most utility (slowing or splash damage) rather than pure raw damage.
Common Mistakes and How to Avoid Them
Even the best-designed bases in Royal Revolt 2: Tower Defense can fall if the player commits common tactical errors. Here is how to avoid them on the Bitter Cold map:
1. Over-Concentration
Do not place all your towers in one small cluster. While it feels safe, a single well-placed spell by an attacker can disable that entire cluster, leaving your throne wide open. Spread your core towers out enough that they still overlap in range, but are not vulnerable to a single-spell wipeout.
2. Ignoring Hero Pathing
Remember that human players can control their heroes. A smart attacker will use their hero to soak up tower damage while their army moves forward. Ensure your defensive layout includes "Hero Traps"—specific configurations of towers that focus fire on the path a hero must take to reach your throne.
3. Neglecting Replay Analysis
The most important tool in your arsenal is the replay system. After every raid, watch how the units moved. If they bypassed your Frost Tower or avoided a critical bottleneck, you have a structural flaw. Treat every failed defense as a blueprint for improvement.
The Philosophy of the "Final Perimeter"
Even the most optimized bottleneck strategy can be bypassed by high-level players using specific spells or high-mobility units. This is why you must never leave your throne completely undefended.
Keep a small, potent defensive presence near the throne, separate from your main pathing structures. This acts as an insurance policy. If an attacker breaches your primary line, they will still have to expend their remaining spells or health to take down those final towers, often resulting in a pyrrhic victory where they fail to destroy the throne itself. By designing for the "worst-case scenario," you ensure that your kingdom remains secure against even the most determined invaders in Royal Revolt 2: Tower Defense.

Free Royal Revolt 2: Tower Defense Codes
Current active codes and how to redeem them.

Emily Johnson
Emily writes practical mobile strategy guides with a focus on resource planning, base progression, and the early decisions that shape a long-term account.
COMMUNITY
Player Comments
40 players commented on this guide.
I wish I had read this before upgrading the wrong thing.
I tried this today and it worked better than my old setup.
Nice guide. I am checking the other Royal Revolt 2: Tower Defense articles next.
The explanation is clear, especially for beginners.