
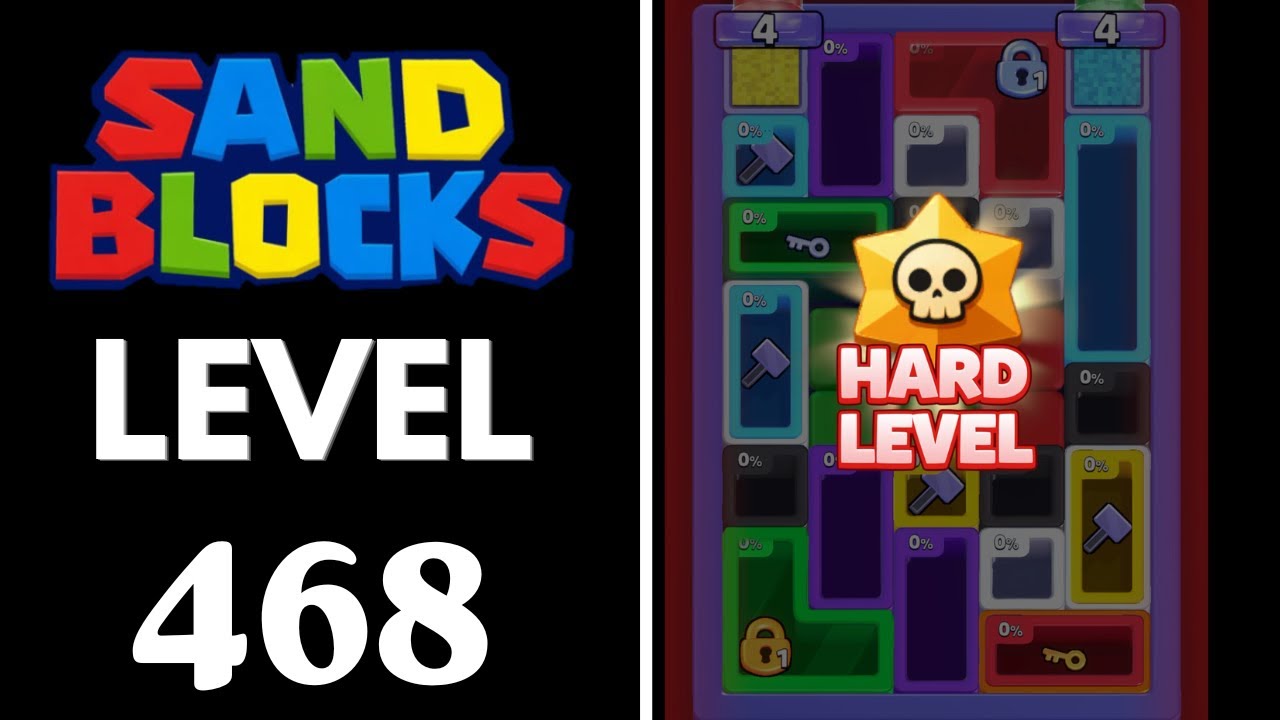
To beat Level 468 in Sand Blocks: Drop Puzzle, build unbroken horizontal bands of a single matching color that connect the left wall directly to the right wall while keeping colors strictly segregated. The primary failure condition occurs when loose sand reaches the top danger line. Because landed blocks collapse into flowing grains that settle along sloped angles, you must keep the center basin flat and anchor the outer edges to prevent stray grains from blocking line completions.
Sand Flow Mechanics and Color Contamination
Unlike rigid block puzzles, landed shapes in Sand Blocks: Drop Puzzle dissolve into individual sand grains upon contact with the floor or existing piles. These grains roll down slopes until they settle into resting crevices. Dropping shapes into the center of the grid builds steep dunes, causing incoming sand to spill unpredictably toward the sides.
A line only clears when a single color connects continuously from border to border. Dropping a contrasting color onto an active layer creates an insulating barrier that blocks matching grains from reaching the sand below.
To keep clearing paths open:
- Group identical colors into dedicated horizontal sections rather than scattering them across the board.
- Avoid dropping mismatched pieces over an active, near-complete color band.
- Deposit unusable colors flat against an isolated side column to preserve the center.
Edge-to-Edge Bridging Sequence
Lines fail most frequently along the outer edges when sand rolls toward the lower center and starves the side walls. Use this placement sequence to secure complete horizontal clears:
- Anchor the outer boundaries: Rotate blocks so their edges press flush against the left and right walls before building upward.
- Level the center channel: Once the outer edges have sufficient color density, drop matching shapes into the middle dip to bridge the gap.
- Compress the line: Use flat block rotations to spread sand horizontally across wide spans instead of forming steep cones.
- Fill corner gaps: Keep sand tightly packed into bottom corners so foreign colors cannot slide underneath and create dead space.
Danger Line Elevation Management
Maintaining low board elevation is more important than chasing complex multi-line clears. If any sand touches the top boundary, the run ends immediately. Use board height to guide placement decisions:
| Tactical Action | Trigger Condition | Primary Benefit | Trade-Off |
|---|---|---|---|
| Immediate Single Clear | Sand enters the upper third of the grid | Drops board height and resets the danger line | Sacrifices multi-line combo potential |
| Multi-Layer Cascade | Sand remains below the board midpoint | Clears multiple tiers and settles lower sand | Higher risk of accidental color contamination |
| Sacrificial Edge Dumping | Incoming piece cannot match active bands | Keeps central clearing channels unobstructed | Fills side column capacity temporarily |
When a lower band clears, the sand above falls into the vacated space. Use this downward collapse to naturally flatten jagged mounds and fill remaining crevices.
Phase-by-Phase Level Progression
Successfully clearing Level 468 requires adjusting your placement habits as sand accumulates:
- Opening Phase: Lay early pieces flat across the bottom floor. Avoid stacking high shapes in single columns, and establish an even base across all columns before building upward.
- Mid-Game Phase: Group sand into specific color zones once the grid reaches one-third capacity. Check the upcoming block queue to anticipate rotations, and trigger line clears promptly to keep the center open.
- Endgame Phase: If sand enters the upper third of the grid, abandon multi-color setups. Focus entirely on the color with the widest presence, drop matching pieces into its remaining gaps, and trigger immediate clears to bring the stack back to a safe height.
Free Sand Blocks: Drop Puzzle Codes
Current active codes and how to redeem them.

James Brown
James focuses on Android gaming on PC, emulator setup, controls, performance tuning, and practical troubleshooting for longer play sessions.
COMMUNITY
Player Comments
104 players commented on this guide.
The tips are practical and easy to follow.
This guide answered the exact question I had.
The explanation is clear, especially for beginners.
This helped me understand strategy much better.