
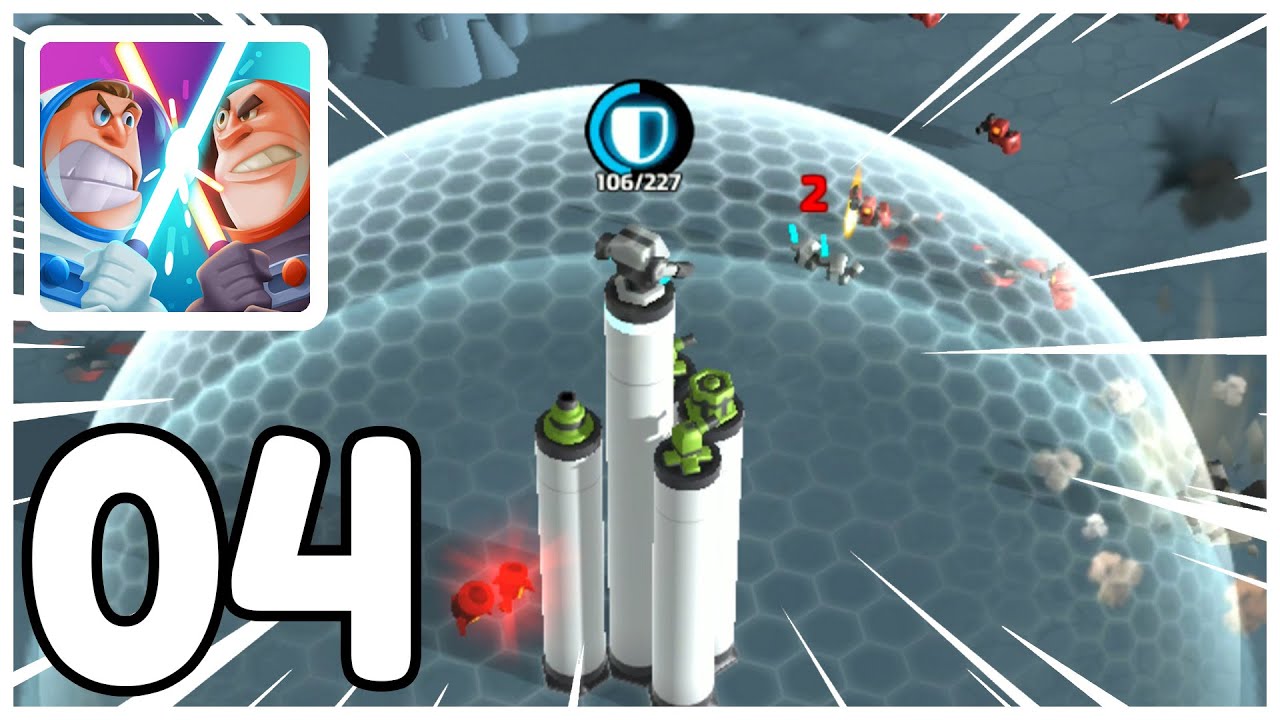
To survive the punishing onslaught in Starguard: Evo Merge TD, you must master the timing of the Shield skill. This defensive ability is a critical tactical tool that grants temporary invulnerability to your towers, preventing them from being overwhelmed by high-damage enemies. By deploying the Shield at the correct moment, you can bypass lethal damage windows, ensuring your defense remains intact during the most intense phases of the wave.
Understanding the Shield Skill Mechanic
The Shield skill functions as a short-term protective barrier for your defensive line in Starguard: Evo Merge TD. Unlike passive upgrades that grant permanent stat boosts, the Shield requires active engagement. When activated, it creates a buffer that absorbs incoming damage, effectively rendering your troopers immune to hostile fire for a set duration.
It is vital to understand that the Shield is not a "fix-all" solution for an under-leveled board. Rather, it is a surgical tool designed to bridge the gap during high-intensity enemy bursts or boss encounters. Because the skill operates on a cooldown, you cannot rely on it as a constant source of protection. Players must constantly evaluate the board state to determine when the risk of tower destruction is highest. Using the Shield too early wastes its potential, while using it too late may result in the loss of a high-level unit, which diminishes your overall DPS and slows down your progression.
Timing Your Defensive Deployment
Strategic activation of the Shield depends heavily on identifying "danger zones" within a wave. Watch for moments when elite mechanical invaders or massive swarms converge on your frontline simultaneously. If your towers are struggling to clear the path, their health bars will drop rapidly. This is the optimal window to trigger the Shield, as it provides your towers with the necessary breathing room to focus fire on priority targets without the threat of being destroyed.
Pay close attention to the enemy spawn rate and the movement speed of the units currently on the field. When you notice a cluster of heavy-hitters approaching your defensive range, wait until they are within striking distance before activating the skill. By forcing the enemy to exhaust their offensive output against your invulnerable barrier, you effectively neutralize their temporary advantage and keep your high-level towers functioning at full capacity.
Managing Cooldowns and Board State
The primary trade-off for utilizing the Shield is its downtime. Once the effect wears off, your towers are fully exposed, leaving them vulnerable to any remaining enemies that were not eliminated while the shield was active. This makes the Shield skill a high-stakes commitment; if you fail to kill the threats during the invulnerability window, your position will be even more fragile immediately following the skill's expiration.
To maximize the efficacy of your Shield management, follow these tactical steps:
- Assess Unit Health: Use the Shield when your most expensive or highest-level towers are low on health to prevent a massive drop in total DPS.
- Monitor Wave Density: Save the ability for the middle or end of a wave where enemy density is at its peak.
- Sync with DPS Bursts: If you have other offensive cooldowns or captain gear abilities available, pair them with the Shield activation to clear the board aggressively while immune.
- Anticipate Boss Abilities: Bosses often telegraph their strongest attacks. Watch for charging animations or glowing indicators; activate the Shield just as the boss begins its primary attack animation to negate the damage entirely.
Limitations and Strategic Risks
While the Shield is an essential tool for survival, it does not compensate for poor tower placement or insufficient unit merging. Relying solely on the Shield to carry a weak setup will eventually lead to failure as waves become progressively harder. The skill should be viewed as a "safety net" rather than a primary defensive strategy. If you find yourself needing the Shield every few seconds, it is a clear indicator that your current unit levels are insufficient for the current stage.
Furthermore, the Shield does not prevent status effects or crowd control abilities that some enemies may inflict on your towers. It is strictly a damage-negation mechanic. Therefore, players should always prioritize building a robust, high-level core of towers first. Use the Shield as a tactical multiplier to extend the life of your best units, ensuring they remain on the board long enough to clear the most challenging segments of the level.
Advanced Strategies: Synergy with Captain Gear
In Starguard: Evo Merge TD, your captain gear can significantly influence the effectiveness of your Shield. Look for gear that reduces cooldowns or enhances the duration of active skills. If you possess gear that provides a "Shield Overcharge" or grants a temporary attack speed buff upon activating a defensive skill, make sure to time your Shield activation to align with your highest damage output.
When facing boss waves, the interaction between your towers and the Shield becomes even more important. Some bosses use AOE (Area of Effect) attacks that can wipe out multiple low-level units simultaneously. Activating the Shield during these boss phases is non-negotiable. If you find your towers are consistently dying before the boss reaches the core, re-evaluate your merge strategy to focus on creating higher-star units, which naturally have higher HP pools, making the Shield even more effective at keeping them in the fight.
Avoiding Common Mistakes
Newer players often fall into the trap of "panic-shielding." This happens when players activate the skill the moment an enemy enters the screen, only to have the shield expire before the real threat arrives.
Avoid these common pitfalls:
- The "Early Trigger": Using the Shield when your towers are at full health. Always wait until the health bars begin to flicker red or the enemy cluster is at its densest.
- Ignoring Merging: Never let the Shield replace the need for constant merging. A shield will not save you if your board is filled with Tier 1 units that lack the damage to kill enemies before the shield drops.
- Over-relying on Cooldowns: Treat the Shield as a finite resource. If you are stuck at a specific stage, it is time to upgrade your base stats or research better gear combinations rather than hoping for a perfect run using only the Shield.
By integrating the Shield into your broader strategy—balancing it with active merging and smart gear selection—you can push past the most difficult waves in Starguard: Evo Merge TD. Remember: the Shield is there to buy you time, but your towers are the ones that earn you the victory.

Free Starguard: Evo Merge TD Codes
Current active codes and how to redeem them.

Emily Johnson
Emily writes practical mobile strategy guides with a focus on resource planning, base progression, and the early decisions that shape a long-term account.
COMMUNITY
Player Comments
150 players commented on this guide.
Can you add more details about strategy in a future update?
This guide answered the exact question I had.
The explanation is clear, especially for beginners.
Good guide for Starguard: Evo Merge TD players. The strategy part was useful.