
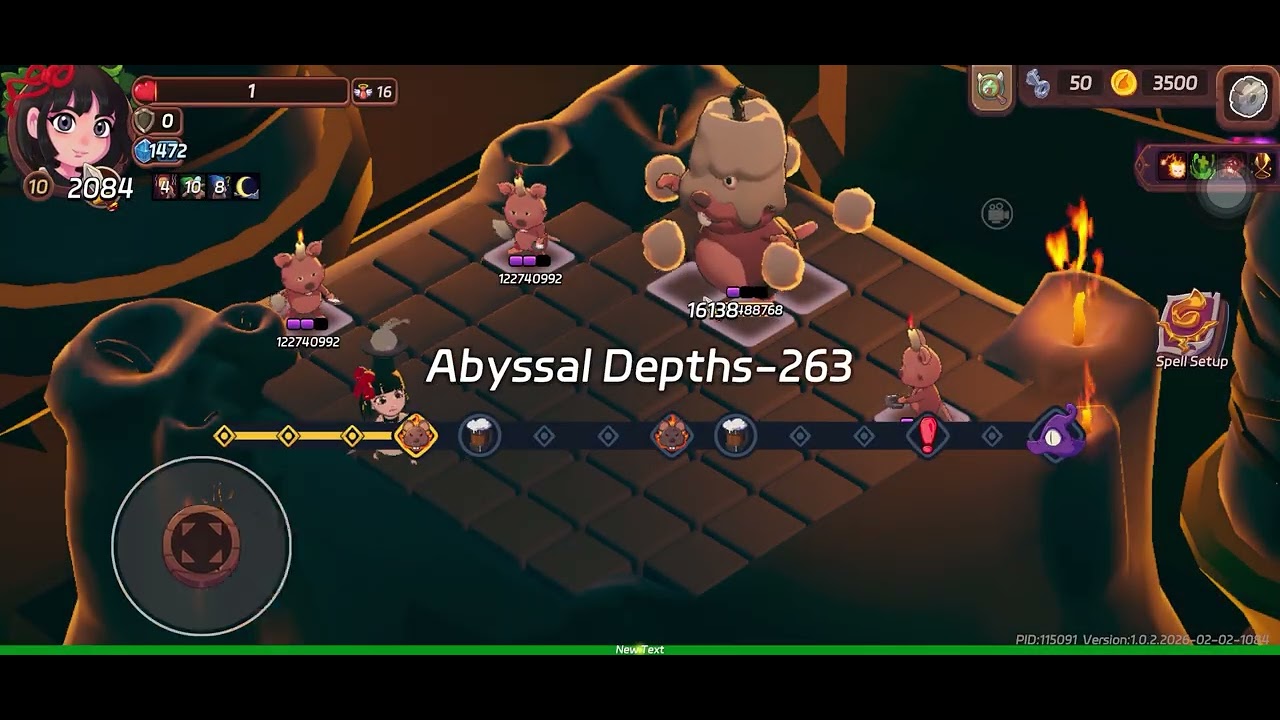
To clear Abyssal Depths 235 to 650 in Tavern Tale, abandon flat health tanking in favor of continuous crowd control, looped invulnerability frames, and strict perimeter kiting. At depth 235 and higher, enemy health pools and movement speeds scale aggressively, while monster hits can deplete your entire health bar in one or two blows by depth 500. Surviving deep runs requires completely avoiding hitboxes and locking down swarms before they surround your path.
Floor Progression and Failure Points
Each segment of the deep abyss introduces distinct scaling bottlenecks. Tailor your focus to the primary threat of each bracket:
| Depth Range | Threat Level | Primary Failure Point | Core Tactical Priority |
|---|---|---|---|
| Depths 235–350 | Moderate Swarms | Ranged projectile overlap | Funneling monsters and establishing continuous skill loops |
| Depths 351–500 | High-Density Elites | Getting cornered during skill downtime | Chaining invulnerability frames and freeze locks |
| Depths 501–650 | Lethal One-Hit Waves | Screen clutter and untelegraphed dashes | Maintaining outer perimeter kiting and persistent area denial |
Defensive Skill Rotation and Crowd Control
Deep floor progression requires keeping defensive downtime under one to two seconds through stacked Cooldown Reduction (CDR). Because standard defense values cannot absorb high-depth hits, rely on two overlapping safety layers:
- Freeze and Knockback: Freeze interrupts enemy dash animations and ranged attack windups. Knockback pushes crowds away if they breach your initial spell boundaries.
- Invulnerability Cycling: Activate damage immunity whenever crowd-control-resistant or teleporting elites close distance.
- The Defensive Hand-off: Deploy a crowd-control burst the exact moment your invulnerability skill expires. This buys time for your immunity skill to cycle back off cooldown without leaving you vulnerable.
Chamber Routing and Mob Funneling
Fighting near the center of the chamber triggers surrounding spawns from multiple directions, cutting off escape routes. Manage aggro using perimeter navigation:
- Stick to the Outer Walls: Rotate continuously along the arena's perimeter boundaries. This forces incoming monster spawns into a single trailing pack behind your character.
- Take Sharp 90-Degree Corner Turns: When reaching a room corner, make a clean perpendicular turn along the next wall to condense chasing monsters into a tight line.
- Maintain Steady Movement: Avoid frantic sprinting into uncleared room sections, which risks triggering fresh spawn clusters that block your path.
- Deploy Lingering Hazards Behind You: Cast persistent area-of-effect spells into the funneled trail directly behind your travel direction to damage the entire wave simultaneously.
Milestone Boss Rules Above Depth 400
Boss encounters above depth 400 introduce overlapping hazards, including tracking beams, ground explosions, and aggressive add spawns. Treat these fights as endurance trials rather than damage races:
- Eliminate Minions Immediately: Shift all burst damage to summoned subordinate monsters as soon as they appear. Leaving minions alive causes fatal body-blocking and limits movement lanes.
- Bait Attacks Toward the Center: Pull the boss toward the open interior before triggering large radial attacks. This keeps the outer wall clear of lasting hazard pools.
- Attack Exclusively During Recovery Frames: Restrict your active offensive spells to the brief recovery windows following a boss's major attack animation, then retreat before the next sequence starts.
Floor Reward Priorities
Above depth 235, utility and avoidance scale far better than raw defensive attributes:
- Top Priority: Cooldown Reduction until your invulnerability and defensive skills cycle seamlessly.
- Secondary Priority: Skill Area Expansion and Movement Speed to maintain safe spacing against accelerated enemies.
- Defensive Choices: Select conditional invulnerability, evasion chance, or barrier shields.
- Avoid: Flat Defense, Flat Health, and minor health regeneration, as late-depth enemy scaling quickly renders flat absorption useless.

Free Tavern Tale Codes
Current active codes and how to redeem them.

Sarah Williams
Sarah specializes in RPG and collection games, explaining team building, character growth, and beginner-friendly ways to avoid expensive early mistakes.
COMMUNITY
Player Comments
157 players commented on this guide.
Can you add more details about strategy in a future update?
This saved me time in the early game.
This guide answered the exact question I had.
The explanation is clear, especially for beginners.