
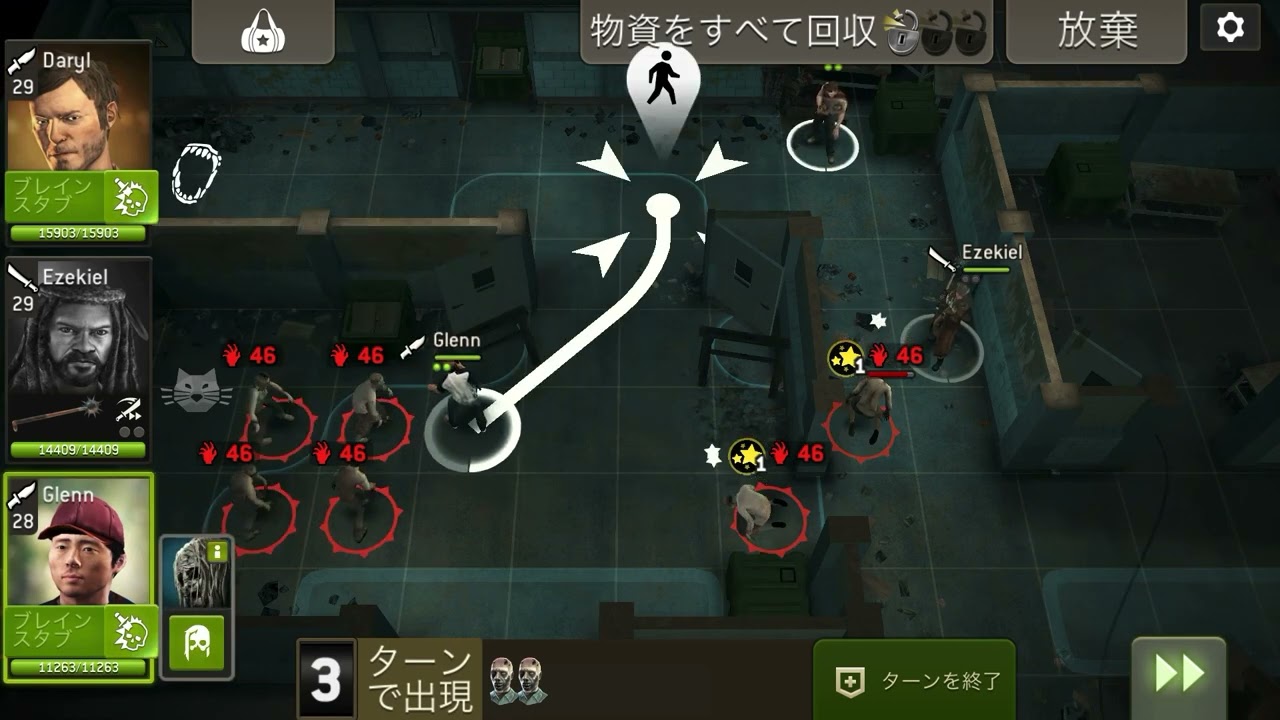
To clear The Dungeon at Difficulty 46 in The Walking Dead No Man's Land, funnel incoming walkers through single-tile doorways, suppress noise to stop reinforcement waves, and extract your entire squad together. At this difficulty level, high-tier walkers deal lethal damage that can incapacitate a survivor in a single turn. Success requires strict Action Point management, silent takedowns, and methodical supply crate retrieval.
Recommended Squad and Weapon Traits
A balanced team consisting of a frontline controller, a long-range marksman, and an agile scout provides the required crowd control and burst damage. Featured in high-level challenge rotations such as the Feeling Lucky event, Difficulty 46 demands specific weapon traits to keep the threat meter low and action economy efficient.
| Class Role | Primary Combat Function | Recommended Weapon Traits | Key Tactical Duty |
|---|---|---|---|
| Scout | Burst damage and objective collection | Agile, Lethal, Tactical | Executes silent single-target kills and safely retrieves crates |
| Hunter | Long-range overwatch and armor piercing | Suppressor, High Caliber, Extended Mag | Covers sightlines, eliminates armored threats, and snipes silently |
| Bruiser or Warrior | Frontline lockdown and area denial | Retaliation, Disruptor, Iron Skin | Anchors doorways, stuns heavy targets, and absorbs incidental hits |
Chokepoint Positioning and Action Point Economy
The Dungeon's layout consists of narrow subterranean corridors, barred cells, and sharp turns. Fighting in open intersections exposes survivors to flanking attacks from multiple angles.
- Bait Walker Movement: Position your melee anchor one tile inside or outside a doorway. If an incoming walker requires three tiles of movement to strike, stopping your survivor two tiles away forces the enemy to exhaust its turn stepping into range without attacking. Your squad can then eliminate it on the following turn without taking damage.
- Preserve Action Points: Each survivor receives two Action Points (AP) per turn. Restrict movement to the inner half of a survivor's movement radius to preserve one AP. This reserved point allows you to make a silent melee attack, fire a suppressed shot, or enter overwatch to intercept charging enemies.
- Keep the Threat Meter Suppressed: Loud gunshots spike the mission threat meter. Filling this gauge immediately triggers walker reinforcements from sewer grates, side cells, or map boundaries. Rely on melee weapons and suppressed firearms to keep the gauge empty.
Crate Retrieval and Extraction Steps
Securing every supply crate maximizes rewards, but splitting up your squad prematurely risks fatal ambushes from dormant walkers.
- Clear Immediate Threats: Neutralize every active walker in the current corridor before unlocking or entering adjacent cell blocks.
- Send the Scout In: Move your Scout to open the crate while retaining at least one AP to step back toward the squad's defensive line.
- Set Overwatch at the Threshold: Keep your Hunter aimed directly at the room entrance to automatically intercept any sudden spawns.
- Stun Priority Targets: When armored or heavy walkers appear, use your Bruiser to apply a stun, followed by the Hunter's armor-piercing shots to take down the target safely.
- Extract Simultaneously: Do not rush survivors into the extraction zone one by one. Move all three squad members in a tight cluster so no isolated unit is caught off guard by late-stage spawns before the mission concludes.

Free The Walking Dead No Man's Land Codes
Current active codes and how to redeem them.

Sarah Williams
Sarah specializes in RPG and collection games, explaining team building, character growth, and beginner-friendly ways to avoid expensive early mistakes.
COMMUNITY
Player Comments
108 players commented on this guide.
Nice guide. I am checking the other The Walking Dead No Man's Land articles next.
This helped me understand strategy much better.
Can you add more details about strategy in a future update?
The explanation is clear, especially for beginners.