
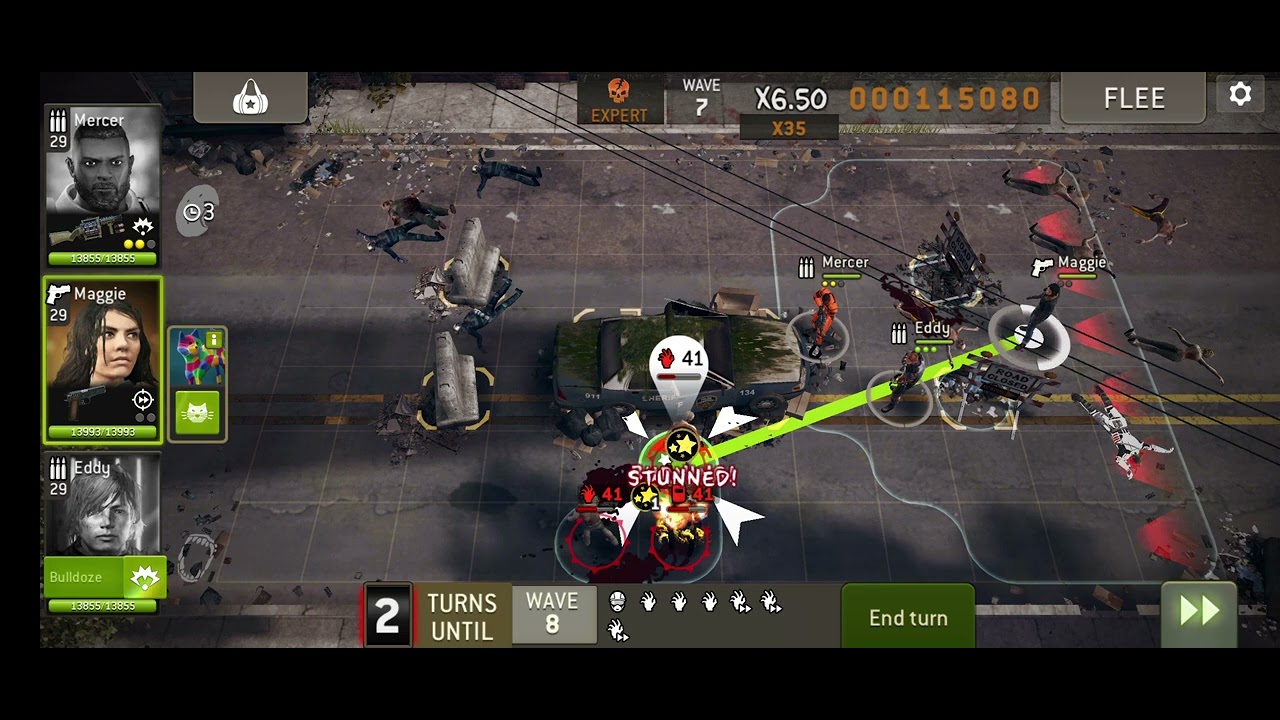
To survive the Old Cruiser Last Stand challenge in The Walking Dead No Man's Land, anchor your squad behind the central vehicle wreckage and use a Civilian Assault survivor equipped with the Hazard Shotgun to control incoming horde corridors. Funneling walkers along the cruiser's perimeter maximizes the shotgun's wide spread and persistent ground hazard, softening incoming waves before they can breach your defensive perimeter.
Role of the Hazard Shotgun in Horde Control
The Hazard Shotgun solves the primary bottleneck in high-density Last Stand waves: escalating spawn counts that overwhelm single-target damage dealers. Discharging the weapon across an approaching group creates an immediate wide-angle hit and leaves behind a temporary hazard zone. Walkers that trudge through this affected ground suffer residual damage over time, turning full-health threats into weakened targets that support teammates can clean up with minimal resource investment.
Because the Hazard Shotgun spreads its total damage across a wide cone, its direct burst damage against individual high-health targets is lower than that of dedicated melee strikes or high-caliber sniper rifles. Treat the weapon as an area-denial tool designed to soften crowds, not as a dedicated boss killer.
Equipping a Civilian Assault Survivor
Deploying a standard Civilian Assault survivor rather than a named hero offers strategic flexibility for enduring extended Last Stand runs:
- Targeted Stat Builds: Civilian survivors allow you to tailor traits, combat badges, and perks exclusively toward weapon uptime and survivability without disrupting your campaign hero assignments.
- Key Defensive Traits: Prioritize traits like Ruthless, Agile, and Defensive Stance to withstand damage if fast runners close the gap between attack rounds.
- Hero Trade-Offs: Civilian units lack passive leader abilities, team-wide action point buffs, and emergency revives. Running a Civilian requires strict adherence to safe positioning and ammunition management to avoid melee overruns.
Old Cruiser Chokepoint Positioning
The Old Cruiser map features an abandoned police vehicle surrounded by open lanes and approach paths. Fighting in the open exposes your squad to flanking spawns from multiple angles. Anchor your team to the vehicle using this movement sequence:
- Secure the Flank: Shift your squad to one side of the cruiser during early rounds, cutting off roughly half of the arena's approach vectors.
- Funnel Advances: Force incoming walkers to route tightly around the car chassis, compressing scattered groups into straight, narrow corridors.
- Set the Kill Box: Place your Assault survivor at the end of the vehicle lane so that every shotgun blast catches the maximum number of targets in its primary cone.
- Maintain Retreat Space: Keep at least two open movement tiles behind your survivors at all times to prevent getting trapped against the map boundary when durable walkers push forward.
Managing Action Points and Reload Cycles
Running out of shotgun shells during an active swarm phase triggers costly reloads that leave your front line defenseless. Alternate between direct fire, tactical movement, and Overwatch triggers according to current swarm distance.
| Tactical Action | Action Point Cost | Primary Benefit | Recommended Timing |
|---|---|---|---|
| Direct Hazard Shot | High (Full Attack) | Strikes multiple targets and deploys ground hazards | Walkers are clumped three or more deep in a lane |
| Overwatch Stance | Reserved End-Turn AP | Intercepts moving targets during the enemy phase | Distant walkers are advancing toward weapon range |
| Manual Reload | Moderate AP | Refills the magazine before the next wave engages | Transition turns with no immediate melee threats |
| Tactical Reposition | Low to Moderate AP | Adjusts line of sight around the vehicle body | Enemies approach striking distance of current cover |
Countering Armored Walkers
Blasting heavily armored walkers repeatedly with the Hazard Shotgun is inefficient. Their damage reduction absorbs wide-spread pellets, shielding common walkers behind them and burning your ammunition without clearing the lane.
When armored enemies appear, use the Hazard Shotgun to strip away the unarmored common walkers surrounding them. Once the armored targets are isolated, direct single-target secondary squad members—such as high-critical Shooters or stun-capable Warriors—to eliminate them through precision weak-point hits or incapacitating stuns. If density surges beyond your ability to clear, fall back two tiles toward secondary cover to reset your firing lane and re-engage.

Free The Walking Dead No Man's Land Codes
Current active codes and how to redeem them.

Emily Johnson
Emily writes practical mobile strategy guides with a focus on resource planning, base progression, and the early decisions that shape a long-term account.
COMMUNITY
Player Comments
145 players commented on this guide.
Nice guide. I am checking the other The Walking Dead No Man's Land articles next.
This helped me understand strategy much better.
This saved me time in the early game.
Can you add more details about strategy in a future update?