
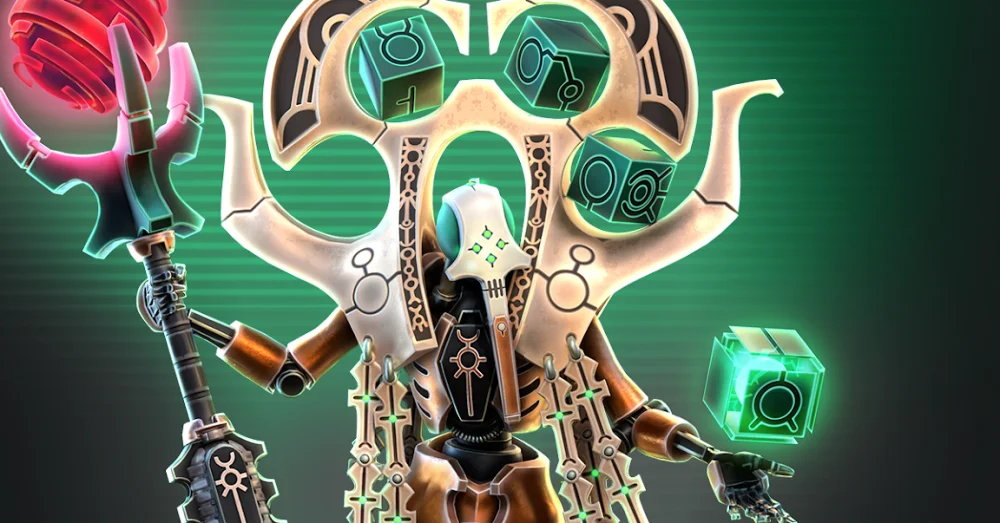
To progress efficiently in Warhammer 40,000: Tacticus ™ ™, invest your early energy and ability badges into multi-mode foundation units rather than niche specialists. Prioritize versatile core carries—headlined by Eldryon, Bellator, Aleph-Null, and Isabella—that perform across core campaigns, Guild Raids, and Legendary Release Events (LREs).
Top 10 Character Priority Comparison
| Character | Primary Role | Key Strength | Main Limitation |
|---|---|---|---|
| Eldryon | Raid Damage Buffer | Passive (Doom) adds flat damage per hit | Negligible personal damage; fragile Light Armor |
| Marneus Calgar | Universal Buffer / Tank | Passive boosts adjacent allies' normal damage | Slow two-hex movement; difficult to acquire |
| Bellator | Campaign / LRE Carry | Active summons up to five multi-hit Inceptors | Weak turn 1–2 presence; summons can clog paths |
| Aleph-Null | Campaign / LRE Carry | Multiplying scarab summons; flying mechanical healer | Scarabs die quickly to blast and flamer attacks |
| Isabella | Imperial Sustain Anchor | Passive heals and revives adjacent Imperial allies | Clustered positioning is vulnerable to blast and suppression |
| Rotbone | Chaos Sustain Anchor | Chaos burst healing and passive revive chance | Revive depends on RNG; low mobility |
| Re'vas | Zone Control / Raid Burst | Range 2 active Overwatch delivers six hits per target | Overwatch lasts only one turn and can be suppressed |
| Sho'syl | Long-Range Sniper | Range 3 attacks with decoy Sniper Drone summons | Severe damage and defense penalties in melee |
| Ragnar Blackmane | Melee Burst Enabler | Active grants bonus movement and guaranteed crits | Lacks defensive sustain if the alpha strike fails |
| Saint Celestine | Mobile Harasser / Decoy | Cross-map flight, summon shields, and a revive | Low armor penetration against heavy targets |
Damage Buffers: Eldryon and Marneus Calgar
Eldryon is the most critical individual upgrade in the game. His passive ability, Doom, applies an unavoidable flat damage boost to every hit landed on an enemy within two hexes. Because premier Guild Raid teams rely on high-hit attackers like Bellator and Ragnar Blackmane, leveling Doom toward level 50 scales overall team damage exponentially. Allocate your rare Xenos badges exclusively to his passive, as his active ability yields diminishing returns and his low base damage and Light Armor make him a pure backline support.
Marneus Calgar provides Imperial teams with broad offensive scaling. His passive ability, Master Tactician, increases the normal attack damage of all adjacent friendly units unconditionally across every game mode. Calgar is durable thanks to Gravis Armor and provides utility through an area-suppression active skill. His primary drawbacks are acquisition difficulty—requiring extended Guild War grinding or Requisition drops—and a slow two-hex movement speed that leaves him susceptible to ranged kiting.
Campaign Carries: Bellator and Aleph-Null
Bellator drives progression across the Indomitus campaign, Onslaught, and Imperial LRE tracks. His active skill, Inceptor Squad, summons armored Inceptor reinforcements that scale with the round number, reaching a maximum of five summons on turn five. Delaying his active until later rounds fills the board with durable, multi-hit units that absorb incoming attacks and trigger Eldryon’s Doom bonus. His early tempo is sluggish, so position him defensively on turns one and two to prevent summons from blocking movement choke points.
Aleph-Null is the primary solo progression carry for the Xenos roster, anchoring Indomitus Mirror and mechanical LRE tracks. Aleph-Null features Flying mobility, self-regeneration, mechanical healing, and an active skill that summons Scarab Swarms. These scarabs duplicate each turn they attack without dying, quickly overwhelming opposing snipers. However, scarabs are fragile against flamer and blast area-of-effect (AoE) abilities, and Aleph-Null's personal piercing damage falls off sharply against heavily armored bosses.
Sustain Anchors: Isabella and Rotbone
Isabella is the core defensive engine for high-tier Imperial LRE tracks. Her passive ability, Field Medic, heals adjacent Imperial allies whenever they suffer damage and automatically resurrects the first adjacent ally defeated each round. This enables the "Isabella turtle" formation, where high-armor units like Bellator and Brother Burchard surround her to form an impenetrable wall. Her primary vulnerability is the required clustering, which leaves the squad exposed to area attacks and suppression from units like Thaddeus Noble or Typhus.
Rotbone serves as the sole native sustain and revive unit for the Chaos faction, making him indispensable for Fall of Cadia Mirror and Chaos LRE tracks. His active ability provides single-target burst healing, while his passive provides a percentage chance to revive adjacent Chaos allies upon death. Unlike Isabella's guaranteed resurrection, Rotbone's revive relies on RNG, and his limited mobility forces him into defensive, slow-moving formations.
Zone Control: Re'vas and Sho'syl
Re'vas shuts down aggressive approaches using an active skill that summons two Shield Drones and activates a Range 2 Overwatch stance. Any enemy entering this kill zone takes six burst-cannon hits per target, halting rushes in Tournament Arena and dealing massive single-turn damage to large Guild Raid bosses like the Rogal Dorn Tank. Her Overwatch lasts only one round and is neutralized by suppression or inexpensive decoy summons, leaving her vulnerable while the ability is on cooldown.
Sho'syl controls long-range sightlines with Range 3 basic attacks and a passive ability that deploys autonomous Sniper Drones each round. These drones deal high-piercing damage and act as disposable targets to bait high-damage enemy attacks. Sho'syl excels on wide Tournament Arena maps and in Guild War defense, but suffers severe close-combat penalties if enemy units close to Range 1.
High-Mobility Executioners: Ragnar Blackmane and Saint Celestine
Ragnar Blackmane powers melee rush teams using his active ability, War Howl. On activation, War Howl grants bonus movement, elevated flat damage, and guaranteed critical hits to all adjacent melee allies. This skill enables lethal first-turn engagements in Tournament Arena and coordinates with multi-hit units to burst down stunned Guild Raid bosses during vulnerability windows. Ragnar relies on high offensive momentum; if his initial strike fails to wipe the target, he lacks the defensive mitigation to survive extended counterattacks.
Saint Celestine operates as an evasive assassin. With Flying mobility, deep-strike movement, and two Geminae Superia summons to absorb incoming hits, she bypasses frontline tanks to eliminate vulnerable backline targets. Her passive resurrection forces opponents to defeat her twice, making her an exceptional tool for baiting enemy Overwatch stances and claiming power-ups in PvP. Her baseline armor penetration is low, meaning she requires external armor-reducing support to damage heavy vehicles and raid bosses effectively.
Free Warhammer 40,000: Tacticus ™ Codes
Current active codes and how to redeem them.

James Brown
James focuses on Android gaming on PC, emulator setup, controls, performance tuning, and practical troubleshooting for longer play sessions.
COMMUNITY
Player Comments
130 players commented on this guide.
This guide answered the exact question I had.
Nice guide. I am checking the other Warhammer 40,000: Tacticus ™ articles next.
Can you add more details about heroes in a future update?
This saved me time in the early game.