
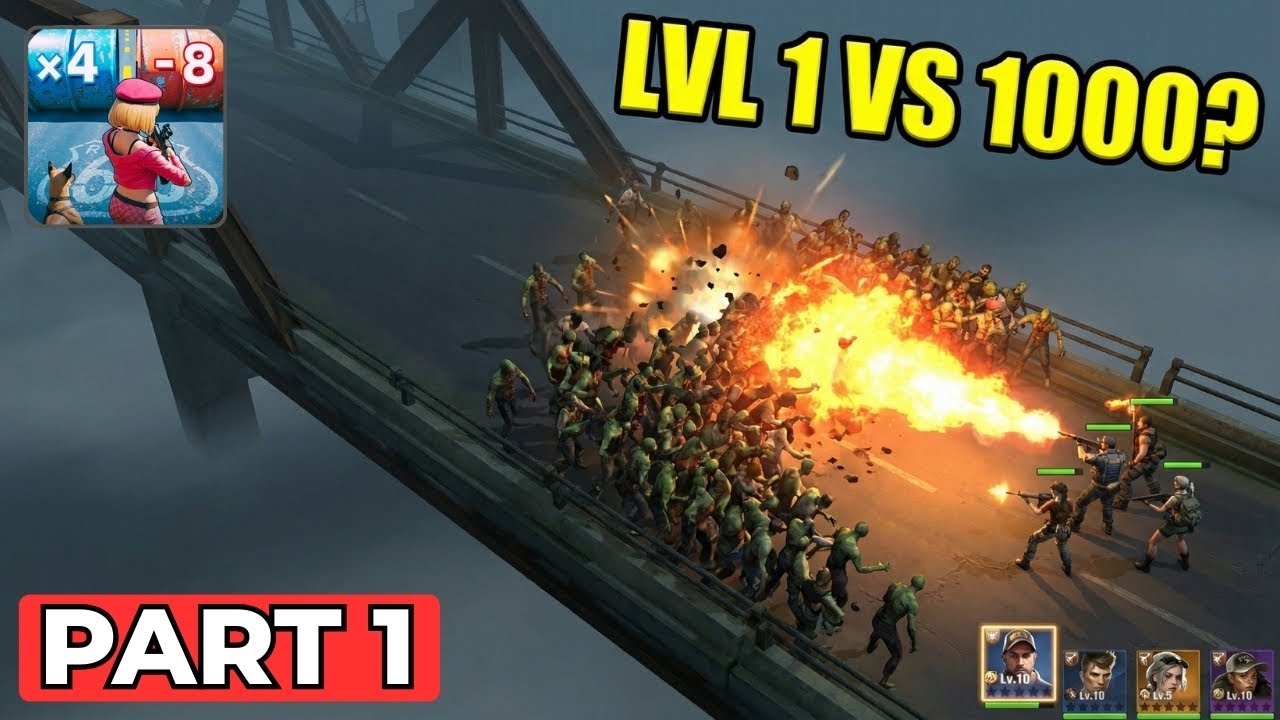
Surviving a 1,000-zombie horde in Z Route: Redemption is the ultimate test of tactical positioning and resource management. When the screen fills with undead, attempting to hold open ground is a recipe for disaster; your squad will quickly be surrounded and overwhelmed. The secret to victory lies in terrain manipulation. By forcing the horde into narrow chokepoints—most notably bridges—you effectively negate their numerical superiority, turning a chaotic swarm into a manageable, single-file firing line. This guide provides the expert strategies needed to turn impossible odds into a routine survival victory.
The Mechanics of Chokepoint Defense
In Z Route: Redemption, the game engine calculates zombie movement based on the shortest path to your squad. When you stand in an open field, zombies approach from a 360-degree radius. However, by positioning your team at the entrance of a narrow bridge or alleyway, you force the AI to pathfind exclusively through that opening.
Why this works:
- Reduced Frontage: Only a few zombies can engage your frontline at any given moment, effectively capping the amount of incoming damage you take.
- Concentrated DPS: Because your squad’s fire is no longer spread across a wide arc, every bullet or ability hits its target, maximizing your damage-per-second (DPS) output.
- Aggro Funneling: You can predict exactly where the "pressure point" of the horde will be, allowing you to focus your manual hero abilities on a singular, dense target area.
Strategic Squad Placement and Formation
Your squad formation is the backbone of your survival. A disorganized group will leak zombies through the sides, leading to the collapse of your backline. When setting up a defensive line, use a "V" or "Flat-Front" formation to ensure no zombie slips through the gaps.
The Role-Based Positioning System
- Frontline Anchors (The Shield): Place your highest health/defense units at the very edge of the bridge. Their role is not just to deal damage, but to act as a physical barrier. They should never move backward unless the entire line is collapsing.
- Mid-Line Sustainers: Position your support and utility units directly behind the anchors. They provide crucial buffs (attack speed, health regeneration, or armor) that keep your anchors alive.
- Backline Burst/AOE: Place your high-damage snipers or explosive experts in the rear. These units should be focused entirely on clearing the densest clusters of the horde. If they are placed too far forward, they risk being caught in the melee, which will interrupt their attack animations.
Mastering Resource and Ability Management
A common mistake in Z Route: Redemption is "panic-using" abilities the moment the horde appears. When facing 1,000 zombies, your resources—ammo, ability cooldowns, and health—are your most precious commodities.
- The Density Threshold: Do not waste area-of-effect (AOE) abilities on the first few waves. Wait until the bridge is fully clogged. The higher the density of the zombies, the higher the value of your ability.
- Ammo Conservation: If your weapon supports semi-automatic fire, use it for individual stragglers. Save your full-auto or high-capacity bursts for when the bridge is saturated.
- Rotation Strategy: If an anchor’s health drops below 30%, do not wait for them to die. Manually toggle their movement to pull them back behind your support line, and immediately push a fresh unit into the gap. This "tag-team" approach keeps your frontline uptime at 100%.
Identifying the Saturation Point
Every chokepoint has a "Saturation Limit"—the point where the number of incoming zombies exceeds your squad's ability to kill them. If you see the front line of zombies consistently pushing your anchors back, you have reached this limit.
Signs of an imminent collapse:
- Visual Pile-up: Zombies are climbing over each other or pushing your units off the bridge edge.
- Ability Exhaustion: All your AOE skills are on cooldown, and the horde is still dense.
- Health Bleed: Your support units are taking chip damage because your anchors can no longer hold the line.
When this happens, do not stand and fight until the end. Execute a "Kite Retreat." Move your entire squad back to a secondary chokepoint or an open area where you can use grenades or kiting tactics to thin the herd before re-engaging.
Common Mistakes to Avoid
- Cornering Yourself: Never retreat into a dead-end. Always ensure there is an open path behind you. Being trapped results in a "wipe" within seconds.
- Over-focusing on One Enemy: Do not spend your manual targeting on a single "tough" zombie if it means ignoring the 50 standard zombies flanking your position. Prioritize the largest cluster to prevent a breach.
- Ignoring Unit Upgrades: If you find yourself consistently failing at the same bridge, your squad’s base stats may be too low. Use the gold and materials collected in previous runs to upgrade your squad’s armor and fire rate before attempting the next high-density challenge.
Tactical Summary for Success
To succeed in Z Route: Redemption, treat the battlefield like a puzzle rather than a brawl. By funneling the 1,000-zombie horde into your custom-built kill zones, you turn their sheer numbers against them. Remember: hold the bridge, keep your frontline healthy through tactical rotations, and only unleash your most powerful abilities when the horde is at its peak density. Follow these principles, and even the most "impossible" bridges will become your greatest tactical advantage.
Free Z Route: Redemption Codes
Current active codes and how to redeem them.

Emily Johnson
Emily writes practical mobile strategy guides with a focus on resource planning, base progression, and the early decisions that shape a long-term account.
COMMUNITY
Player Comments
36 players commented on this guide.
This helped me understand strategy much better.
Can you add more details about strategy in a future update?
This saved me time in the early game.
The tips are practical and easy to follow.