

To clear Dawn Breakout Level 1 in Z Route: Redemption, build your squad size by taking additive gates early, switching to multiplier gates once your unit count exceeds 10, and shooting red explosive barrels from long range to clear lanes before facing the final Elite Infected boss.
Core Runner Mechanics and Gate Strategy
In Dawn Breakout Level 1, your active squad automatically runs forward while weapons fire continuously at oncoming infected, barriers, and interactive objects. You control lateral lane steering to grab beneficial buffs and avoid hazards.
Your soldier count serves two simultaneous functions:
- Collective Health Bar: Colliding with barricades or allowing infected to reach your front line removes soldiers on a one-to-one basis.
- Firepower Multiplier: Higher troop counts output a denser volume of fire, allowing your squad to destroy obstacles and enemy clusters before making contact.
Choosing between lane gates depends on your current headcount:
- Under 10 Soldiers: Prioritize green or blue additive gates (such as +5 or +10). When your starting squad is small, flat additions yield a higher net increase than low multipliers.
- Over 10 Soldiers: Switch immediately to multiplier gates (such as 2x). Multiplying an established troop count provides far more units than standard additive options.
- Red Gates: Steer away from red gates, which subtract soldiers or decrease firing effectiveness.
Recommended Squad Setup
Set your hero composition before starting the run to ensure balanced projectile coverage across all lanes.
| Slot Position | Hero Archetype / Example | Primary Role in Level 1 |
|---|---|---|
| Front Center | Durable DPS / High Fire Rate | Absorbs minor stray hits and clears central lane corridors directly ahead. |
| Left Flank | Piercing / Single Target (e.g., Li Rifle) | Drills through dense walker lines and triggers distant explosive barrels early. |
| Right Flank | Area-of-Effect / Bullet Spread (e.g., UR Aria) | Weakens wide zombie packs and clears incidental trackside clutter. |
Level 1 Stage Walkthrough
Navigate the three distinct phases of Level 1 using controlled lane adjustments rather than wide, erratic movements.
- Phase 1: Initial Deployment
Stay centered as the run begins. Watch for the first gate set and steer into the highest positive additive gate. Ignore isolated walkers at the track edges to avoid pulling your formation out of position.
- Phase 2: Barrels and Obstacles
The middle track introduces wooden barriers and red explosive barrels. Align your formation directly with red barrels from maximum distance. Detonating them early clears surrounding infected clusters instantly. Never collide with an unexploded barrel, as the blast will inflict heavy squad casualties.
- Phase 3: Pre-Boss Consolidation
Before reaching the boss arena, the track narrows into a final gate choice. Commit to the multiplier gate to enter the final encounter at peak troop capacity.
Defeating the Elite Infected Boss
The Level 1 boss is an Elite Infected that advances slowly down the center lane.
- Hold the Center Lane: Keep your squad aligned directly with the boss. Drifting left or right splits your firing angles and reduces damage output.
- Overwhelm with Volume: This fight is a raw damage check. If you maintained a high unit count through the track gates, your concentrated squad fire will stagger and eliminate the Elite Infected before it closes into melee range.
Defeating the boss completes the stage, awards event points, and unlocks Dawn Breakout Level 2.
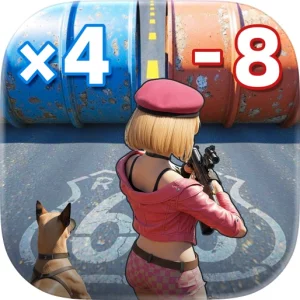
Free Z Route: Redemption Codes
Current active codes and how to redeem them.

Emily Johnson
Emily writes practical mobile strategy guides with a focus on resource planning, base progression, and the early decisions that shape a long-term account.
COMMUNITY
Player Comments
63 players commented on this guide.
The explanation is clear, especially for beginners.
I tried this today and it worked better than my old setup.
This guide answered the exact question I had.
This helped me understand strategy much better.