
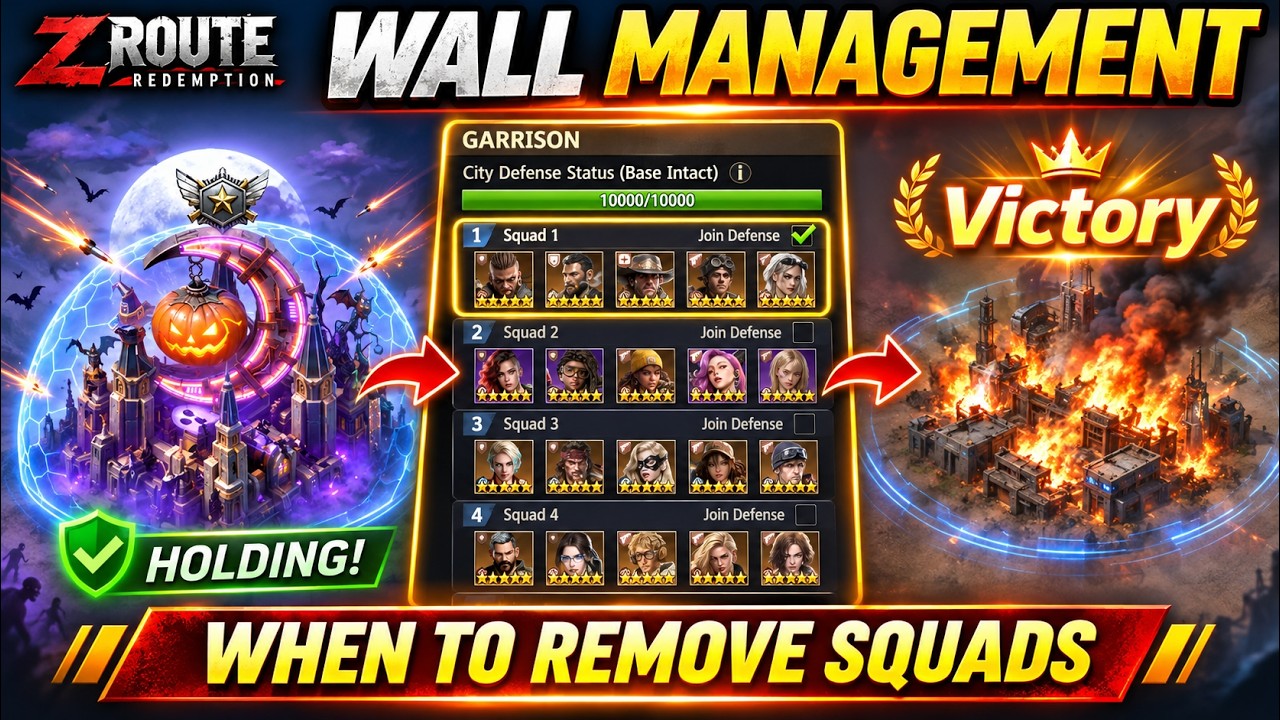
To manage your wall effectively during fights in Z Route: Redemption, unassign your defense squads whenever you face incoming alliance rallies or superior commanders. Clearing your wall forces enemy marches to hit an empty base, completely protecting your troops from hospital overflow and permanent death while denying the attacker event kill points.
How Wall Defense Mechanics Work
By default, the game automatically stations your highest-tier squads to defend your headquarters. When an incoming enemy march reaches your base, combat resolves automatically against your garrisoned units:
- Sequential Defender Battles: Attackers commit only the troops in their march or rally, but your base deploys all stationed garrison squads in order until every defender is defeated.
- Hospital Limits and Permanent Losses: Defending casualties fill your base hospital. Once your medical capacity is full, any additional wounded soldiers die permanently, wasting training resources and speedups.
- Separation of Troops and Durability: If an attacker strikes an empty wall, your base catches fire and loses structural defense points, but your soldiers, vehicles, and heroes remain completely safe inside your base. Structural damage can be repaired and fires extinguished for negligible cost compared to replacing high-tier armies.
Steps to Clear Your Wall Garrison
When an incoming attack is too strong to contest, remove your garrison immediately:
- Tap your defensive wall structure from the main base view.
- Select the garrison deployment menu.
- Manually toggle off or unassign every stationed squad until all slots show as empty.
- Confirm the layout to update your wall status.
Once cleared, incoming enemy attacks bypass your military. The attacker receives a victory report and inflicts a minor reduction on your wall's durability, but receives zero combat kill points because no defending units took the field.
When to Clear vs. When to Defend
| Tactical Wall State | Casualty Risk | Attacker Event Points | Best Use Case |
|---|---|---|---|
| Empty Wall (Cleared) | Zero troop casualties; hospital capacity remains completely free | Zero kill points awarded | Facing full alliance rallies, superior commander stats, or going offline without a shield |
| Full Defense Garrison | High; risks rapid hospital overflow and permanent troop death | Maximum points awarded based on defender units killed | Defending against equal or weaker solo attacks with top-tier alliance reinforcements |
| Bait Garrison (Sniping) | Low; controlled engagements against beatable targets | Yields defender kill points while punishing isolated attackers | Luring weak solo pillagers into an unannounced, last-second defensive setup |
Baiting and Trapping Solo Attackers
If a solo enemy targets your base without rally support, use wall toggling to eliminate their march:
- Keep your wall empty to display no visible defenders.
- Open the incoming march alert screen and review the attacker's squad composition, tier, and remaining travel time.
- If your primary squad counters or out-tiers the incoming march, wait until the march enters its final approach window (typically two to three seconds before impact). Attackers cannot recall their march during these final seconds.
- Quickly reassign your strongest squad to the garrison slot and confirm.
- Immediately after combat resolves, reopen the wall menu and unassign your squad back to empty to avoid retaliatory strikes or follow-up rallies.
Managing Wall Fire, Durability, and Relocation
Absorbing undefended hits degrades your wall's structural defense value over time. If this meter reaches zero, your base suffers a forced burnout and randomly teleports across the map.
- Check Remaining Durability: Monitor the wall durability bar between incoming enemy waves to ensure it does not hit critical levels.
- Extinguish Fires: Tap the extinguish function to stop active burn timers. Extinguishing has a cooldown, but clearing the fire halts continuous durability loss.
- Repair the Wall: Use the repair option between battles to gradually restore defense points.
- Relocate Proactively: If multiple hostile rallies threaten to deplete your entire defense meter before you can repair, do not wait for forced burnout. Use an Advanced Teleport or Alliance Teleport to move immediately onto allied territory, keeping your army safe and repositioning on your own terms.
Free Z Route: Redemption Codes
Current active codes and how to redeem them.

Sarah Williams
Sarah specializes in RPG and collection games, explaining team building, character growth, and beginner-friendly ways to avoid expensive early mistakes.
COMMUNITY
Player Comments
59 players commented on this guide.
Nice guide. I am checking the other Z Route: Redemption articles next.
I wish I had read this before upgrading the wrong thing.
This saved me time in the early game.
I tried this today and it worked better than my old setup.