
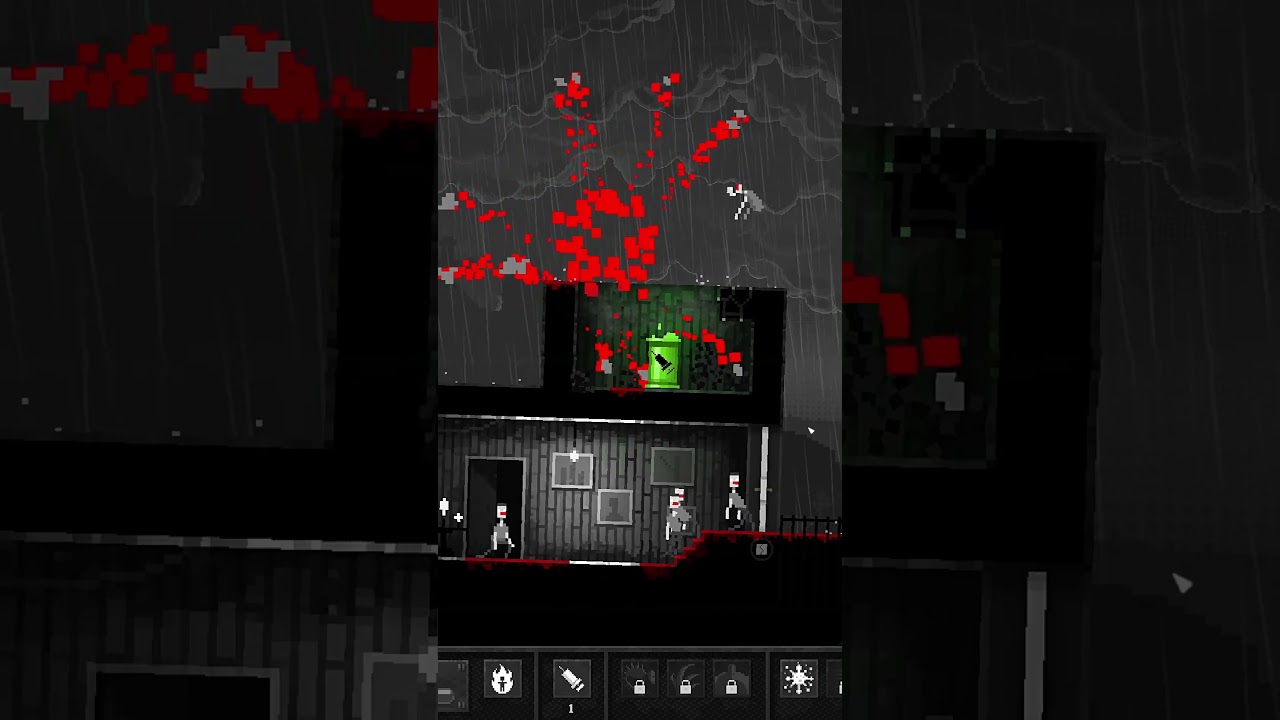
To execute an aerial drop ambush in Zombie Night Terror, position your horde on high ground above armed defenders, gather the infected into a tight stack using an Overlord, and release them directly into melee range. Dropping vertically exploits human sightline blind spots, allowing your swarm to land and grapple defenders before horizontal firing lines can inflict frontal casualties.
Survivor Sightlines and Fall Height Limits
Human defenders equipped with pistols and shotguns track targets within fixed horizontal sightlines. Approaching fortified guards along flat ground forces standard Walkers to run straight into continuous gunfire. Because armed survivors cannot shoot directly upward, dropping your infected from overhead bypasses their forward cones of vision. Landing directly next to a defender forces them into a close-quarters melee reaction that disrupts their aiming and stops weapon fire.
Vertical drops require careful elevation management. Falling past safe height thresholds causes Walkers to splatter instantly upon impact, wasting infected units without dealing damage or infecting targets. When navigating multi-story structures, inspect the descent path for intermediate ledges:
- Balconies and decorative awnings that divide high falls into safe steps
- Fire escapes and metal grating along exterior walls
- Wall-mounted air conditioning units and structural piping
Stepping down across these lower perches keeps vertical descents within safe height limits while preserving your frontline units.
Stacking Drop Waves with Overlords
Dropping zombies individually or in small trickles allows even lone riflemen to pick off infected one by one as they land. To overwhelm armed defenders, the entire group must strike the floor simultaneously.
Set an Overlord right at the edge of a roof, fractured floorboard, or balcony to halt forward movement. Oncoming Walkers compress behind the Overlord into a single, dense cluster. Releasing the Overlord drops the entire concentrated pack at once. The landing pack immediately saturates the defender's melee space, preventing guards from cycling weapon bolts or reloading. You can also orient the Overlord's release direction so zombies drop behind defensive sandbags rather than directly into secondary crossfire.
Drop Method Comparison
Different unit mutations modify drop speed, clearance range, and structural impact during vertical descents:
| Drop Method | DNA Cost | Tactical Purpose | Key Failure Point |
|---|---|---|---|
| Standard Walker Plunge | 0 extra DNA | Overwhelming isolated riflemen or civilians from short ledges | Splattering on ground if drop height exceeds the safe limit |
| Directional Overlord Drop | Moderate DNA | Guiding airborne trajectories across gaps and over sandbags | Misaligned release angles exposing zombies to side fire |
| Runner Kinetic Drop | Low DNA | Closing landing distances quickly before survivor alert meters fill | Overshooting narrow perches due to high horizontal speed |
| Airborne Bomber Detonation | High DNA | Breaching breakable floors and wiping clustered defenders below | Exploding mid-air too high or splattering before the fuse ends |
When using an airborne Bomber to clear fortified rooms below, trigger the mutation during the descent. Timing the detonation with your landing breaches weak wooden flooring and eliminates entrenched survivors who are otherwise protected by frontal cover.
Step-by-Step Vertical Deployment Routine
When descending multi-floor buildings or clearing interior shafts, execute your vertical breach systematically:
- Secure the ledge: Place an Overlord at the top edge of the opening to hold your swarm in place.
- Scout the landing area: Inspect the lower floor directly below the drop point for lethal hazards such as open flames, live electrical cables, or explosive barrels.
- Open the descent line: Destroy fragile floor sections or breakable glass panes that obstruct a direct downward path.
- Release and redirect: Drop the clustered horde simultaneously, then apply directional commands immediately upon landing to herd the infected into adjacent rooms before alert timers expire.
Managing Environmental Hazards and DNA Efficiency
Frontal assaults against fortified choke points often cost ten to fifteen Walkers, forcing you to burn DNA on replacement infections. Spending DNA to establish an Overlord pivot on an upper platform is significantly more resource-efficient, preserving your core horde numbers for subsequent stage objectives.
However, aerial drops must be avoided if the landing zone contains environmental hazards. Dropping zombies into live electrical wiring, burning debris, toxic waste pools, or bottomless pits causes immediate, irreversible casualties. Always confirm that landing surfaces are clear and fall distances are survivable before releasing an Overlord's hold.

Free Zombie Night Terror Codes
Current active codes and how to redeem them.

James Brown
James focuses on Android gaming on PC, emulator setup, controls, performance tuning, and practical troubleshooting for longer play sessions.
COMMUNITY
Player Comments
102 players commented on this guide.
I wish I had read this before upgrading the wrong thing.
This helped me understand strategy much better.
The tips are practical and easy to follow.
Good guide for Zombie Night Terror players. The strategy part was useful.