
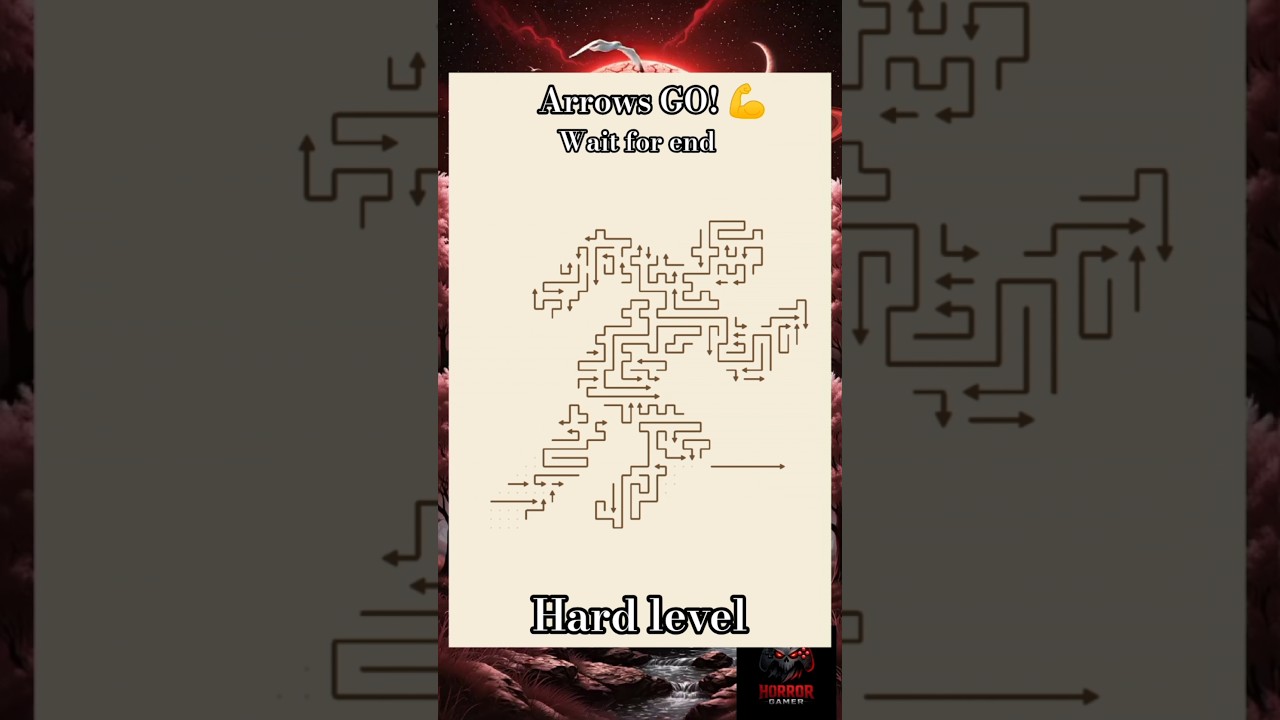
To clear Level 99 in Amaze GO!, you must execute a strict outside-in clearing sequence. The board is constructed around an interlocking central knot that cannot escape until exterior release corridors are fully open. Tapping any piece without a clear line of sight off the board results in a collision and a failed attempt.
Prioritize outward-facing perimeter arrows first, dismantle the mid-ring chains from lead to trailing arrows, and finish by releasing the central core.
| Arrow Layer | Board Location | Movement Condition | Clearing Priority |
|---|---|---|---|
| Free Perimeter | Outer edges and corners | Points directly away from the grid | Phase 1 (Immediate) |
| Mid-Ring Chains | Middle ring between edge and core | Path crosses vacated perimeter slots | Phase 2 (Sequential) |
| Central Key Piece | Center cluster edge | Forward lane fully cleared to boundary | Phase 3 (Initiator) |
| Core Intersections | Deepest center tiles | Unlocked only after the key piece clears | Phase 4 (Final) |
Step-by-Step Clearing Sequence
Rushing to tap pieces that look isolated can ruin the lane alignment required for interior tiles. Work through the puzzle in three distinct phases.
Phase 1: Clear Outward-Facing Perimeter Arrows
Start by removing the outermost layer to create escape runways for the inner rings:
- Tap all corner arrows that point outward into open space. These pieces face no obstructions and leave the grid immediately.
- Tap the straight exterior arrows that point along or away from the board perimeter.
- Do not touch any exterior arrow that points inward toward the central mass.
- Verify that the outer border is clear before touching the secondary layer.
Phase 2: Dismantle the Mid-Ring Crossings
The second layer contains paired arrows that cross into the lanes you just vacated:
- Locate two-piece chains where one arrow trails directly behind another.
- Tap the leading arrow first. Tapping the trailing arrow first causes it to crash into the front piece.
- Work around the grid symmetrically so that clearance routes open evenly on opposing sides.
Phase 3: Unlock the Central Core
The center of Level 99 consists of tightly packed arrows pointing across each other in a closed loop:
- Identify the single key arrow whose forward trajectory points directly into an open lane cleared in Phase 2.
- Tap this key arrow to break the central loop.
- Tap the remaining center arrows in counter-clockwise order as each consecutive departure path becomes unobstructed.
Managing Perpendicular Crossings and Deadlocks
Perpendicular intersections are the primary failure point on Level 99. These occur when two arrows sit at right angles, with one arrow's path crossing directly in front of the other.
- Trace the Full Exit Line: Before tapping an arrow, look all the way to the boundary edge. If another arrow rests on that line—even if it is facing away—the moving piece will collide with it. The blocking arrow must leave the grid first.
- Locate External Unblockers: If two perpendicular pieces appear mutually blocked, search the opposite side of the grid. Clearing an unrelated mid-ring arrow often opens the departure runway for one of the two locked pieces.
Traps and Stage Restart Signals
Certain board states cannot be recovered without wasting moves or tools:
- Inward-Facing Border Traps: Visual decoys sit on the board edge but face inward. Never tap an arrow simply because it sits on the perimeter; verify that its point directs away from the center.
- Staggered Parallel Lanes: Two adjacent arrows pointing in the same direction may not clear safely at the same time. Staggered placement can cause one piece to clip the corner of an adjacent block. Check lateral clearance before tapping parallel pairs.
- Core Deadlocks: If all remaining center arrows point directly into one another with no vacant exit path, Phase 2 was executed out of order. Restart the level immediately to reset the grid.
Free Amaze GO! Codes
Current active codes and how to redeem them.

Michael Smith
Michael covers live-service games, events, reward systems, and efficient daily routines, turning frequent updates into clear actions for players.
COMMUNITY
Player Comments
26 players commented on this guide.
This guide answered the exact question I had.
Can you add more details about strategy in a future update?
This saved me time in the early game.
This helped me understand strategy much better.