
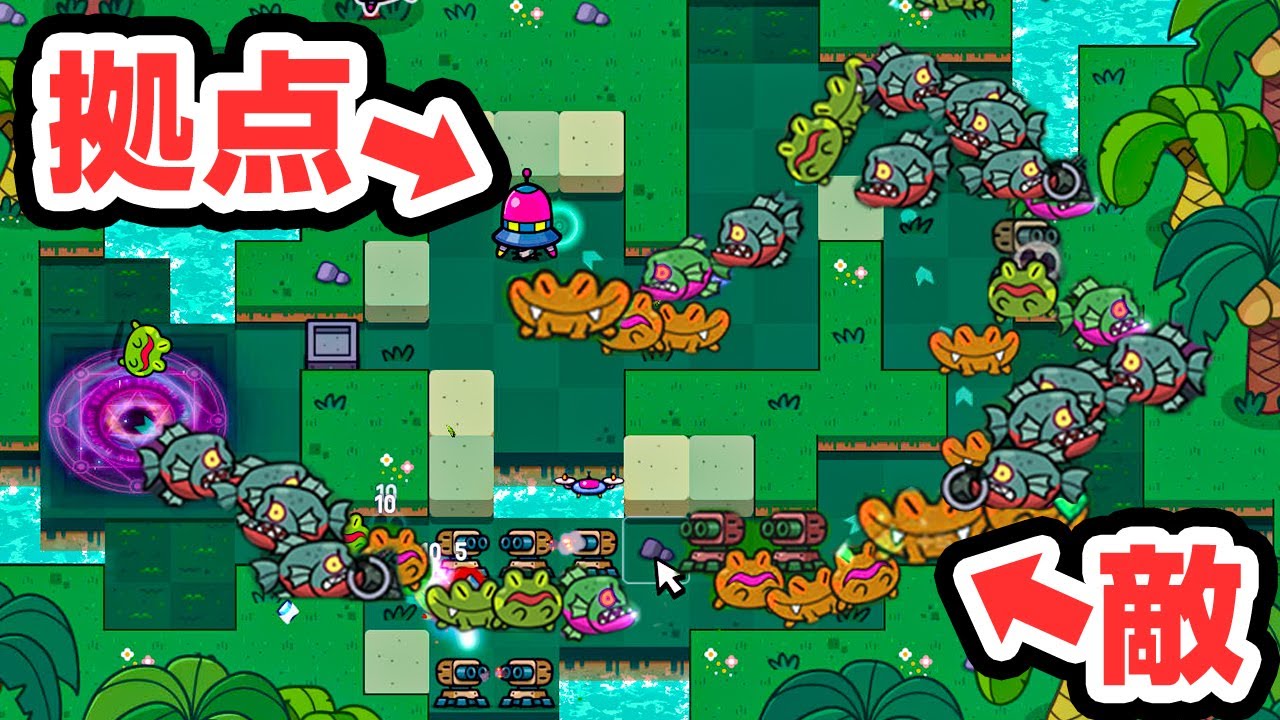
Deploy your landing base along a map border or corner and construct an open, winding barrier corridor that leaves an unobstructed path between enemy spawn portals and your core. Ground monsters in Battle Strategy: Tower Defense always calculate the shortest open route to your base. If you leave a clear path, enemies will walk through your entire maze without attacking your walls; if you seal the base completely, they will attack and break the nearest barriers directly.
Selecting the Base Location
Place your landing base against map borders, high-ground edges, or natural terrain obstacles rather than in the center of the map. Central base placement allows waves from multiple spawn portals to converge from several directions at once, forcing you to spread defensive resources across multiple fronts.
Positioning the core near an edge eliminates flanking angles and funnels incoming waves along predictable routes. Maximizing the distance between enemy portals and your landing base provides the grid space needed to build long barrier corridors. Before confirming base deployment coordinates, check the layout of all enemy spawn portals and natural choke points.
Pathfinding Rules and Barrier Mazing
Enemies prioritize unblocked paths over attacking barriers, but they switch to attacking structures as soon as all navigable routes are closed. Creating a maze requires leaving a continuous open corridor from every active spawn point to the landing craft.
Do not completely box in your base. When the pathfinding algorithm finds no open tile route, monsters begin attacking the nearest barrier segment. Once that barrier breaks, the breach creates a direct shortcut to your base, bypassing surrounding turrets.
| Maze Strategy | Monster AI Response | Defense Efficiency | Resource Demand |
|---|---|---|---|
| Open Serpentine Maze | Follows the winding lane; ignores walls | High; turrets attack continuously | Moderate; invests in corridor shaping |
| Fully Sealed Perimeter | Attacks and destroys barriers directly | Low; broken walls create shortcuts | Very High; requires continuous repairs |
| Funnel Chokepoint | Merges multiple lanes into a single path | Maximum; concentrates area-of-effect damage | Low to Moderate; uses natural terrain edges |
To build an efficient serpentine layout, alternate barrier placements by two tiles per turn. This switchback pattern extends monster travel time through your defenses without causing the pathfinding system to register the route as blocked.
Turret Placement Along Corridors
Turret efficiency depends on matching weapon firing profiles to corridor shapes:
- Linear weapons: Position laser turrets at the ends of long, straight stretches. Firing down the length of a lane pierces multiple advancing enemies in a single beam, whereas placing lasers perpendicular to lanes limits them to single-target hits.
- Rapid-fire weapons: Place Gatling and shotgun turrets on the inside corners of tight turns. Monster movement speed through a turn decreases relative to weapon tracking arcs, keeping targets in the firing cone longer.
- Area-of-effect weapons: Place long-range artillery and missile launchers on central tiles behind your barrier walls. Their reach allows them to hit multiple parallel corridors while remaining protected from direct ground attacks.
Defending Against Flying Units and Fast Swarms
Airborne enemies ignore ground barriers and fly directly toward your base in a straight line. Ground mazes offer no passive protection against air waves, so you must position anti-air turrets directly along the vector between air spawn portals and your core. Placing air defenses slightly ahead of your base intercepts flyers before they reach the objective.
Fast ground swarms can outrun single-target fire. Install slowing or frost support modules at early corridor corners to group runners together, allowing artillery and splash weapons to hit entire clusters at once.
Resource Priority Between Barriers and Upgrades
Spend early resources on expanding barrier corridors before investing in expensive weapon or wall tier upgrades. Basic turrets possess enough base damage to clear early waves as long as the maze forces enemies to spend sufficient time in range. Adding cheap barrier segments doubles total target exposure across all existing turrets, offering a higher early defensive return than upgrading a single tower.
Reserve high-tier barrier durability upgrades, repair costs, and weapon promotions for mid-to-late waves when heavy units and bosses appear. Once your layout merges incoming paths into a central kill corridor, upgrade splash turrets and repair critical wall segments to manage incidental damage from tough targets.

Free Battle Strategy: Tower Defense Codes
Current active codes and how to redeem them.

Emily Johnson
Emily writes practical mobile strategy guides with a focus on resource planning, base progression, and the early decisions that shape a long-term account.
COMMUNITY
Player Comments
72 players commented on this guide.
This helped me understand base building much better.
This guide answered the exact question I had.
I wish I had read this before upgrading the wrong thing.
Good guide for Battle Strategy: Tower Defense players. The base building part was useful.