
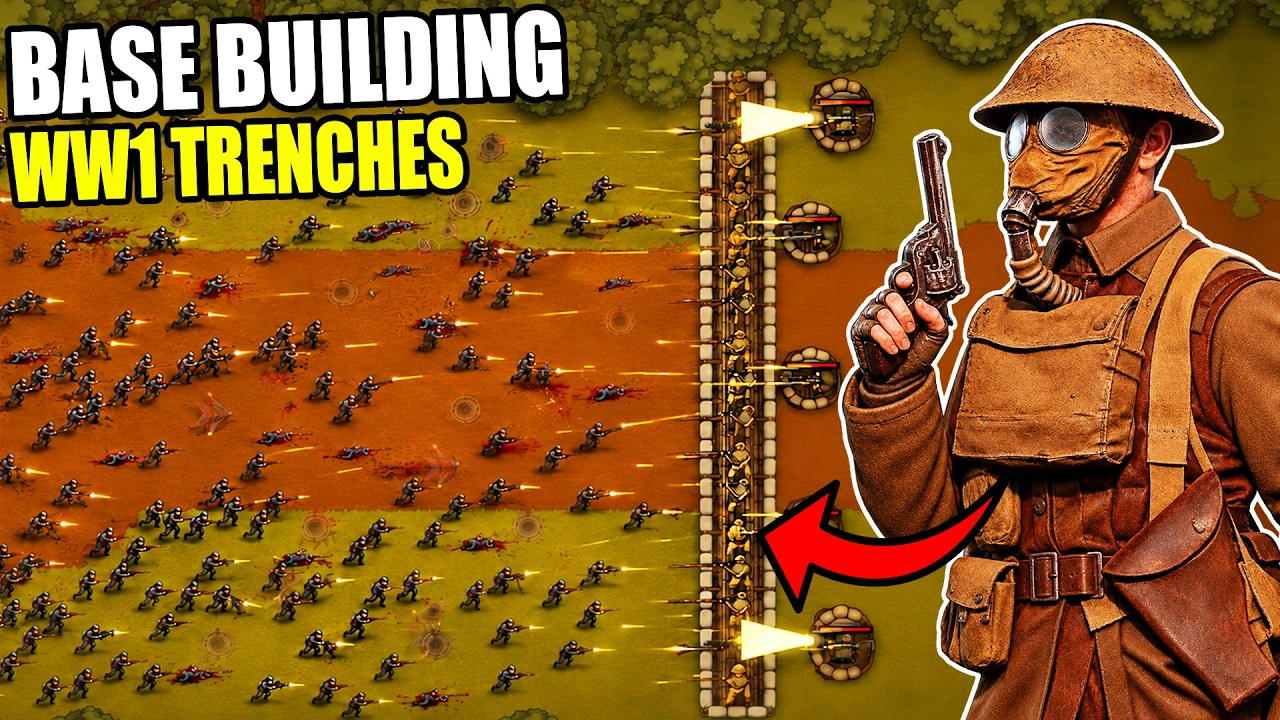
To survive fortress sieges in Trenchhold TD, replace single-line perimeters with segmented, two-tiered trench networks protected by angled barbed-wire funnels. Construct zigzagging forward trenches to contain explosive blast radiuses, anchor wire choke points with flanking machine guns to establish lethal crossfire, and place indirect mortar batteries behind secondary redoubts to shell advancing infantry without taking direct return fire.
Designing Layered Trench Networks and Zigzag Layouts
Linear trench lines fail during heavy sieges because a single localized breach exposes the entire defensive perimeter to enfilade fire and sweeping artillery barrages. Surviving massed infantry charges requires geometric trench architecture:
- Segment corridors into zigzags: Build short, angled traverses rather than straight ditches. Segmented corridors confine grenade and artillery blast radiuses to single sections, preventing enemy stormtroopers from firing down an entire line after entering a trench.
- Add forward firing steps: Angle firing steps toward No Man's Land so stationed riflemen can concentrate forward volleys while restricting attacking pathing within the ditch.
- Establish two-tiered defensive depth: Construct a frontline firing trench, connect it with perpendicular communication trenches, and dig a secondary reserve redoubt.
- Provide covered retreat routes: Communication trenches allow reinforcements to shift laterally and give frontline defenders a safe fallback route into the secondary line when artillery strikes land.
Funneling Enemies into Machine Gun Crossfire
Barbed-wire obstacles should channel charging waves into narrow kill zones rather than act as flat barriers across the map. Laying wire straight across your front delays waves uniformly, causing massive enemy clusters that inevitably break through a single trench section.
- Angle wire diagonally: Run wire bands diagonally across No Man's Land to herd advancing infantry toward designated choke corridors.
- Anchor the funnel with bunkers: Terminate wire funnels directly in front of recessed defensive positions to trap slowed troops at ideal weapon range.
- Position machine guns on the flanks: Place machine gun nests on the flanking wings of the wire funnel rather than pointing directly down the center. Frontal fire limits active shooting time because targets close distance head-on. Flanking guns generate an interlocking crossfire that cuts across the entire enemy formation, maximizing target uptime and suppressing multiple squads simultaneously.
Positioning Mortar Pits for Indirect Fire Support
Direct-fire weapons require clear lines of sight, leaving them vulnerable to counter-battery fire and frontline blast damage. Mortars launch high-trajectory high-explosive ordnance over obstacles, allowing them to operate from protected positions behind your secondary trenches.
Coordinate mortar targeting zones directly with barbed-wire funnels. Because mortar rounds suffer from flight travel time and projectile dispersion, firing at fast-moving targets in open terrain wastes valuable ammunition. When infantry clumps inside barbed-wire choke points, their reduced movement speed keeps them inside blast radiuses. Station frontline riflemen forward to provide continuous line of sight through smoke, ensuring rear batteries maintain targeting data during extended bombardments.
Managing Garrisons and Countering Trench Breaches
Preserving infantry manpower requires active rotation between defensive positions during heavy artillery strikes:
- Dodge incoming barrages: When warning markers or sirens indicate an incoming artillery salvo, pull frontline rifle squads back into communication trenches or fortified dugouts. Return troops to the firing steps immediately after the barrage lifts to meet charging ground forces.
- Cede breached forward ditches: If armored units or shock troops enter a frontline trench segment, do not commit infantry to close-quarters melee within the ditch. Fall back to the secondary redoubt to expose the occupied trench to rear-facing machine guns and pre-sighted mortar strikes.
- Counterattack and rebuild: Once crossfire clears infiltrating forces, send combat engineers forward to eliminate stragglers, repair damaged sandbag parapets, and rebuild severed wire entanglements before the next wave arrives.
Defensive Structure Roles and Construction Priorities
Investing evenly across structural tiers keeps your base prepared for changing wave compositions without exhausting construction supplies.
| Defensive Structure | Primary Tactical Function | Optimal Grid Placement | Critical Vulnerability / Counter |
|---|---|---|---|
| Barbed-Wire Entanglements | Slows infantry movement speed; channels pathing | Angled funnels in No Man's Land leading to kill zones | Crushed by heavy tanks; bypassable if unanchored |
| Machine Gun Nest | Rapid continuous fire; wipes bunched infantry | Flanking trench salients providing diagonal crossfire | Vulnerable to artillery shells and high-damage snipers |
| Mortar Pit Emplacement | Long-range indirect HE splash damage | Sheltered behind secondary trenches and redoubts | Blind at point-blank range; vulnerable to line breaches |
| Reinforced Pillbox | High-durability bunker housing heavy weapons | Core intersection points and primary breach angles | High building cost; fixed forward firing arc |
Begin matches by laying angled barbed-wire lines and forward machine gun posts to handle early infantry rushes economically. As enemy waves integrate armor and heavy artillery, invest surplus resources into rear mortar pits and concrete-reinforced pillboxes. Always maintain a reserve of building supplies during late waves to instantly patch broken wire and repair crumbled trench parapets.
Free Battle Strategy: Tower Defense Codes
Current active codes and how to redeem them.

James Brown
James focuses on Android gaming on PC, emulator setup, controls, performance tuning, and practical troubleshooting for longer play sessions.
COMMUNITY
Player Comments
87 players commented on this guide.
Good guide for Battle Strategy: Tower Defense players. The base building part was useful.
I tried this today and it worked better than my old setup.
I wish I had read this before upgrading the wrong thing.
Nice guide. I am checking the other Battle Strategy: Tower Defense articles next.