
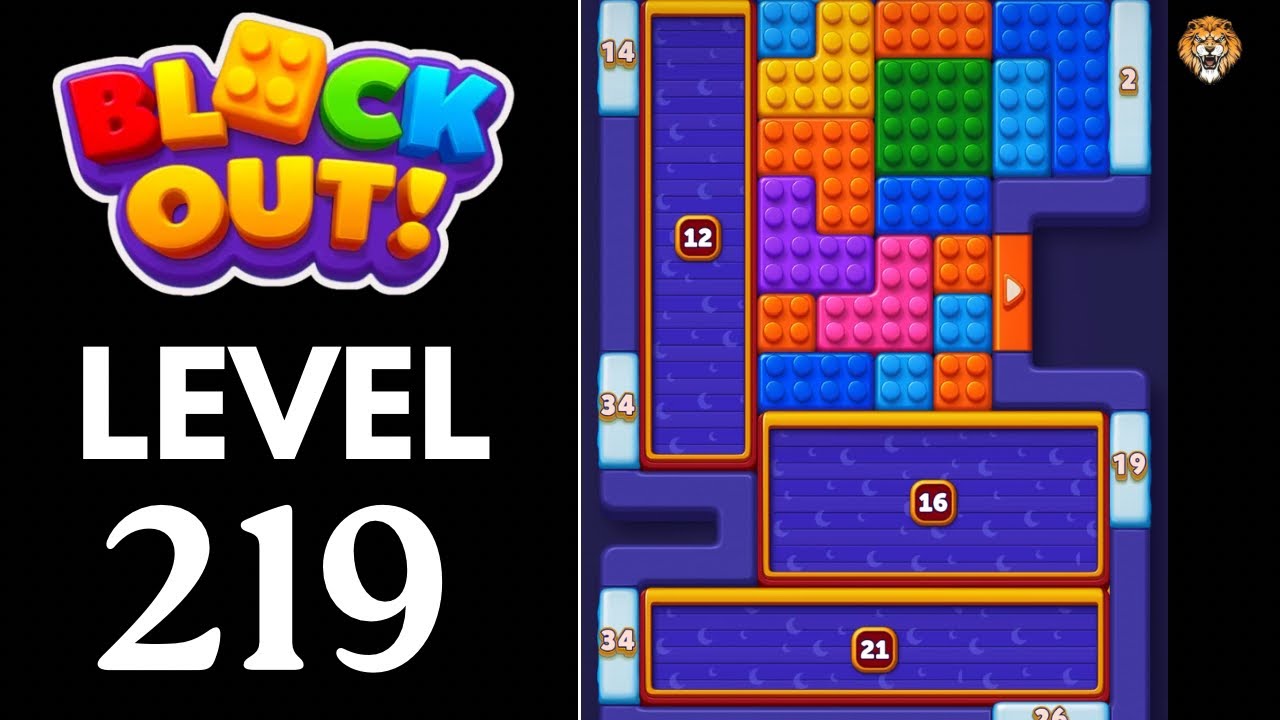
To beat Level 219 in Block Out without running out of moves, clear direct matches through the upper color gates immediately and keep at least two buffer tray slots open at all times. Level 219 locks players into deadlocks when off-color pieces are pulled into the staging dock without a clear exit path.
Understanding the Board Bottlenecks
The board layout in Level 219 features dense, vertically layered columns feeding into active upper exit gates. Key matching colors needed for the open gates are frequently buried beneath secondary blocker blocks that lack open exits.
The main failure point is the central column grouping. Tapping through a column without checking the underlying piece frequently shifts an unaligned color forward, cutting off lane movement.
| Board Element | Role in Level 219 | Tactical Rule |
|---|---|---|
| Active Color Gates | Accept matching blocks immediately | Clear matching surface blocks before touching any buried pieces |
| Buffer Tray / Dock | Holds staged blocks temporarily | Maintain at least two empty slots to absorb required staging steps |
| Layered Columns | Hide required colors beneath blocker blocks | Unpack only when the underlying piece can immediately exit |
| Secondary Blockers | Obstruct column lanes | Leave untouched until their corresponding exit gates become active |
Buffer Tray Management Rules
Your buffer tray acts as a holding dock with strict capacity limits. Sending an off-color block into the tray without an open gate keeps that slot occupied until its matching gate appears. If the dock fills with mismatched pieces, the run ends in an irreversible deadlock.
To protect your board state, separate every turn into one of two actions:
- Direct Routing: Move a surface piece that directly matches an open exit gate. This clears immediately, consuming zero net tray space.
- Targeted Staging: Move an obstructing piece into the tray solely to free a matching piece beneath it.
Only execute a staging move if the newly exposed block immediately exits into an active gate or pairs with a piece already in the tray. If a staging action fills your second-to-last open buffer slot without completing a clear, do not make that move. Switch to a lateral lane instead.
Step-by-Step Clearing Sequence
Execute your moves in three structured phases to dismantle the board safely:
1. Flush Direct Surface Matches
Scan the top row of every column for pieces that match the currently open exit gates. Clear all direct matches across peripheral and central lanes before tapping any trapped pieces. This clears clearance room and reveals mixed layers without taking up any buffer dock slots.
2. Stage Blockers to Unlock the Center
Once direct surface matches are exhausted, target the central columns containing the highest density of gate-ready pieces:
- Stage a single blocking piece into the tray only when the piece underneath directly matches an open gate.
- Funnel the uncovered piece into its exit gate.
- Avoid holding three distinct colors in the buffer tray simultaneously, as fragmented slots prevent further staging maneuvers.
3. Clear Remaining Stacks
As the column stacks thin and remaining gates open, route the remaining column tops into their exits. Use the pieces stored in your dock to finish matching sets as their gates become available, clearing the board without overfilling the tray.
Avoiding Common Failure Points
Two primary habits cause deadlocks on Level 219:
- Orphan block pulling: Tapping an isolated color into the tray in the hope of uncovering a useful piece underneath will clog your dock. Every staged piece must have an immediate, predictable clearance path.
- Tunnel vision on central stacks: Forcing moves in a stubborn central stack burns through buffer capacity rapidly. If uncovering a central piece requires filling two or more tray slots without an immediate match, check the outer lanes for alternate matches instead.
Emergency Recovery When Down to One Slot
If your buffer tray is reduced to its final empty slot, stop all exploratory tapping immediately and apply these recovery steps:
- Scan for tray matches: Check every exposed column surface for a color that matches a piece already sitting in your dock. Routing that surface piece completes the set, freeing up dock space.
- Execute a one-step trade: If no direct match is visible, locate a single blocking block that, when moved into the final dock slot, instantly exposes a piece that clears into an open gate.
- Reset if locked: If no single move can trigger an immediate exit to free a dock slot, the board is locked. Restart the level rather than committing additional resources.
Free Block Out Codes
Current active codes and how to redeem them.

Sarah Williams
Sarah specializes in RPG and collection games, explaining team building, character growth, and beginner-friendly ways to avoid expensive early mistakes.
COMMUNITY
Player Comments
132 players commented on this guide.
This helped me understand updates much better.
The tips are practical and easy to follow.
The explanation is clear, especially for beginners.
This saved me time in the early game.