
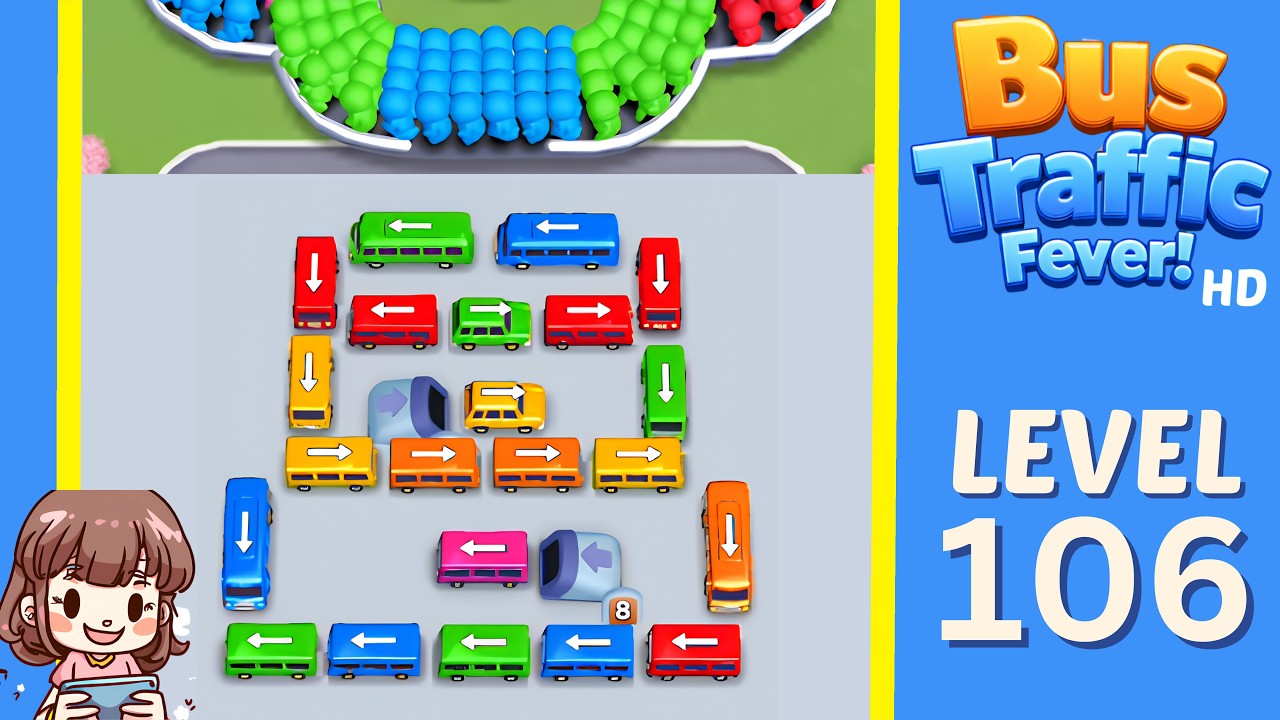
Level 106 in Bus Traffic Fever! is widely considered a "bottleneck" stage, where the game transitions from simple color-sorting to complex spatial management. The primary solution to clearing this level lies in prioritizing the central cluster over peripheral vehicles. Because the grid is highly interconnected, moving the wrong bus first will trigger an irreversible deadlock.
To solve Level 106, you must systematically dismantle the center lane to create maneuverability, utilize "holding lanes" to bypass color-sorting conflicts, and practice "batch clearing" to prevent gridlock as you approach the final moves.
Analyzing the Initial Grid Layout
In Level 106, the board is configured with a high-density cluster at the center. Unlike easier levels that allow for wide, sweeping movements, this layout forces you to manage limited "maneuver space."
The most common mistake players make is clearing the outer edge buses too early. This is a trap; the outer buses often serve as your "padding" or temporary storage. If you remove them first, you lose the ability to shift central buses into empty slots to change their orientation.
Pro-Tip: Identify the "Anchor Buses"—these are the vehicles positioned in the absolute center of the grid that block three or more other vehicles. Before making a single move, count how many paths a bus is obstructing. You must clear the bus with the highest obstruction count first to maximize the potential for subsequent moves.
Prioritizing Central Lane Clearance
The central lane is the "artery" of the board in Level 106. Because buses are color-coded to specific exits, the center frequently acts as the intersection where different color routes collide.
To clear this effectively, follow the "Pocket Clearing" method:
- Identify a Vacant Side Lane: Look for any perimeter lane that is entirely empty.
- Shift the Anchor: Move an obstructing bus into this vacant lane. This creates a "pocket" of empty space.
- Shuffle: Use this newly created empty space to shuffle buses that are currently locked behind one another.
- Exit Flow: Once a path to the exit is open, move the bus that has the most restricted movement potential first.
By prioritizing the central lane, you ensure that you aren't leaving "dead" buses in the middle of the board that cannot be moved later due to color-sorting requirements.
Managing Complex Bus Intersections
Level 106 features intersections where bus paths overlap. If you move a bus that is only at the beginning of its route, you will inevitably block a bus that is already halfway through its exit sequence.
When you reach an intersection, apply this hierarchy:
- Priority 1: The "Ready-to-Exit" Bus. Any bus that has a clear line to its destination should be moved immediately to open up space.
- Priority 2: The "Obstructor." If a bus is blocking two or more others, move it to a temporary holding lane (even if it isn't moving toward an exit yet).
- Priority 3: The "Filler." Buses that do not block any other vehicles should be moved last.
Following this logic prevents the "frozen board" state, where your remaining moves are technically possible but functionally blocked by poorly placed vehicles.
Avoiding Common Traps and Deadlocks
The most frequent cause of failure in Level 106 is the "Clogging Effect." This happens when you move a bus into a lane that effectively severs access to the rest of the board.
How to avoid it:
- Never commit to a one-way path: Before moving a bus, look at the potential move after that one. If your intended move leaves a bus trapped in a corner with no exit, do not take it.
- Reverse Movement: Remember that you can often move a bus backwards into a cleared starting area. If you find your forward progress is blocked, look to see if shifting a bus into a previously occupied starting zone can open up a new angle for your primary color-coded vehicles.
- The "One-Lane Rule": Always try to keep at least one lane completely clear of buses until you are in the final stage of the level. This lane acts as your "buffer" for moving pieces out of the way of others.
Sequencing for Maximum Efficiency
Efficiency is vital in Bus Traffic Fever! because every move counts toward your level completion score. "Batch clearing" is the most effective strategy for the mid-to-late stage of Level 106.
Once the center is cleared, do not move buses randomly. Group your movements by color. If you have three blue buses and two red buses left, prioritize clearing the blue cluster entirely. Clearing one color group completely often opens up a large enough section of the grid that the remaining buses can be moved without any further complex maneuvering.
Final Decision Logic for Level 106
If you find yourself stuck with the final three buses, use this checklist to force the win:
- Is there a "Free" lane? If yes, move a bus into it to realign the others.
- Is a bus blocking an exit? If yes, move the blocking bus, not the one trying to exit.
- Can I reverse? If you are truly stuck, look for a move that pulls a bus away from the exit to clear a path for a different color.
By focusing on the center-first strategy, maintaining a buffer lane, and batch-clearing by color, you will navigate the gridlock of Level 106 consistently. Remember that in Bus Traffic Fever!, patience and spatial planning are your most valuable tools. Always prioritize clearing the congestion in the middle, and the rest of the puzzle will naturally fall into place.

Free Bus Traffic Fever! Codes
Current active codes and how to redeem them.

James Brown
James focuses on Android gaming on PC, emulator setup, controls, performance tuning, and practical troubleshooting for longer play sessions.
COMMUNITY
Player Comments
88 players commented on this guide.
The tips are practical and easy to follow.
Good guide for Bus Traffic Fever! players. The strategy part was useful.
I tried this today and it worked better than my old setup.
This guide answered the exact question I had.