
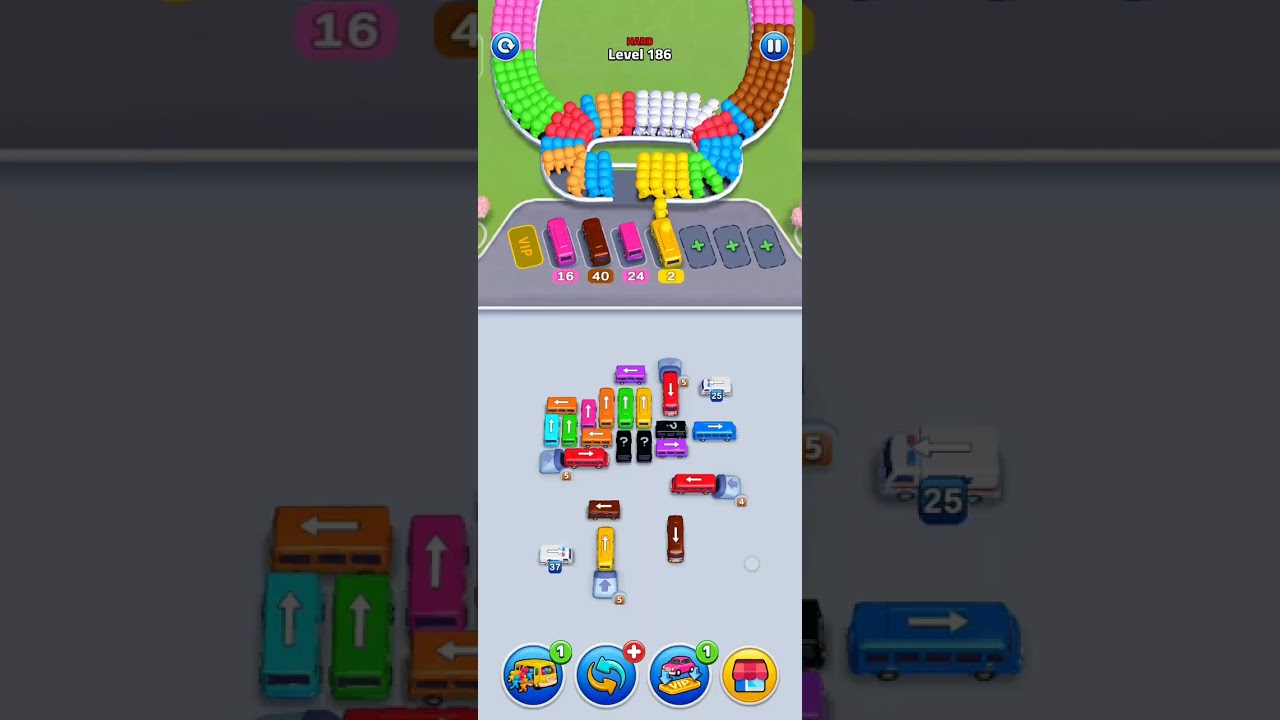
Level 186 in Bus Traffic Fever! is a classic "Hard" difficulty gatekeeper that tests your ability to visualize spatial relationships within a restricted grid. Unlike earlier levels where you can frequently clear buses based on convenience, Level 186 demands a calculated approach. To succeed, you must move away from the "clear anything that moves" mentality and adopt a strategy focused on identifying high-impact bottlenecks that unlock the rest of the board.
The Mechanics of "Hard" Difficulty in Bus Traffic Fever!
When a level is marked as "Hard," it is not just adding more buses; it is intentionally creating "trap" configurations. In Level 186, the developers have placed specific vehicles in positions where moving them early actually guarantees a failure state later.
The core mechanic here involves managing the "Traffic Cascade." Each bus you remove shifts the available parking spaces, meaning one move can either open up a lane or permanently block an exit path. Understanding that every move has a consequence is the first step toward mastering this level. You are not just solving a puzzle; you are managing a flow system where the exit lane is the final destination.
Step 1: Identifying Primary Bottlenecks
At the start of Level 186, ignore the buses that are easily accessible. This is the most common mistake players make. Instead, scan the board for the following:
- Terminal Blockers: Buses that sit directly in front of an exit lane and have no other path to move.
- The "Anchor" Bus: Look for the bus that, if moved, creates an immediate opening for two or more other vehicles.
- The "Dead Weight": Identify buses that, even if cleared, provide no utility for freeing up other vehicles. Leave these in place.
By prioritizing the "Anchor" buses over the "Terminal Blockers," you generate momentum. If you clear a Terminal Blocker before you have the infrastructure (empty lanes) to back it up, you often end up shuffling buses into a dead-end loop.
Managing Restricted Lane Flow
Level 186 features lanes that are extremely sensitive to congestion. If you move a bus from the center of a cluster, you effectively "choke" the lane, preventing any other movement from behind it.
To maintain flow, follow the Outer-to-Inner Rule:
- Clear the Perimeter: Start by moving buses on the edges of the grid. This creates a "buffer zone" of empty space.
- Peripheral Utility: Once the outer edges are clear, move inward. This allows you to slide center-clustered buses into the empty perimeter slots you just created.
- Avoid the "Trap" Zone: Never pull a bus into a lane if there is no immediate path for it to exit. If you move a bus into a spot where it blocks another, you are simply trading one problem for a larger one.
Strategic Decision-Making: When to Re-evaluate
Because this is a "Hard" level, the mid-game is where most players lose. As you clear the first layer of buses, the board will shift. Do not continue your initial strategy blindly. Every time you clear a significant cluster, pause.
Ask yourself: "If I move this bus, does it open a path to the exit, or does it push me into a wall?" If you are unsure, look for the move that creates the most open cells on the board. In Bus Traffic Fever!, empty space is your most valuable resource. Every empty cell increases the number of potential combinations you can execute, effectively lowering the difficulty of the remaining puzzle.
Common Mistakes to Avoid
- The "Early Exit" Fallacy: Moving a bus just because you can is a trap. If that bus doesn't help unlock a path for another, it is a wasted move that reduces your future options.
- Ignoring the Color-Sorting Clues: Even in parking challenges, look for color groupings. Often, the game designers place buses of the same color in positions that hint at the intended order of removal.
- Panic Tapping: When you are down to the last few buses, it is tempting to tap quickly. However, the end-game in Level 186 requires the most precision. A single mistap here can create a gridlock that is impossible to recover from.
The Final Clearing Sequence
As you approach the end of the stage, stop focusing on individual buses and start focusing on the "Exit Path." The final three or four buses are usually a test of your path-finding skills.
- Calculate the Exit Sequence: Determine which bus is the absolute furthest from the exit and start there. If you move the bus closest to the exit first, you often block the path for the buses behind it.
- Clear the Exit Path: Ensure that the final lanes are completely clear of any non-essential vehicles.
- Final Cleanup: Once the path is clear, move your buses in the order of their distance from the exit (farthest to nearest).
Expert Summary for Level 186
Level 186 is not a sprint; it is a tactical exercise in traffic management. By focusing on the "Anchor" buses and preserving empty spaces for as long as possible, you can dismantle even the most complex clusters. Remember that the "Hard" label is there to punish impatience. Slow down, prioritize the removal of vehicles that unlock the most space, and always keep your exit lanes clear of unnecessary clutter. With this disciplined approach, you will navigate through the congestion and secure your victory in Bus Traffic Fever!.

Free Bus Traffic Fever! Codes
Current active codes and how to redeem them.

Emily Johnson
Emily writes practical mobile strategy guides with a focus on resource planning, base progression, and the early decisions that shape a long-term account.
COMMUNITY
Player Comments
157 players commented on this guide.
Nice guide. I am checking the other Bus Traffic Fever! articles next.
The tips are practical and easy to follow.
I wish I had read this before upgrading the wrong thing.
This saved me time in the early game.