
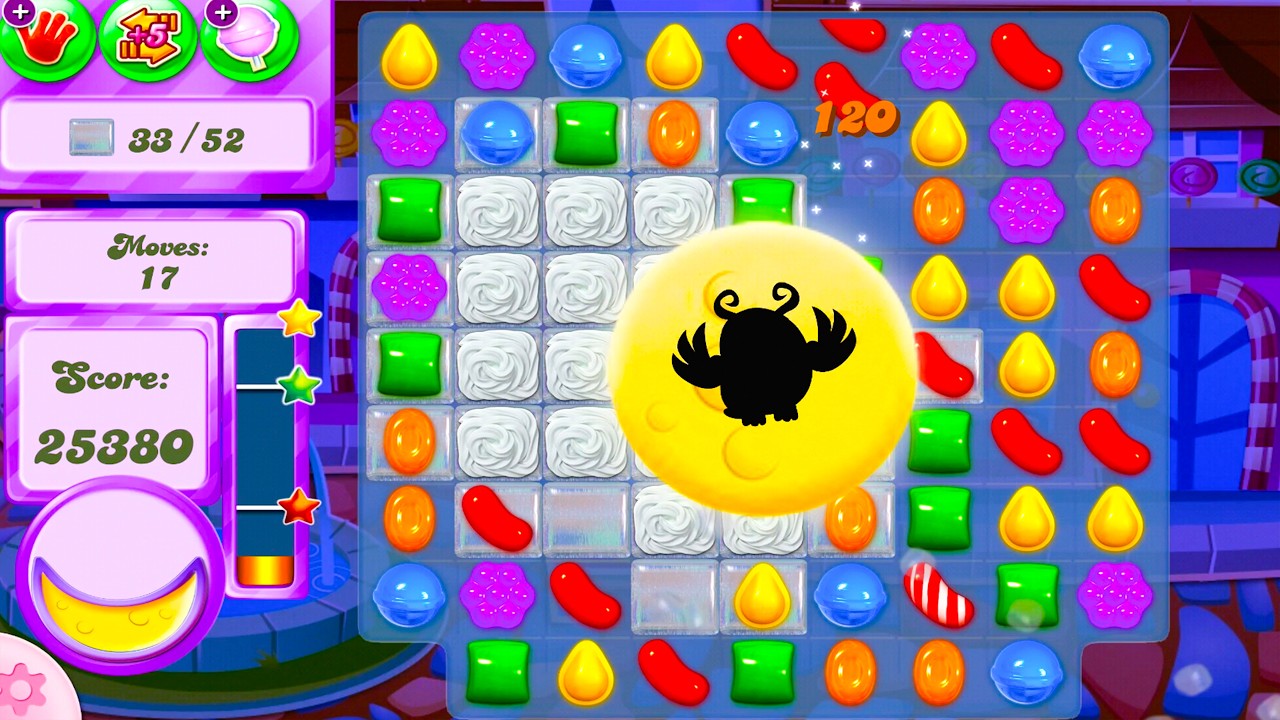
To beat classic Dreamworld levels in Candy Crush Saga, you must complete your standard board objectives while keeping Odus the Owl balanced atop his crescent perch. Every move must either maintain balance by clearing untracked colors or correct a tilted scale by matching the lighter perch color. If the scale tips too far to one side and that color is cleared again, Odus falls, causing an instant level failure regardless of how many moves remain.
How the Odus Scale Mechanic Works
Dreamworld designates two candy colors to Odus's perch, displayed on the left and right sides of the crescent moon scale. Clearing candies of either active color adds weight to that respective side, pushing the balance bar outward:
- Neutral Candies: Any candy color not displayed on the perch can be matched freely without shifting the balance.
- Perch Candies: A standard 3-candy match shifts the scale moderately, while 4-candy matches, 5-candy matches, and cascades cause aggressive tilts.
- Failure Condition: If the needle enters the danger zone on either side and you trigger another match of that dominant color, Odus drops and the game ends.
| Match Condition | Scale Impact | Risk Level | Tactical Action |
|---|---|---|---|
| Neutral Candy Match | No shift to balance needle | Safe | Make when the scale is tilted or fragile |
| Opposite Perch Color | Shifts needle back toward center | Low / Corrective | Use to pull the scale out of danger zones |
| Heavy Perch Color | Pushes needle farther to the edge | High | Avoid unless triggering Moon Struck |
| Color Bomb on Heavy Side | Removes all candies of dominant color | Fatal | Never match; causes immediate defeat |
Step-by-Step Priority to Prevent Odus from Falling
To prevent accidental tilts from uncalculated cascades, reverse standard bottom-board matching habits and evaluate the grid before every swap:
- Identify the Active Perch Colors: Note the two colors currently tracked on Odus's scale before looking at jellies, blockers, or ingredients.
- Evaluate the Balance Angle: If the needle leans in either direction, identify the opposite perch color or locate neutral matches to stabilize the board.
- Scan Columns Above the Swap: Look at the tiles directly above your intended match to confirm that falling cascades will not clear the heavier perch color.
- Make Moves in the Upper Half: When the scale sits near a danger zone, restrict swaps to the top rows of the grid. Higher matches minimize chain reactions, preventing secondary collapses.
Timing and Maximizing the Moon Struck Phase
Matching perch colors gradually fills the circular moon meter behind Odus. When the meter reaches full capacity, Odus flies upward and activates the Moon Struck phase:
- Mechanic Pause: The balance scale is temporarily disabled for a designated turn count. Odus cannot fall while Moon Struck is active.
- Color Removal: Both perch colors are entirely removed from the board, significantly reducing the candy pool.
- Natural Cascades: With fewer colors in play, automatic matches, 4-candy stripes, and Color Bombs form frequently through cascades.
Use this window to attack hard-to-reach level requirements:
- Break Protected Blockers: Target corner jellies, multi-layered frosting, and chocolate that are otherwise too risky to clear during balanced play.
- Detonate Pre-set Specials: If possible, create Wrapped or Striped candies just before filling the moon meter. Detonating them during Moon Struck sweeps large sections of the board safely.
- Pause Before the Reset: When the Moon Struck turn counter ends, Odus returns to his perch and randomly selects two new colors. Stop rapid matching immediately and check the new assignments before making your next swap.
Managing Objectives and Special Candies
Because Dreamworld requires completing regular goals under Odus's constraints, adjust how you handle board elements and special candies:
- Ingredient Drops: Avoid firing vertical Striped candies directly under an ingredient if that column clears a large cluster of the overloaded perch color. Instead, use horizontal Striped candies across neutral rows to drop ingredients down gradually.
- Edge and Corner Jellies: Clear isolated corner jellies early while the scale is centered, or leave them for the Moon Struck cascade phase to avoid getting forced into fatal moves later.
- Color Bombs: Only match a Color Bomb with the lighter perch color to reset an uneven scale, or with a neutral color. Matching a Color Bomb with the dominant perch color removes every instance across the board, instantly knocking Odus off the scale. The only exception is when that match collects enough candies to fill the moon meter on that exact turn, as activating Moon Struck bypasses the fall check.
- Wrapped Candies: Avoid detonating Wrapped candies in the bottom rows during regular play. Their two-stage 3x3 blast creates erratic secondary drops that frequently trigger fatal cascades. Detonate explosive specials strictly within the center of the board or during Moon Struck.

Free Candy Crush Saga Codes
Current active codes and how to redeem them.

Sarah Williams
Sarah specializes in RPG and collection games, explaining team building, character growth, and beginner-friendly ways to avoid expensive early mistakes.
COMMUNITY
Player Comments
154 players commented on this guide.
This guide answered the exact question I had.
I wish I had read this before upgrading the wrong thing.
This saved me time in the early game.
Can you add more details about strategy in a future update?