
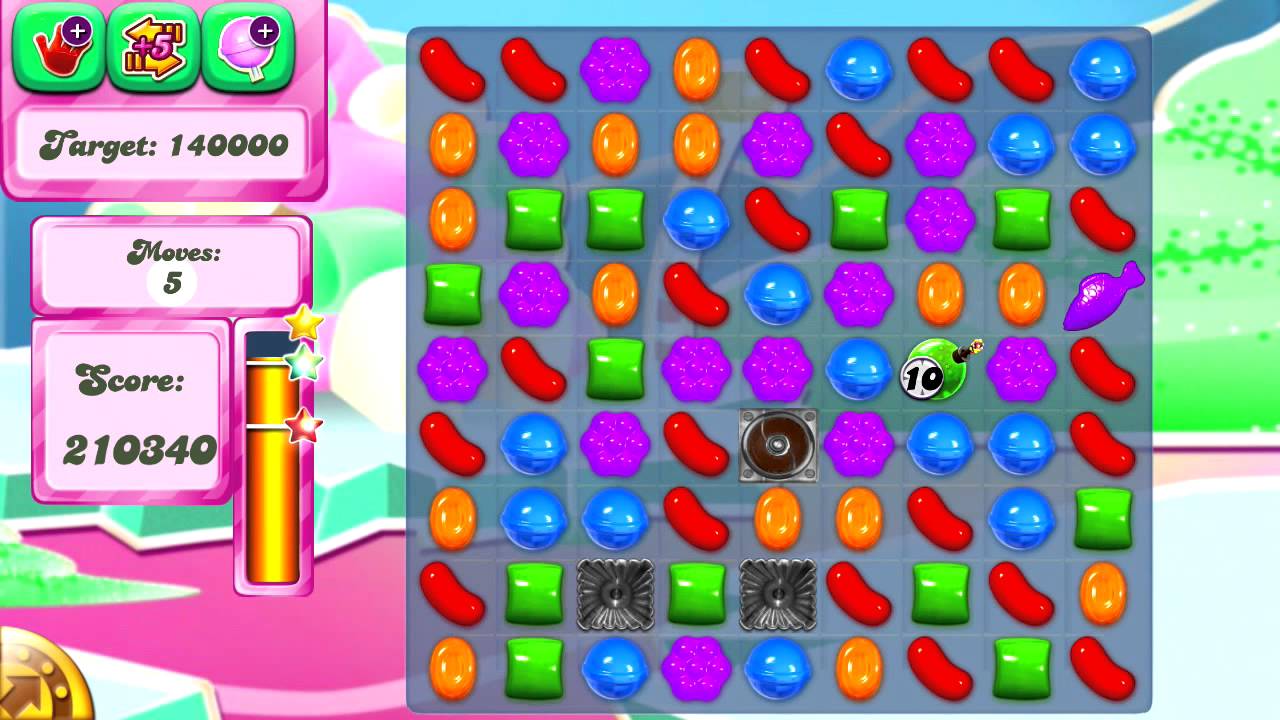
Level 14 of Candy Crush Saga serves as a foundational "test" level that forces players to stop playing for the center and start thinking about board geometry. Unlike earlier stages that can be cleared with random matches, Level 14 requires a disciplined approach to vertical space and gravity manipulation.
To succeed, you must move away from the habit of matching candies in the top half of the board. Because of the way candies fall in Candy Crush Saga, the bottom rows are the engine room of your board. By focusing your efforts there, you generate "cascades"—automatic matches that occur as candies shift to fill empty spaces—which are essential for clearing jellies without wasting your precious, limited moves.
Mastering the Bottom-Up Clearing Strategy
The most common mistake players make in Level 14 is attempting to clear the board from the top down. While this might look cleaner, it is mathematically inefficient.
When you make a match at the top, the candies below remain stagnant. However, when you clear a match at the bottom, you force every single candy above that match to drop. This massive shift in the board state significantly increases the probability of accidental matches forming. In professional Candy Crush Saga play, we refer to these as "free moves."
Why this works:
- Gravity Advantage: Every candy you remove from the bottom creates a vacuum that pulls new candies into the play area, increasing the variety of colors and potential combinations.
- Corner Vulnerability: The jellies in the bottom corners are often the hardest to clear. By keeping the bottom rows active, you ensure that candies are constantly cycling through these difficult zones.
Leveraging Cascading Matches for Maximum Efficiency
Cascades are the secret to earning three stars and passing levels with high move counts remaining. In Level 14, you should constantly look for "potential energy"—board setups where one move will cause a chain reaction.
To trigger consistent cascades:
- Vertical Alignment: Prioritize moves that clear a vertical column. This forces four or more new candies to drop simultaneously, which is much more likely to trigger a cross-match than horizontal clearing.
- Avoid Top-Heavy Play: Unless a top-row match is the only way to clear a specific jelly, ignore it. Horizontal matches in the top third of the board rarely result in helpful downward shifts.
- Pause and Scan: After a cascade happens, wait for the animation to finish completely before making your next move. Rushing often causes you to miss a "free" match that the game just handed you.
Strategic Move Management
Candy Crush Saga Level 14 is a move-limited stage. You must treat your moves as a finite resource, similar to currency. Every turn must provide a return on investment.
If you find yourself in the final five moves, the "strategy" phase ends and the "clean-up" phase begins. At this point, stop trying to set up complex combos. If a match is available that clears a jelly, take it—even if it seems like a sub-optimal move. Many players lose Level 14 because they spend three moves trying to build a Special Candy when they could have simply matched the three jellies directly.
Identifying and Resolving Board Bottlenecks
Bottlenecks are areas of the board where jellies are trapped behind non-jelly candies or in isolated corners. These are the primary reason for failure on this level.
If you see a jelly in an isolated corner that has remained untouched for several turns, you must immediately prioritize it. The longer a corner jelly sits, the more likely it is that you will "seal it off" by matching all the candies around it, effectively turning it into a dead zone that requires a Color Bomb or Striped Candy to clear. Keep the center columns flexible; if you empty the center too quickly, you lose the ability to shift candies into those side columns.
Using Special Candies Effectively
Special candies are powerful tools, but they are frequently misused by novice players. In Level 14, the Striped Candy is your most valuable asset.
- The Striped Candy: Created by matching four candies in a row, a Striped Candy can clear an entire row or column. Use this to clear a column that has two or more stubborn jellies.
- The "Cost" Calculation: Before creating a special candy, ask yourself: How many moves will this take to build? If it takes three moves to build a Striped Candy that clears two jellies, you have effectively traded three moves for two. That is a losing trade. Only build special candies if they can be created using moves that are already helping you clear jellies, or if they are necessary to reach a bottleneck that is otherwise impossible to clear.
Common Mistakes to Avoid
- Chasing "Shiny" Combos: Do not get distracted by the potential to make a massive combo if it doesn't align with clearing your jelly objectives.
- Clearing the Top Rows First: This is the fastest way to run out of moves. Always work from the bottom to generate momentum.
- Ignoring the Clock/Move Counter: Stay aware of how many moves you have left. If you are under 10 moves, start taking every match that clears a jelly, regardless of whether it triggers a cascade.
By focusing your play on the bottom of the board and valuing move efficiency over flashy combinations, you will clear Level 14 consistently. Remember: the board is a system. If you manipulate the bottom, the rest of the board will fall into place.
Free Candy Crush Saga Codes
Current active codes and how to redeem them.

Emily Johnson
Emily writes practical mobile strategy guides with a focus on resource planning, base progression, and the early decisions that shape a long-term account.
COMMUNITY
Player Comments
122 players commented on this guide.
The tips are practical and easy to follow.
This saved me time in the early game.
Can you add more details about strategy in a future update?
This guide answered the exact question I had.