
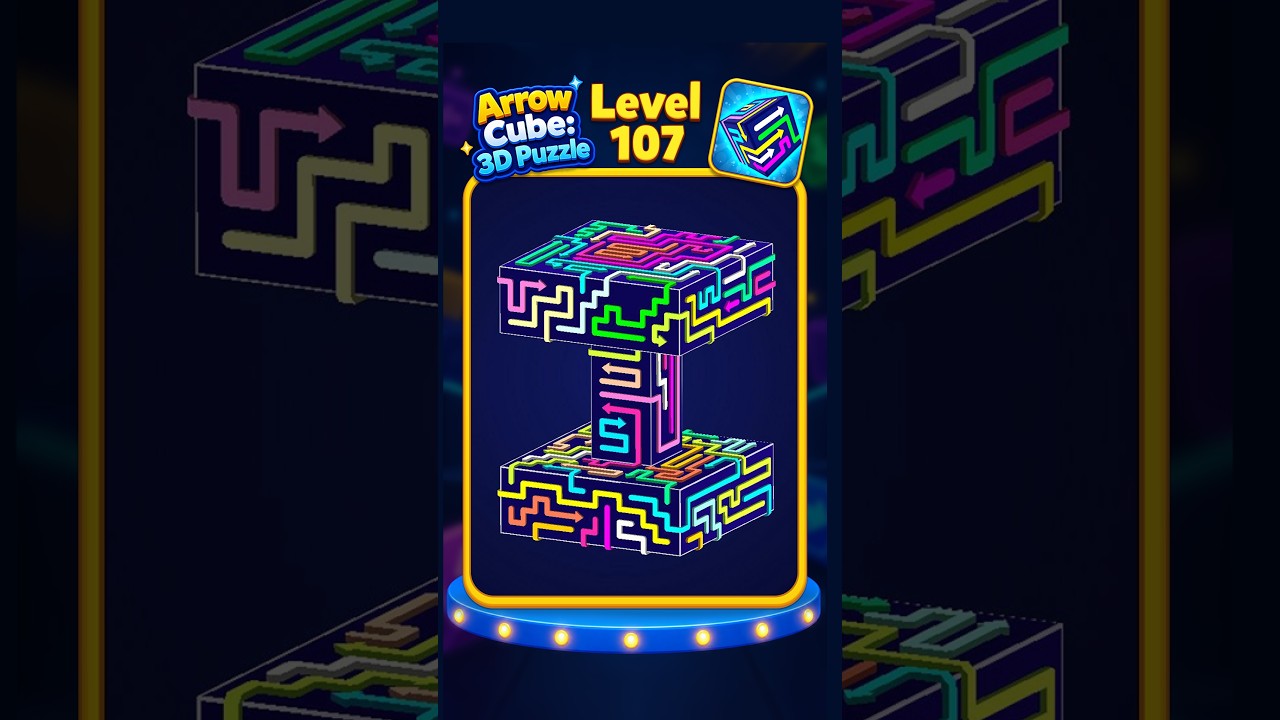
To clear Level 107 in CubeAway, dismantle the wide horizontal slabs at the top and bottom before tapping blocks in the narrow vertical stem. The stage's capital "I" layout creates tight junctions where inward-pointing blocks collide directly into the central spine. Peeling the outward-facing perimeter arrows off both wide platforms opens clean escape paths, leaving the central column exposed for a straightforward clear.
Level 107 Structure and Clearing Priority
Level 107 consists of two wide, flat rectangular slabs connected by a slender column running through the center. The cantilevered edges of both slabs hang over empty space, providing clear launch trajectories for exterior arrows. In contrast, blocks closer to the center column are trapped behind these outer frames.
To clear the formation without causing collisions, follow this sequence:
- Top and Bottom Outer Wings: Rotate the camera to inspect the outer perimeter of both wide slabs. Tap all arrows pointing directly outward into empty space.
- Concentric Slab Layers: As the outer frame disappears, tap the newly exposed sideways-facing arrows to peel the slabs inward toward the center.
- Slab-to-Stem Junctions: Remove the remaining blocks anchored against the column once their exit paths are no longer blocked by slab edges.
- Central Column: Clear the exposed vertical and lateral arrows along the central spine from top to bottom.
| Puzzle Section | Arrow Orientation Priority | Primary Collision Risk | Safe Clearing Condition |
|---|---|---|---|
| Top Slab Wings | Outward / Upward | None (faces open space) | Immediate at stage start |
| Bottom Slab Wings | Outward / Downward | None (faces open space) | Immediate at stage start |
| Slab-to-Stem Joints | Horizontal inward | Adjacent slab blocks | Only after outer wings are removed |
| Central Column | Lateral / Vertical | Overhanging slab sections | After horizontal slab corridors are empty |
How to Clear the Central Vertical Stem
Once both horizontal caps are stripped down to their connection points, the central pillar becomes your primary target. The stem consists of stacked arrow blocks oriented in alternating vertical and lateral directions. Because the column has a narrow footprint, lateral blocks require fully vacant horizontal corridors to fly off-screen.
- Remove the crest blocks: Tap the upward-facing arrows at the top of the column to open vertical line-of-sight down the spine.
- Clear lateral rows top-down: Rotate the puzzle horizontally to locate sideways-pointing blocks. With the wide slabs gone, these blocks have unobstructed escape routes across the screen.
- Clear alternating layers: Removing each lateral row reveals the orientations of the blocks beneath it, allowing you to systematically work down to the base.
Camera Angles and Collision Checks
Recessed corners where the vertical stem meets the horizontal slabs create visual blind spots. Inward-facing arrows can appear clear from static angles while still being obstructed by the opposite wall.
- Check angles at 45 degrees: Tilt the view downward at an angle to confirm whether an arrow pointing toward the interior has a clear path through an already emptied space.
- Rotate 180 degrees after a failed tap: If a tapped block twitches and fails to launch, immediately spin the puzzle to identify the blocking cube directly behind it.
- Maintain top-and-bottom balance: Avoid stripping the top slab entirely while leaving the bottom slab untouched. Clearing both ends concurrently prevents the base from restricting camera angles during the later stages of the puzzle.

Free CubeAway Codes
Current active codes and how to redeem them.

Michael Smith
Michael covers live-service games, events, reward systems, and efficient daily routines, turning frequent updates into clear actions for players.
COMMUNITY
Player Comments
35 players commented on this guide.
The tips are practical and easy to follow.
Good guide for CubeAway players. The strategy part was useful.
I tried this today and it worked better than my old setup.
This saved me time in the early game.