
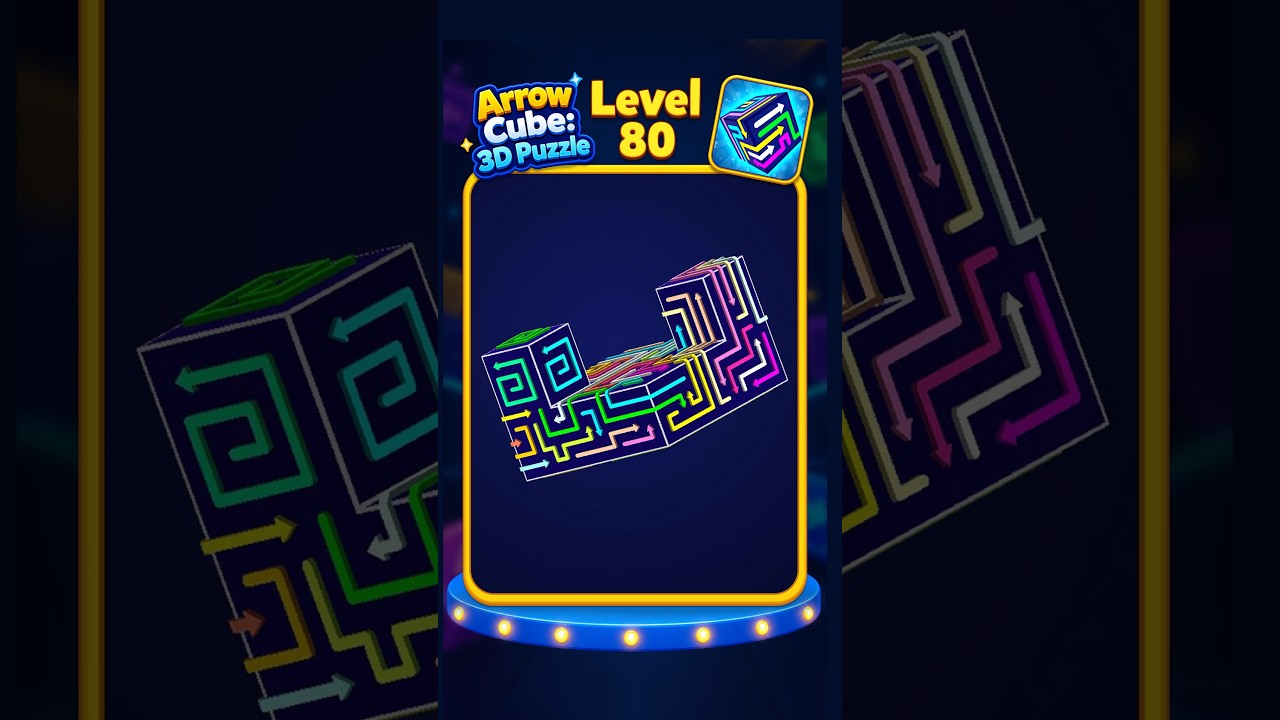
To clear Level 80 in CubeAway, peel the unblocked outer arrows from the right upright tower and base bridge before touching the left tower. The stage forms an asymmetric U-shape with an interlocking twin spiral occupying the left column. Tapping the free perimeter blocks first creates the open flight paths needed to dismantle both spirals without triggering collisions.
---
Level 80 Structural Layout and Removal Order
Level 80 consists of two vertical towers connected by a horizontal lower bridge. While the right tower is composed of single-layer, outward-facing blocks, the left tower features two intertwined spirals where each cube points toward an adjacent neighbor. Inner cubes cannot launch until the outer layers clear.
| Puzzle Section | Primary Obstacle | Clearance Priority |
|---|---|---|
| Right Tower | Outward-facing exterior blocks | Clear first to open sightlines |
| Base Bridge (Outer) | Downward-pointing edge arrows | Clear alongside the right tower |
| Left Tower (Outer Spiral) | Interlocked blocks wrapping corners | Clear second, starting from the lead arrow |
| Left Tower (Inner Spiral) | Blocked flight paths behind outer shell | Clear third, cascading from top to base |
| Base Bridge (Inner/Core) | Pinned beneath tower trajectories | Clear last, working left to right |
---
Step-by-Step Solving Sequence
1. Strip the Exterior Perimeter
Rotate the puzzle horizontally to locate blocks with clear flight paths into empty space.
- Tap all cubes on the right upright tower that face upward, rightward, or backward away from the center mass.
- Remove downward-facing arrows along the bottom rim of the connecting bridge.
- Stripping these pieces clears visual clutter and opens view corridors into the base of the left tower.
2. Dismantle the Left Tower Outer Spiral
The left tower contains two intertwined spirals. Tapping the inner spiral early causes an immediate collision because its exit paths remain obstructed.
- Rotate the camera to a three-quarter angle facing the left tower.
- Locate the lead arrow near the top exterior rim that points outward into open air rather than into an adjacent cube.
- Tap the lead arrow to open the flight path for the cube behind it.
- Follow the spiral path inward, tapping each subsequent arrow only after its preceding blocker has departed.
3. Clear the Inner Spiral
Once the outer wrap is gone, the inner core becomes accessible.
- Begin at the newly exposed top edge of the inner spiral.
- Work downward block by block toward the base, treating the remaining column as a reverse cascade.
- Never tap an inner arrow if any piece of the outer shell still intersects its trajectory.
4. Clear the Bridge and Inward-Facing Blocks
With the left tower eliminated, the central void is fully open.
- Tap the remaining horizontal bridge blocks from left to right. Working in this direction ensures that blocks moving rightward do not crash into remaining structural anchors.
- Remove any lingering right-tower blocks that point inward toward the now-empty bridge space.
---
Camera Angles and Key Failure Points
A flat, front-facing view conceals critical alignments in the twin spirals. Tilt the camera upward at roughly 45 degrees to track the top rims of both towers, and rotate to the rear to confirm exit trajectories before tapping.
The primary failure point on Level 80 occurs when attempting to clear downward-pointing arrows in the left tower while the horizontal bridge remains fully populated. Descending spiral blocks will collide with the bridge below if their flight paths are not completely open. Ensure the perimeter and relevant base clearance steps are finished before triggering downward cascades.

Free CubeAway Codes
Current active codes and how to redeem them.

Sarah Williams
Sarah specializes in RPG and collection games, explaining team building, character growth, and beginner-friendly ways to avoid expensive early mistakes.
COMMUNITY
Player Comments
133 players commented on this guide.
Nice guide. I am checking the other CubeAway articles next.
This helped me understand base building much better.
The tips are practical and easy to follow.
Can you add more details about base building in a future update?