
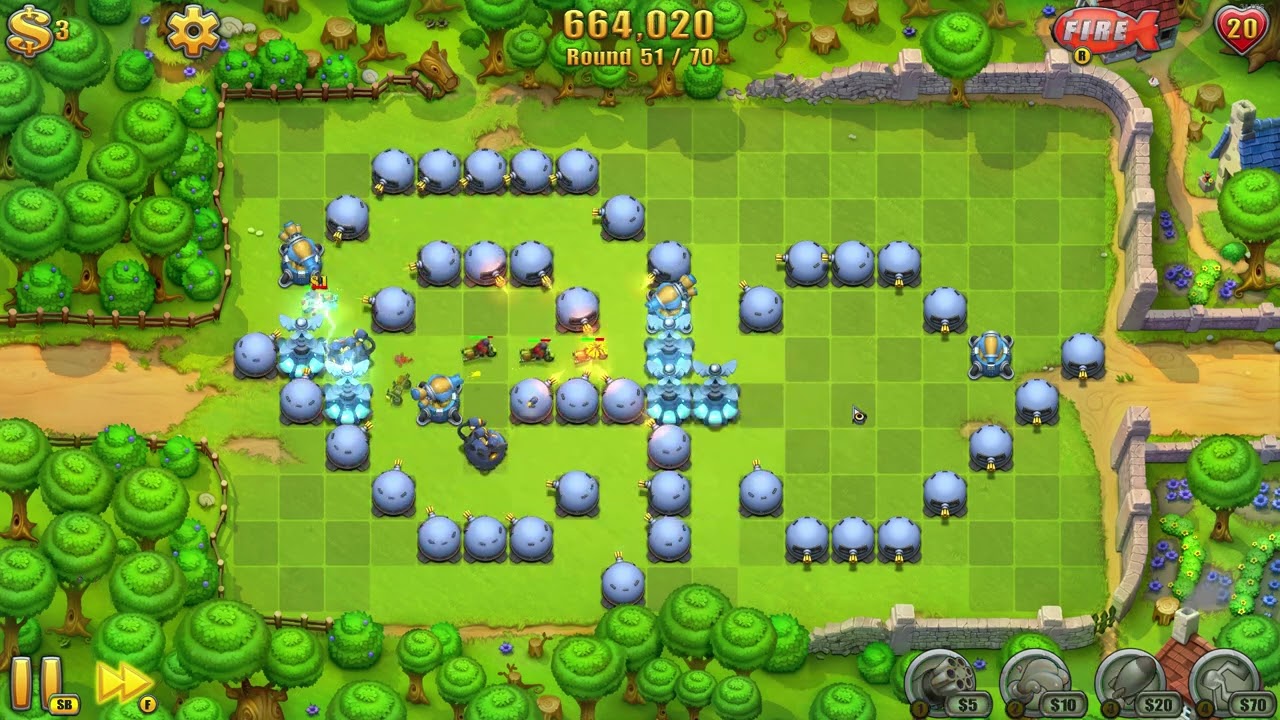
To clear Home On Derange on Heroic difficulty with a flawless 20-heart score using only starter towers, construct an additive serpentine maze across the open field using Gatling, Glue, Mortar, and Missile towers. Because this challenge forbids selling towers and using consumable inventory items, every placed tower must serve as a permanent boundary wall or a dedicated damage anchor throughout the entire run.
Starter Tower Roles and Upgrade Priorities
Without specialty towers or emergency consumables, your four base towers must fulfill all crowd-control, splash, and anti-air responsibilities.
| Tower | Primary Function | Placement Priority | Upgrade Priority |
|---|---|---|---|
| Gatling Tower | Maze walls, early ground routing, chip anti-air | Perimeter borders and lane dividers | Low early; upgrade selectively late |
| Glue Tower | Slowing choke points and grouping swarms | Turn corners and parallel path intersections | High (bring to Level 2 and Level 3 early) |
| Mortar Tower | Heavy ground splash damage against grouped targets | Central interior to cover multiple lanes | Highest priority during mid-game waves |
| Missile Tower | Tracking anti-air and heavy single-target armor damage | Central spine for full 360-degree sky coverage | High (fully upgrade 2–3 towers before late waves) |
Opening Maze Layout
- Establish the initial lane: Place low-cost Level 1 Gatling towers near the center-left enemy spawn to begin an S-curve corridor. Do not spend cash upgrading Gatlings to Level 3 early in the run, as path length provides more survival buffer than single-target burst damage.
- Anchor the first turn: Place a Glue tower directly at the first corner of your S-curve. Slowing lead units at the bend forces trailing infantry into dense packs.
- Extend the ground track: Add alternating columns of Gatling towers to force incoming enemies to walk outward toward the edges of the grassland before heading back toward the exit.
Mid-Game Expansion and Upgrades
As faster runners and armored vehicles begin spawning, widen the track and transition cash into artillery:
- Double-dip slow zones: Upgrade central Glue towers to Level 2 and Level 3 where two parallel paths run side by side. A single upgraded Glue tower placed between parallel paths coats enemies on both their outgoing and return loops.
- Deploy Mortars in the core: Position Mortar towers within range of your primary Glue slow zones. Mortar shells move slowly and will miss fast targets unless those enemies are trapped in a slow field.
- Maintain a central kill zone: Avoid placing heavy crowd-control towers near the exit. Keep the highest concentration of slow fields and Mortar splash near the map's center to eliminate waves while they still have maximum track left to walk.
Late-Game Armor and Air Defense
The final waves deploy heavily armored tanks alongside high-health planes and blimps. Because flying units ignore your ground maze and travel directly toward the base, prepare your defenses before these waves spawn:
- Maximize 2 to 3 Missile towers: Position these along the central midline. Fully upgrade them to Level 3 so their tracking rockets engage incoming air targets across the entire skybox.
- Sustain Level 3 Mortar fire: Keep your central Mortars at maximum rank to continuously strip health from dense clusters of tanks and heavy ground units slowed by your Glue network.
- Add Gatling anti-air chip damage: Upgrade key Gatling towers situated directly underneath the straight-line flight paths to Level 3. Their rapid fire assists your Missile towers in dropping heavy air units before they cross the goal line.

Free Fieldrunners 2 for iPad Codes
Current active codes and how to redeem them.

Emily Johnson
Emily writes practical mobile strategy guides with a focus on resource planning, base progression, and the early decisions that shape a long-term account.
COMMUNITY
Player Comments
61 players commented on this guide.
This saved me time in the early game.
Good guide for Fieldrunners 2 for iPad players. The heroes part was useful.
I wish I had read this before upgrading the wrong thing.
I tried this today and it worked better than my old setup.