
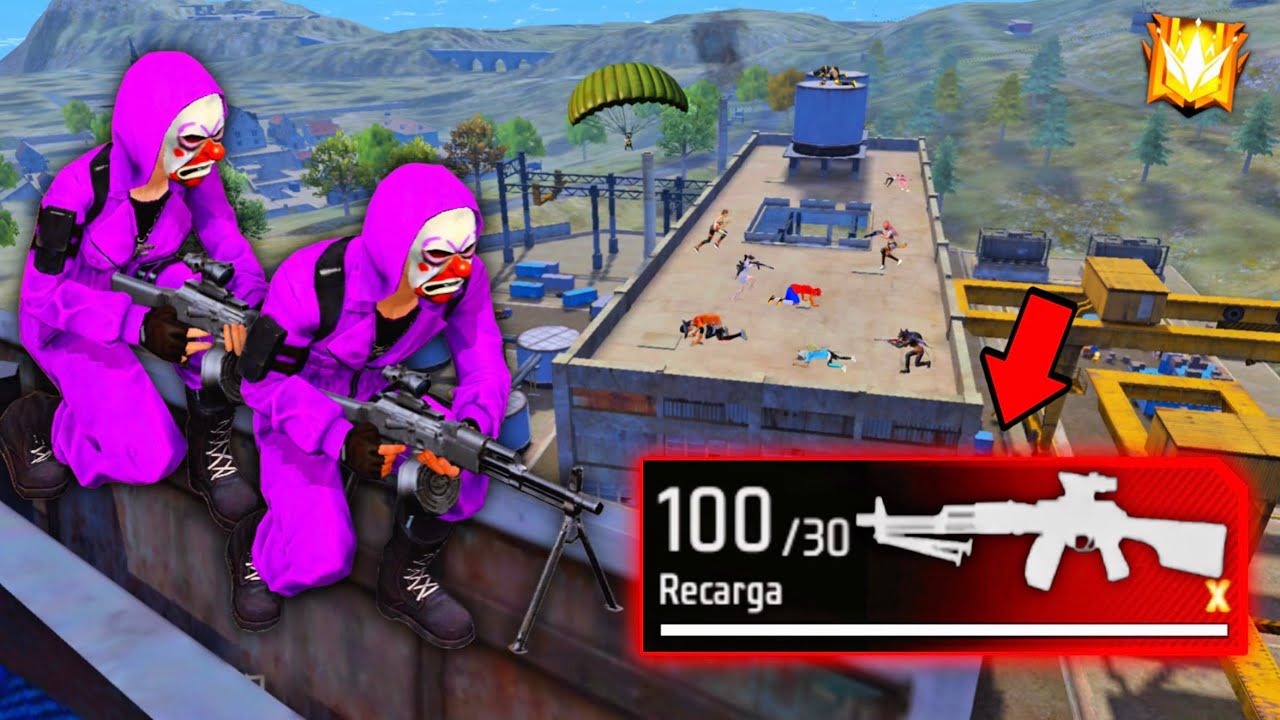
To play effectively with the RPK machine gun in Free Fire, switch from aggressive rushing to stationary, defensive zone control. The weapon offers high base damage and a large default magazine, but it sharply reduces your sprint and aim-down-sights mobility while kicking heavily during prolonged automatic fire. Win matches by securing elevated compounds early, managing high ammunition consumption, and exploiting the weapon's continuous firepower to break enemy Gloo Walls.
Weapon Strengths and Handling Trade-offs
The RPK functions as a sustained-suppression light machine gun rather than a run-and-gun assault rifle. While weapons like the SCAR or M4A1 rely on balanced mobility and frequent reloads, the RPK locks down lanes through sheer bullet volume.
| Weapon Trait | RPK Profile | Gameplay Application |
|---|---|---|
| Damage | High per bullet | Punishes enemies caught crossing open terrain |
| Magazine Capacity | Very high | Destroys cover without pause for reloads |
| Mobility | Heavy and slow | Ineffective in sprint duels; requires pre-aiming from cover |
| Recoil | Expands with prolonged fire | Requires crouching or 4–6 round burst pulses to steady |
Because the weapon's recoil spread widens after the first few shots, avoid holding down the trigger while running. Always drop into a crouch behind solid cover to tighten the cone of fire before initiating a medium-range spray.
Essential Loot Priorities
Fielding the RPK requires a dedicated inventory setup focused on ammunition reserves and defensive utility:
- Rifle Ammunition: Carry a minimum reserve of 200 to 250 rounds. Sustained suppression and barrier destruction quickly drain standard magazine counts.
- Gloo Walls: Secure four to five Gloo Walls to construct emergency barriers, block grenade trajectories, and patch exposed angles.
- Armor and Repairs: Equip Level 3 armor and repair kits to sustain trades while holding stationary sightlines.
Holding High Ground and Chokepoints
The RPK is least effective inside cramped rooms where fast-firing submachine guns and shotguns dominate. Instead, set up in elevated, semi-open positions located inside the initial safe zone boundary:
- Claim elevated structures: Anchor rooftops, two-story house balconies, or high rocky ridges overlooking primary rotation paths.
- Use third-person peeking: Stand behind solid structural walls rather than thin railings, rotating the camera to track enemy squad movements without exposing your hitbox.
- Engage in open transitions: Wait until enemies commit to crossing bridges, open fields, or narrow valleys before firing. Sustained fire eliminates targets before they can reach the next piece of cover.
Countering Rushers and Shredding Gloo Walls
The RPK's core combat strength is its ability to melt deployed Gloo Walls. When an opponent drops an ice barrier to heal or revive a downed teammate, do not pause your assault. Maintain continuous fire directly into the center of the wall. The high-capacity magazine will demolish the barrier in seconds, catching the sheltering player exposed and low on health.
If aggressive opponents push your compound with close-range weapons like the MP40:
- Do not backpedal while hip-firing. The RPK's low handling speed makes un-aimed retreat unreliable.
- Place a defensive Gloo Wall to stall the push.
- Step to the side, crouch to stabilize your spread, and pre-fire the chokepoint as the enemy rounds the corner.
Late-Zone Rotation Strategy
Because the RPK reduces character movement speed, trailing behind the closing boundary will leave you vulnerable to faster squads and sniper fire. Rotate toward the center of the upcoming safe zone well before the blue zone contracts, securing a durable boulder or concrete building ahead of the lobby.
Once established in the final circles, exercise trigger discipline. Firing the RPK alerts all remaining players to your bunker position. Let competing squads engage each other first, then crouch and unleash continuous fire to eliminate survivors as the shrinking boundary forces them out of cover.
Free Free Fire Codes
Current active codes and how to redeem them.

Emily Johnson
Emily writes practical mobile strategy guides with a focus on resource planning, base progression, and the early decisions that shape a long-term account.
COMMUNITY
Player Comments
122 players commented on this guide.
The explanation is clear, especially for beginners.
I tried this today and it worked better than my old setup.
Good guide for Free Fire players. The strategy part was useful.
This saved me time in the early game.