
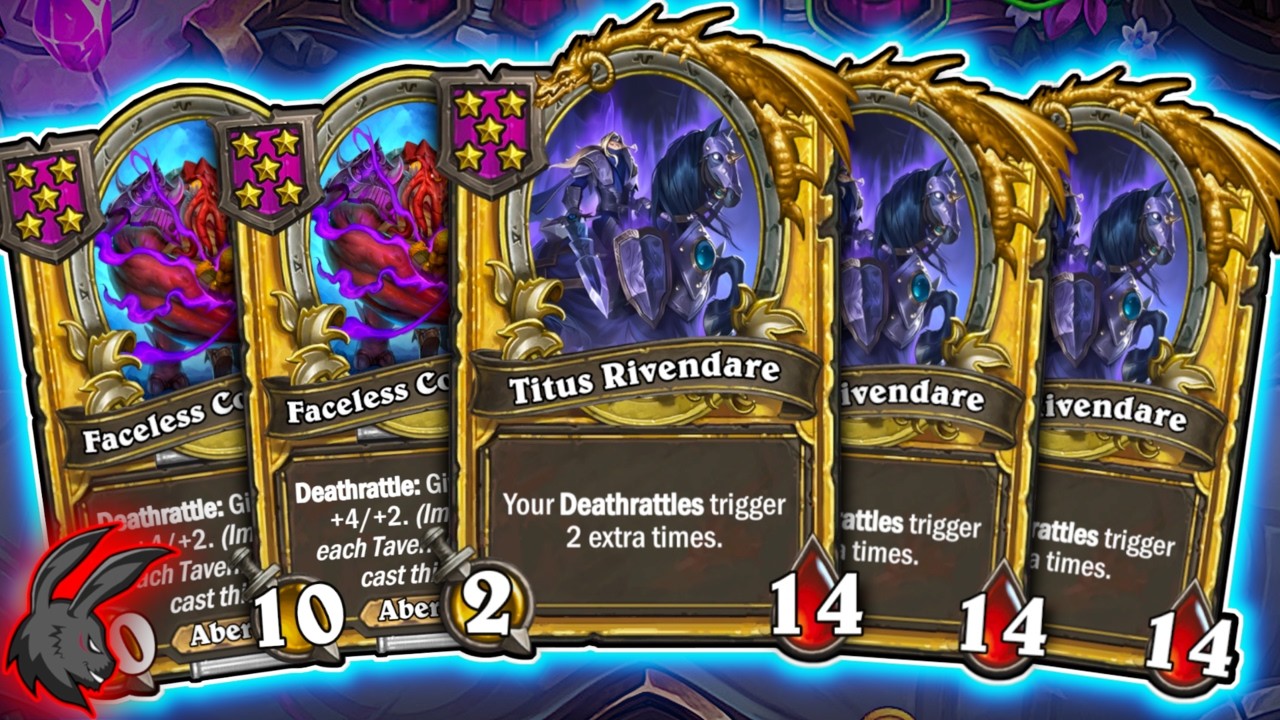
In Hearthstone Battlegrounds, Titus Rivendare acts as a force multiplier for Deathrattle compositions by causing friendly Deathrattles to trigger an extra time. To maximize his impact, place Titus on the far right side of your warband behind Taunt minions and pair him with Deathrattle engines that scale stats or summon high-tier units without exceeding your board space limit.
How Titus Rivendare Multipliers Stack
Titus Rivendare uses additive stacking rather than a static aura. Each copy on your board contributes its bonus triggers to all friendly Deathrattle effects:
| Titus Board State | Additional Triggers | Total Activations per Deathrattle |
|---|---|---|
| 1x Regular Titus | +1 Trigger | 2x |
| 2x Regular Titus | +2 Triggers | 3x |
| 1x Golden Titus | +2 Triggers | 3x |
| 1x Golden + 1x Regular | +3 Triggers | 4x |
| 2x Golden Titus | +4 Triggers | 5x |
Because two regular copies grant the exact same bonus (+2 triggers) as a single Golden Titus, do not combine them automatically when you find a third copy. Tripling into a Golden Titus frees up one board slot, but your total trigger count remains unchanged. Wait to combine them until you have a powerful combat minion or tech card ready to place into the newly opened space.
Choosing Between Stat Buffs and Token Engines
Titus Rivendare provides no baseline offensive stats, so his value depends entirely on the Deathrattle minions deployed alongside him:
- Board-Wide Stat Buffs: Minions such as Goldrinn, the Great Wolf, Ghoul-acabra, or Catacomb Crasher grant combat-wide stats when they die. Because these buffs apply directly to existing units, they never waste triggers and represent the most consistent late-game scaling option when stacking multiple Titus copies.
- Token Summons: Units that summon sub-minions (such as Mech or Undead summoners) require open board space to resolve. The maximum board size in Hearthstone Battlegrounds is seven minions. If a minion attempts to summon multiple units through repeated Titus triggers while your board is full, any summons that exceed available space are lost. Prioritize minions that summon single, high-tier units over swarms of small tokens to prevent board choking.
Positioning and Protection Rules
Titus must remain alive during combat for his multiplier to take effect. If he dies early, remaining Deathrattles trigger only at their baseline value. Follow these positioning safeguards:
- Place Titus on the Far Right: Position a single Titus in slot 7, or two copies in slots 6 and 7. This ensures your frontline Deathrattle units attack and die first, resolving their triggers before Titus is targeted by standard attacks.
- Set Taunt Walls on the Left or Center: Keep high-health Taunt minions on the left or middle of the board to absorb incoming enemy hits while your setup activates.
- Buffer Against Cleave Damage: Never place Titus adjacent to a Taunt minion. If an enemy minion deals cleave damage to adjacent targets, Titus will take collateral hits. Place a non-essential minion between your Taunt wall and Titus.
- Buff Titus's Attack Against Snipes: Opponents running tech cards like Zapp Slywick target your lowest-Attack minions. Increase Titus's Attack using tavern spells, Blood Gems, or magnetic attachments so he is not the lowest-Attack minion on your board.
Combat Sequencing and Board Management
Deathrattles resolve sequentially as combat unfolds. When an attacking minion dies, its Deathrattle triggers immediately before subsequent minion attacks occur.
If your strategy relies on token generation, arrange low-health, high-attack units first in attack order. This allows them to trade and clear board slots before your primary summoner attacks and triggers multiple sub-unit spawns. If board space remains congested despite sequencing, transition toward stat-granting Deathrattle units that scale existing minions without requiring open board slots.

Free Hearthstone Codes
Current active codes and how to redeem them.

Michael Smith
Michael covers live-service games, events, reward systems, and efficient daily routines, turning frequent updates into clear actions for players.
COMMUNITY
Player Comments
87 players commented on this guide.
The tips are practical and easy to follow.
This helped me understand strategy much better.
This guide answered the exact question I had.
Can you add more details about strategy in a future update?